Sexton Blake Bibliography: 1968
Publishing: The SEXTON BLAKE LIBRARY fifth series comes to an end and, aside from five more novels (one of which will be a TV tie-in), there will be no more official Blake text stories until 2014. Meanwhile, the detective is resurrected in comic strip format in the VALIANT. These tales, inspired by the television series, are very low grade affairs and feel more like episodes of Scooby Doo than they do the Blake of old.
NOVEL · 1968 · Dean & Son Ltd · Price unknown
Illustrator: Unknown
Other content: None
Notes: This is a hardcover reprint of SEXTON BLAKE
LIBRARY 2nd series issue 645 (1938).
Unrated
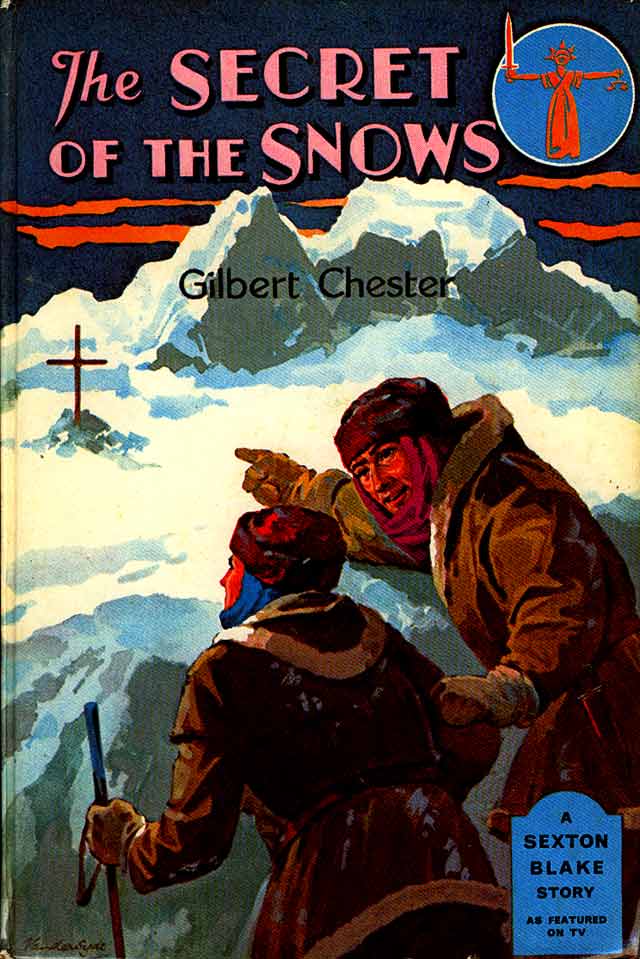
NOVEL · 1968 · Dean & Son Ltd · Price unknown
Illustrator: Unknown
Other content: None
Notes: This is a hardcover reprint of SEXTON BLAKE
LIBRARY 3rd series issue 282 (1953). Gilbert Chester was usually the pen-name
of H. H. Clifford Gibbons but, in this case, the original novel was
attributed to Walter Tyrer, so he may be the author behind the pseudonym
in this case.
Unrated
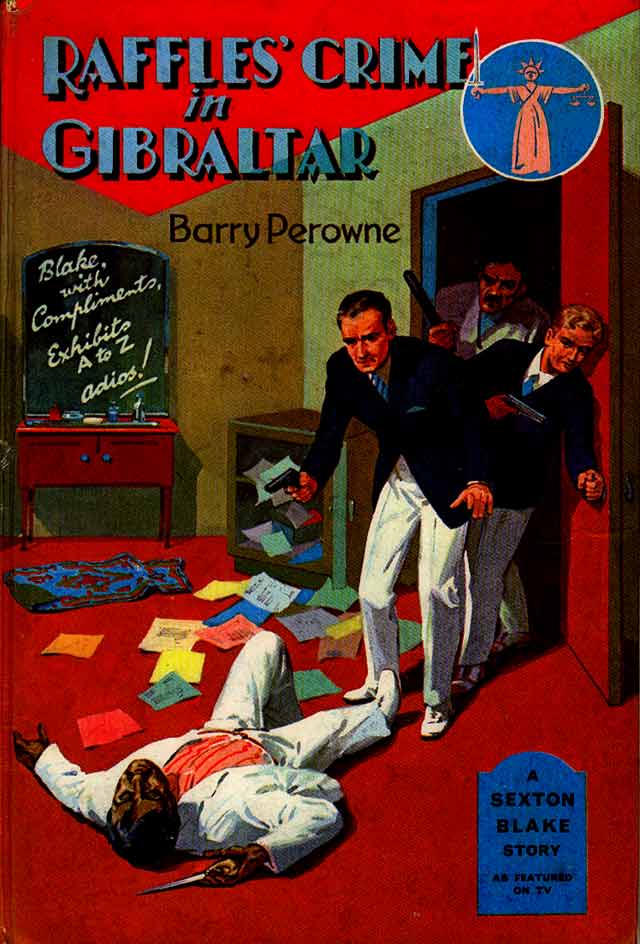
NOVEL · 1968 · Dean & Son Ltd · Price unknown
Illustrator: Unknown
Other content: None
Notes: This is a hardcover reprint of SEXTON BLAKE
LIBRARY 2nd series issue 601 (1937).
Unrated
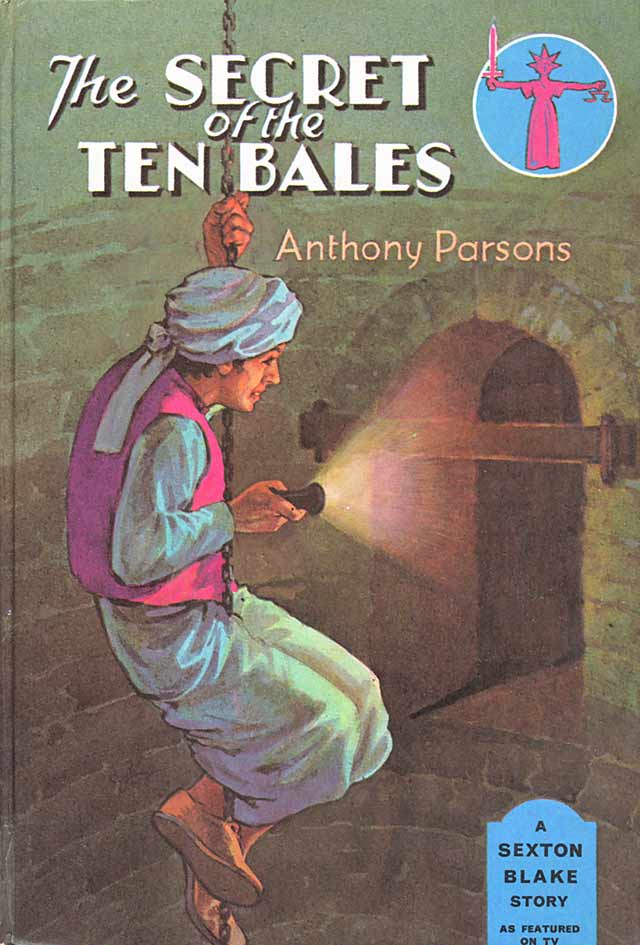
NOVEL · 1968 · Dean & Son Ltd · Price unknown
Illustrator: Unknown
Other content: None
Notes: This is a reprint of Anthony Parsons' first Sexton Blake novel. When the clerk of a shipping company is murdered, it soon emerges that a permit for the collection of transported goods — ten bales of cotton — has been stolen. The bales were meant to be delivered to a company in India but were picked up by someone else. They then became involved in a bandit raid during which they were searched. It seems obvious that something was smuggled in them — but what? An Indian named Khan is the only suspect, so Sexton Blake follows his trail to India. There he meets with a secret service officer who tells him that unrest has been rife on the borders since the bales arrived and anyone who enquires after them ends up dead. The detective takes a train to the troubled area — Famipur — accompanied by Tinker and an agent named Ali Singh. At a frontier station he meets Captain Winfield of the frontier police and Doctor Kershaw and his daughter Judy. He also becomes acquainted with a gun-runner named Bir Beg who, he learns via a double-agent, got to the bales and looted them before Khan could recover them. Under the cover of a funeral procession, the content of the bales is to be smuggled across the border but, after a number of betrayals and double-crosses, Khan regains control and kills Bir Beg. He also captures Tinker and Winfield. Blake rescues them and, using information they have overheard, organises an ambush against the arms convoy. The raid is successful and the content of the bales is finally revealed — as is the unexpected identity of Khan. The villain flees but Blake and Tinker follow in a plane and parachute down for the final confrontation.
Trivia: This is a hardcover reprint of SEXTON BLAKE LIBRARY 2nd series issue 596 (1937). The review notes are based on a reading of the original issue.
Rating: ★★★☆☆
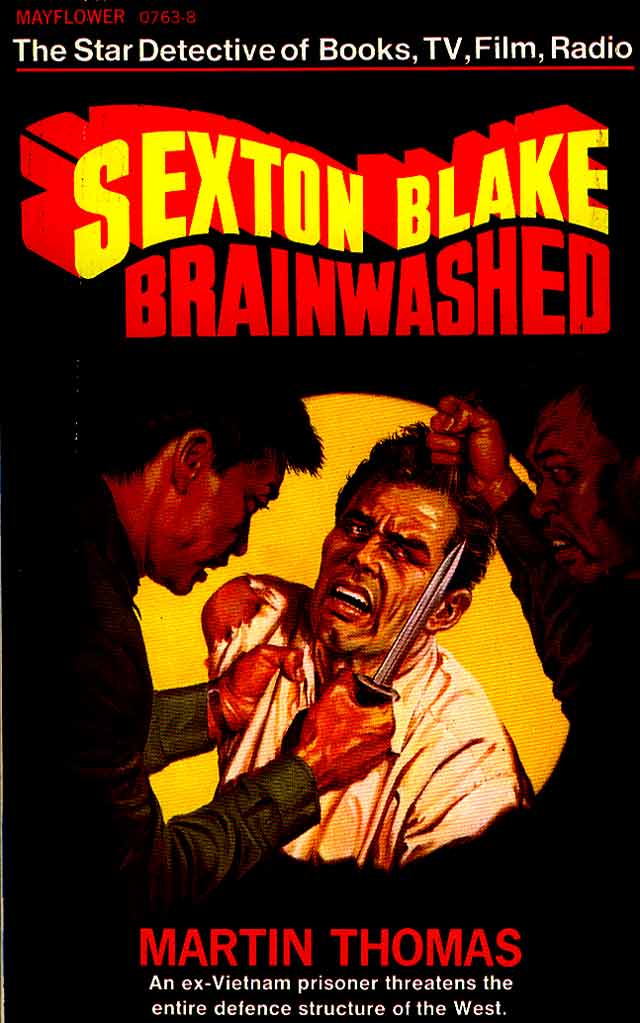
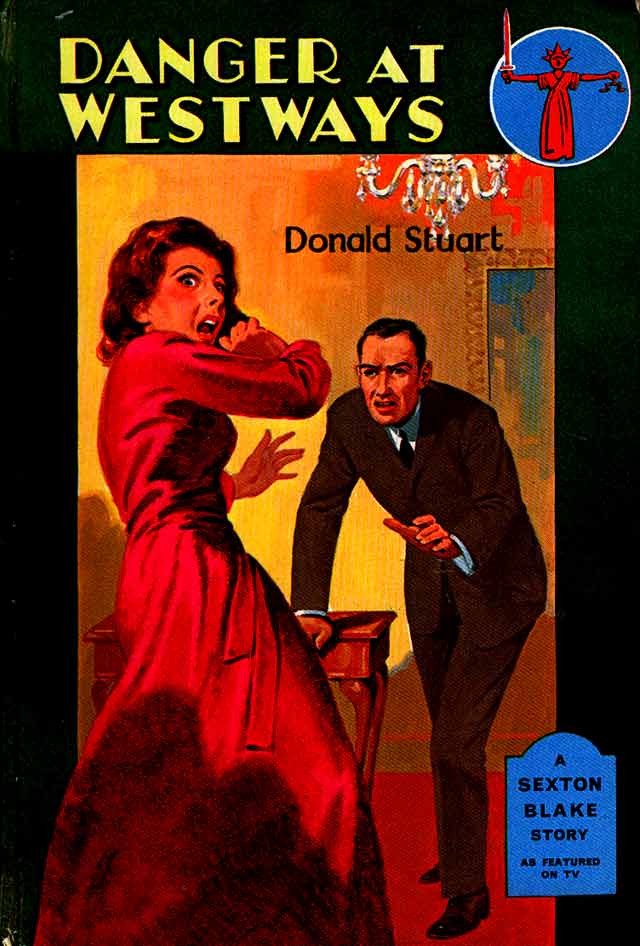
THE SEXTON BLAKE LIBRARY · 5th series · Novel 44 · Jul. 1968 · Mayflower Books · 3/6
Illustrator: Unknown
Other content: None
Notes: While on holiday in Italy, Sexton Blake, Edward 'Tinker' Carter and Paula Dane witness the death of Spencer Warley, who is pushed from a hotel window. Evidence from a chambermaid suggests that a man wearing yellow gloves was responsible, and Blake is later able to identify the culprit in the background of pictures taken by Mike Bremner, the son of a Hollywood mogul whose whole family was killed by the Nazis. The murderer turns out to be Otto Schulmann, who had been in charge of the death camp where the Bremners died. Blake traces Schulmann's daughter who, under the name Delina Ann, is working as an actress in a production being filmed not far away. She is unaware of her father's vicious past. When Tinker goes to find her, he learns that she has vanished. Blake correctly deduces that she has been kidnapped by a renegade Israeli Nazi hunter named Vendoza, who forced Schlumann to kill Warley or suffer his daughter's death. Warley had to die because he'd discovered that Vendoza had found a secret Nazi laboratory at the end of a tunnel beneath a vault in a graveyard. When Schulman follows his enemy, he is led to the vault where he falls into a trap and is forced by Vendoza to labour in chains to clear the tunnel of a fall of rocks. Tinker traces Vendoza to a nearby villa but finds it guarded by a tiger. He is captured by the villain and put to work alongside Schulmann until the passage is cleared and the Israeli can pass through to recover the formula for a deadly nerve gas from the chamber beyond. Blake, accompanied by Mike Bremner, follows his assistant's trail to the vault and catches Vendoza in the act of wiring the tunnel with explosives. The detective rescues Tinker but Schulmann and Vendoza break free and, battling each other, plunge into a ravine to their deaths. Delina Ann is found and the formula is burned by Blake, being too dangerous to fall into anyone else's hands.
Trivia: Mrs Bardell has a recently bereaved sister. Her name isn't mentioned — could she be Mary Ann Cluppins, the sister frequently mentioned in the old UNION JACK tales? If so, she must have re-married at some point, as she was already widowed in those stories (and let's not even discuss her probable age!).
Reference is made to the scene at the end of THE LAST TIGER (SBL4 issue 526, 1963) when Blake and Paula appeared to be on the verge of marriage. The moment passed, we are informed, and is unlikely to come again.
Rating: ★★★★★
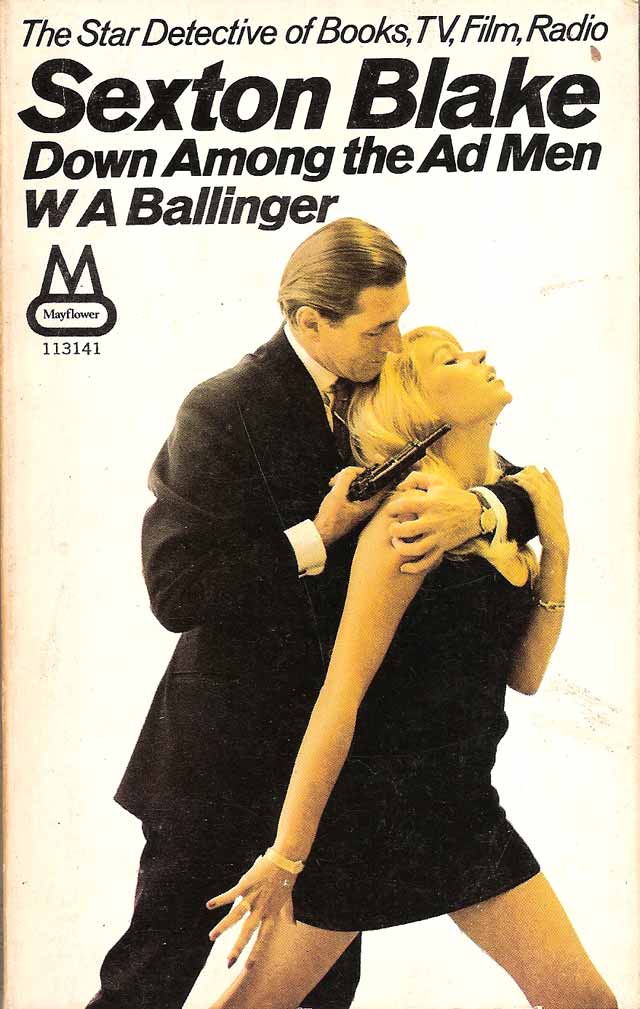
THE SEXTON BLAKE LIBRARY · 5th series · Novel 45 · Oct. 1968 · Mayflower Books · 3/6
Illustrator: None
Other content: None
Notes: Barsford's Advertising Agency needs a new director and its executives are battling for the position. Alun Chaney gets his chance when he's asked to promote a new soft drink. He employs Miss Galaxy Dawn (real name Maggie Dunn) — who he spots in a restaurant — as a model. However, she turns out to be trouble; a hard-drinking nymphomaniac who's posed for a set of pornographic pictures. Then she vanishes after having been seen with a crook named Leon Procello and is later found by Sexton Blake drugged, with a gun in her hand and the dead body of Procello at her feet. Blake thinks the girl has been set up so he instructs Tinker to get her away from the crime scene. This does not go down well with Detective Superintendent Theodore Dukelow, who definitely can't be counted among Blake's Scotland Yard friends. It's not very rewarding for Tinker either; the girl eludes him and runs away. When Blake sends Paula Dane to search for her, Procello's bodyguards, who are now working for the mysterious "Toots", find Paula. They mistake her for Galaxy and, since Toots is after the pornographic pictures that the two bodyguards can't find, they try to force Paula to pose for a new set. Blake discovers who's buying shares in Barsford's and the whole case turns on its head. Realising what's going on, he races to Paula's rescue. The identity of Toots is revealed and the case is resolved ... but not before a not so innocent participant is shot through the head.
Trivia: We learn a lot about Blake's Baker Street premises in this story. It is in the same building (the whole of which he owns) as his apartment from the pre-Berkeley Square days; here given as number 252. The front door opens onto a public hallway that is covered in graffiti, painted by the local youths, who the detective refers to as 'The Baker Street Irregulars'. A shabby lift gives access to the five office floors and to Blake's rooms at the top. On the detective's floor, it opens onto a small landing and the door, which is opened via an electronic scanning device. The apartment beyond is decorated and furnished in a modern style, though Blake's old desk adds an element of eclecticism. We also gain information about Miss Pringle's father: apparently, he was an 'itinerant cattle dealer'. The Duke of Derwentwater receives a mention in this story.
Rating: ★☆☆☆☆

VALIANT · 13/01/1968 · Fleetway Publications Ltd · 7d
Illustrator: Anon. (Eric Dadswell)
Other content: Various strips and text stories.
Rating: ☆☆☆☆☆

VALIANT · 20/01/1968 · Fleetway Publications Ltd · 7d
Illustrator: Anon. (Eric Dadswell)
Other content: Various strips and text stories.
Rating: ☆☆☆☆☆

VALIANT · 27/01/1968 · Fleetway Publications Ltd · 7d
Illustrator: Anon. (Eric Dadswell)
Other content: Various strips and text stories.
Rating: ☆☆☆☆☆

VALIANT · 03/02/1968 · Fleetway Publications Ltd · 7d
Illustrator: Anon. (Eric Dadswell)
Other content: Various strips and text stories.
Rating: ☆☆☆☆☆

VALIANT · 10/02/1968 · Fleetway Publications Ltd · 7d
Illustrator: Anon. (Eric Dadswell)
Other content: Various strips and text stories.
Rating: ☆☆☆☆☆

VALIANT · 24/02/1968 · Fleetway Publications Ltd · 7d
Illustrator: Anon. (Eric Dadswell)
Other content: Various strips and text stories.
Rating: ☆☆☆☆☆

VALIANT · 09/03/1968 · Fleetway Publications Ltd · 7d
Illustrator: Anon. (Eric Dadswell)
Other content: Various strips and text stories.
Rating: ☆☆☆☆☆

VALIANT · 16/03/1968 · Fleetway Publications Ltd · 7d
Illustrator: Anon. (Eric Dadswell)
Other content: Various strips and text stories.
Rating: ☆☆☆☆☆

VALIANT · 23/03/1968 · Fleetway Publications Ltd · 7d
Illustrator: Anon. (Eric Dadswell)
Other content: Various strips and text stories.
Rating: ☆☆☆☆☆

VALIANT · 30/03/1968 · Fleetway Publications Ltd · 7d
Illustrator: Anon. (Eric Dadswell)
Other content: Various strips and text stories.
Rating: ☆☆☆☆☆

VALIANT · 06/04/1968 · Fleetway Publications Ltd · 7d
Illustrator: Anon. (Eric Dadswell)
Other content: Various strips and text stories.
Rating: ☆☆☆☆☆

VALIANT · 13/04/1968 · Fleetway Publications Ltd · 7d
Illustrator: Anon. (Eric Dadswell)
Other content: Various strips and text stories.
Rating: ☆☆☆☆☆

VALIANT · 20/04/1968 · Fleetway Publications Ltd · 7d
Illustrator: Anon. (Eric Dadswell)
Other content: Various strips and text stories.
Rating: ☆☆☆☆☆

VALIANT · 27/04/1968 · Fleetway Publications Ltd · 7d
Illustrator: Anon. (Eric Dadswell)
Other content: Various strips and text stories.
Rating: ☆☆☆☆☆

VALIANT · 04/05/1968 · Fleetway Publications Ltd · 7d
Illustrator: Anon. (Eric Dadswell)
Other content: Various strips and text stories.
Rating: ☆☆☆☆☆

VALIANT · 11/05/1968 · Fleetway Publications Ltd · 7d
Illustrator: Anon. (Eric Dadswell)
Other content: Various strips and text stories.
Rating: ☆☆☆☆☆

VALIANT · 18/05/1968 · Fleetway Publications Ltd · 7d
Illustrator: Anon. (Eric Dadswell)
Other content: Various strips and text stories.
Rating: ☆☆☆☆☆

VALIANT · 25/05/1968 · Fleetway Publications Ltd · 7d
Illustrator: Anon. (Eric Dadswell)
Other content: Various strips and text stories.
Rating: ☆☆☆☆☆

VALIANT · 15/06/1968 · Fleetway Publications Ltd · 7d
Illustrator: Anon. (Eric Dadswell)
Other content: Various strips and text stories.
Rating: ☆☆☆☆☆

VALIANT · 29/06/1968 · Fleetway Publications Ltd · 7d
Illustrator: Anon. (Eric Dadswell)
Other content: Various strips and text stories.
Rating: ☆☆☆☆☆

VALIANT · 06/07/1968 · Fleetway Publications Ltd · 7d
Illustrator: Anon. (Eric Dadswell)
Other content: Various strips and text stories.
Rating: ☆☆☆☆☆

VALIANT · 13/07/1968 · Fleetway Publications Ltd · 7d
Illustrator: Anon. (Eric Dadswell)
Other content: Various strips and text stories.
Rating: ☆☆☆☆☆

VALIANT · 20/07/1968 · Fleetway Publications Ltd · 7d
Illustrator: Anon. (Eric Dadswell)
Other content: Various strips and text stories.
Rating: ☆☆☆☆☆

VALIANT · 27/07/1968 · Fleetway Publications Ltd · 7d
Illustrator: Anon. (Eric Dadswell)
Other content: Various strips and text stories.
Rating: ☆☆☆☆☆

VALIANT · 03/08/1968 · Fleetway Publications Ltd · 7d
Illustrator: Anon. (Eric Dadswell)
Other content: Various strips and text stories.
Rating: ☆☆☆☆☆

VALIANT · 10/08/1968 · Fleetway Publications Ltd · 7d
Illustrator: Anon. (Eric Dadswell)
Other content: Various strips and text stories.
Rating: ☆☆☆☆☆

VALIANT · 17/08/1968 · Fleetway Publications Ltd · 7d
Illustrator: Anon. (Eric Dadswell)
Other content: Various strips and text stories.
Rating: ☆☆☆☆☆

VALIANT · 24/08/1968 · Fleetway Publications Ltd · 7d
Illustrator: Anon. (Eric Dadswell)
Other content: Various strips and text stories.
Rating: ☆☆☆☆☆

VALIANT · 31/08/1968 · Fleetway Publications Ltd · 7d
Illustrator: Anon. (Eric Dadswell)
Other content: Various strips and text stories.
Rating: ☆☆☆☆☆

VALIANT · 07/09/1968 · Fleetway Publications Ltd · 7d
Illustrator: Anon. (Eric Dadswell)
Other content: Various strips and text stories.
Rating: ☆☆☆☆☆

VALIANT · 14/09/1968 · Fleetway Publications Ltd · 7d
Illustrator: Anon. (Eric Dadswell)
Other content: Various strips and text stories.
Rating: ☆☆☆☆☆

VALIANT · 21/09/1968 · Fleetway Publications Ltd · 7d
Illustrator: Anon. (Eric Dadswell)
Other content: Various strips and text stories.
Rating: ☆☆☆☆☆

VALIANT · 28/09/1968 · Fleetway Publications Ltd · 7d
Illustrator: Anon. (Eric Dadswell)
Other content: Various strips and text stories.
Trivia: This adventure occurs in the early 1930s.
Rating: ☆☆☆☆☆

VALIANT · 05/10/1968 · Fleetway Publications Ltd · 7d
Illustrator: Anon. (Eric Dadswell)
Other content: Various strips and text stories.
Rating: ☆☆☆☆☆

VALIANT · 12/10/1968 · Fleetway Publications Ltd · 7d
Illustrator: Anon. (Eric Dadswell)
Other content: Various strips and text stories.
Rating: ☆☆☆☆☆

VALIANT · 19/10/1968 · Fleetway Publications Ltd · 7d
Illustrator: Anon. (Eric Dadswell)
Other content: Various strips and text stories.
Rating: ☆☆☆☆☆

VALIANT · 26/10/1968 · Fleetway Publications Ltd · 7d
Illustrator: Anon. (Eric Dadswell)
Other content: Various strips and text stories.
Rating: ☆☆☆☆☆

VALIANT · 02/11/1968 · Fleetway Publications Ltd · 7d
Illustrator: Anon. (Eric Dadswell)
Other content: Various strips and text stories.
Rating: ☆☆☆☆☆

VALIANT · 09/11/1968 · Fleetway Publications Ltd · 7d
Illustrator: Anon. (Eric Dadswell)
Other content: Various strips and text stories.
Rating: ☆☆☆☆☆

VALIANT · 16/11/1968 · Fleetway Publications Ltd · 7d
Illustrator: Anon. (Eric Dadswell)
Other content: Various strips and text stories.
Rating: ☆☆☆☆☆

VALIANT · 23/11/1968 · Fleetway Publications Ltd · 7d
Illustrator: Anon. (Eric Dadswell)
Other content: Various strips and text stories.
Rating: ☆☆☆☆☆

VALIANT · 30/11/1968 · Fleetway Publications Ltd · 7d
Illustrator: Anon. (Eric Dadswell)
Other content: Various strips and text stories.
Rating: ☆☆☆☆☆

VALIANT · 07/12/1968 · Fleetway Publications Ltd · 7d
Illustrator: Anon. (Eric Dadswell)
Other content: Various strips and text stories.
Rating: ☆☆☆☆☆

VALIANT · 14/12/1968 · Fleetway Publications Ltd · 7d
Illustrator: Anon. (Eric Dadswell)
Other content: Various strips and text stories.
Rating: ☆☆☆☆☆

VALIANT · 21/12/1968 · Fleetway Publications Ltd · 7d
Illustrator: Anon. (Eric Dadswell)
Other content: Various strips and text stories.
Rating: ☆☆☆☆☆

VALIANT · 28/12/1968 · Fleetway Publications Ltd · 7d
Illustrator: Anon. (Eric Dadswell)
Other content: Various strips and text stories.
Rating: ☆☆☆☆☆
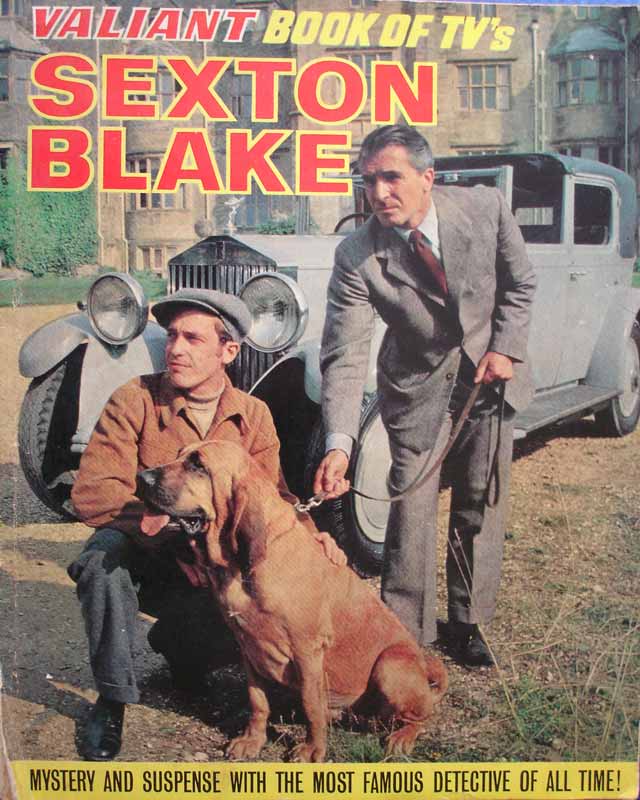
THE VALIANT BOOK OF TV'S SEXTON BLAKE · 1968 · Fleetway Publications · 6/6d
Other content: Sexton Blake's Honour (strip); Interpol — Enemy of World Crime (article); Four-Legged Crime-Buster (strip); The Tealeaf Trio (strip); Crooked Chuckles; The Valiant Men in Blue (article); Emperor of Crime (strip); Sexton Blake's Casebook (quiz); Material Evidence (strip); Crook-Catchers — The Siege of Sidney Street (strip); Tricks of my Trade by Sexton Blake (article); Lawless Laughs; Crook-Catchers — Public Enemy No.1 (strip); Decoy for Diamonds (strip); The Man-Hunters (article); Fun at the Fair (strip); Toby Jugg (strip); Crook-Catchers — The Taming of the Idaho Kid (strip); Terror of the Tong (strip).
Notes: None at present.
Unrated
Illustrator: Unknown
Notes: None at present.
Unrated
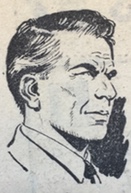
Illustrator: Eric Parker
Notes: This is a reprint (in an abridged form) of the first Sexton Blake tale to have ever appeared in the UNION JACK (1st series issue 2) but mistakenly claims that it was the first Blake story ever written.
Unrated