Sexton Blake Bibliography: 1915
Publishing: THE SEXTON BLAKE LIBRARY begins its 53-year reign. Leonard Pratt takes the helm as its editor, a position he would occupy for forty years.
PLUCK publishes a serial in which Will Spearing, Tinker and Pedro have an independent adventure without Sexton Blake.
Lewis Jackson (real name Jack Lewis) makes his debut. His most famous contribution to the saga was Leon Kestrel, the Master Mummer. Jackson died in 1958.
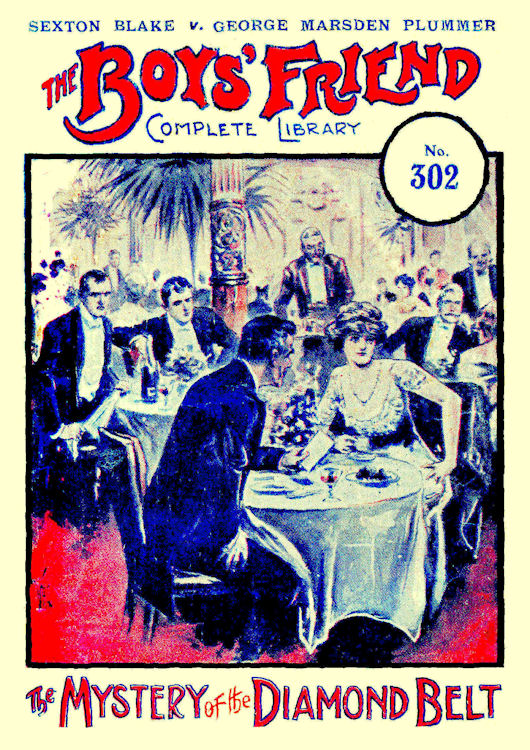
THE BOYS' FRIEND LIBRARY · Issue 302 · Jun. 1915 · Amalgamated Press · 3d
Illustrator: Val Reading
Other content: Unknown
Notes: This is a reprint of the BOYS' JOURNAL serial that ended this same year. Story features George Marsden Plummer.
Unrated
THE BOYS' JOURNAL · Issue 72 · 30/1/1915 · Amalgamated Press · 1d
Illustrator: Unknown
Other content: Unknown
Notes: This was the final issue of THE BOYS' JOURNAL. The story would be continued in DREADNOUGHT. Story features Ezra Q. Maitland and Broadway Kate.
Unrated
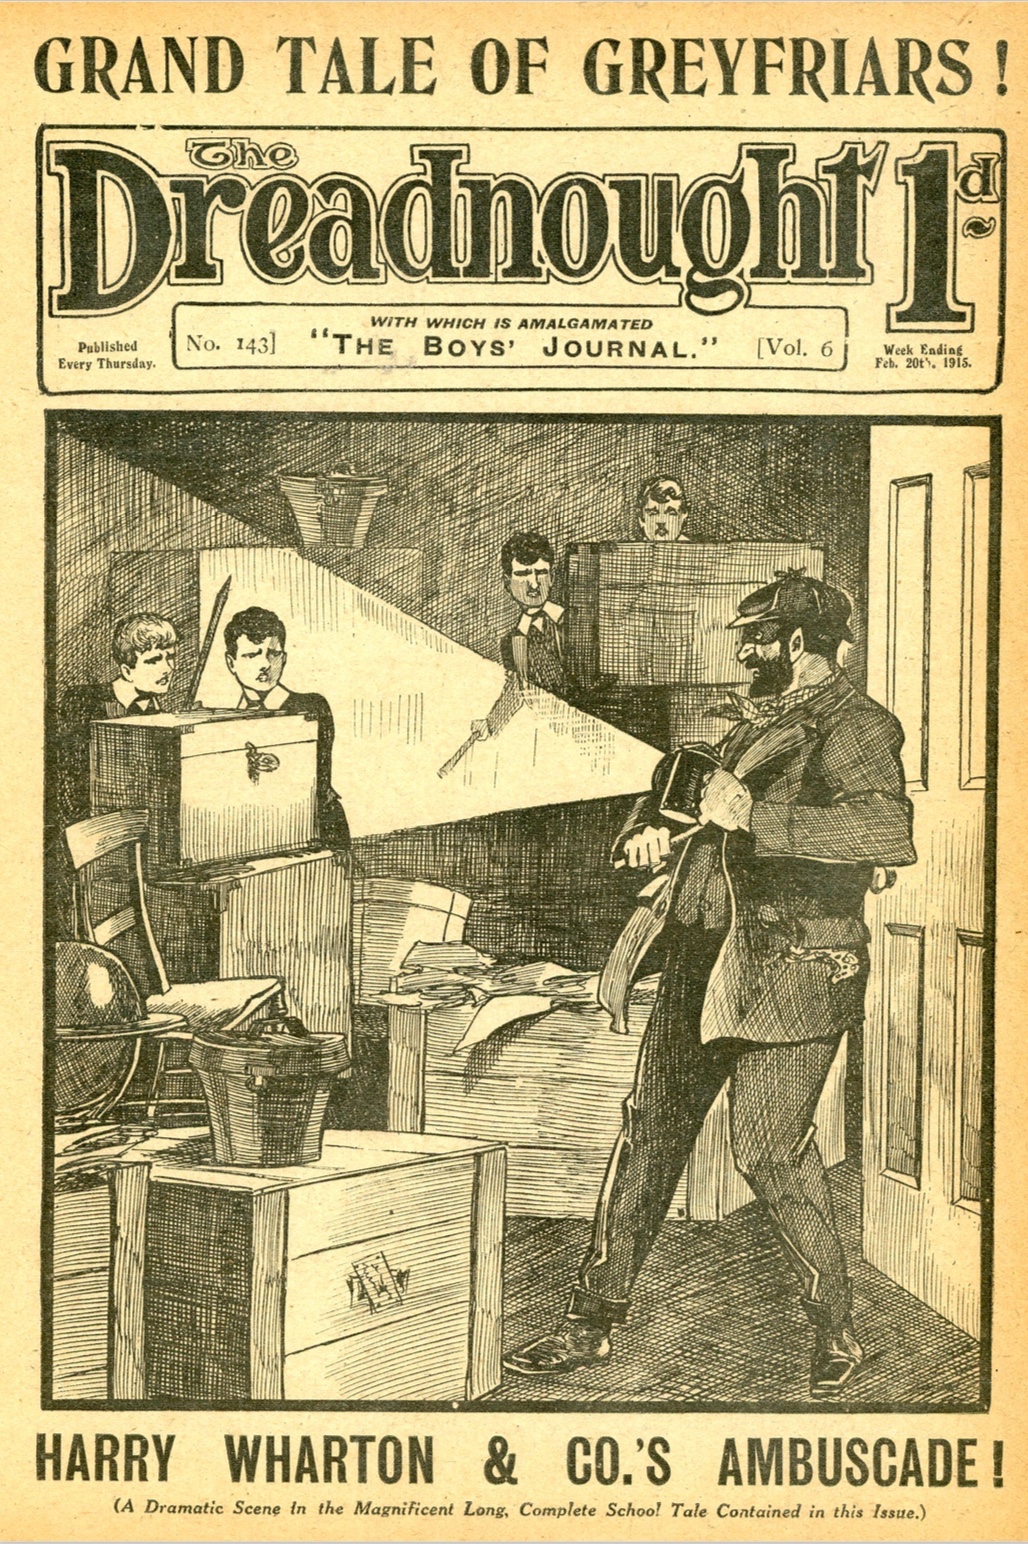
THE DREADNOUGHT · Issue 136 · 2/1/1915 · Amalgamated Press · 1d
Illustrator: Unknown
Other content: Unknown
Notes: This is a reprint of SEXTON BLAKE IN AMERICA which appeared in THE BOYS' FRIEND issues 252 to 268 in 1906 ((see those issues for the story review)..
Rating: ★★☆☆☆
THE DREADNOUGHT · Issue 137 · 9/1/1915 · Amalgamated Press · 1d
Illustrator: Unknown
Other content: Unknown
Notes: This is a reprint of SEXTON BLAKE IN AMERICA which appeared in THE BOYS' FRIEND issues 252 to 268 in 1906 ((see those issues for the story review)..
Rating: ★★☆☆☆
THE DREADNOUGHT · Issue 138 · 16/1/1915 · Amalgamated Press · 1d
Illustrator: Unknown
Other content: Unknown
Notes: This is a reprint of SEXTON BLAKE IN AMERICA which appeared in THE BOYS' FRIEND issues 252 to 268 in 1906 ((see those issues for the story review)..
Rating: ★★☆☆☆
THE DREADNOUGHT · Issue 139 · 23/1/1915 · Amalgamated Press · 1d
Illustrator: Unknown
Other content: Unknown
Notes: This is a reprint of SEXTON BLAKE IN AMERICA which appeared in THE BOYS' FRIEND issues 252 to 268 in 1906 ((see those issues for the story review)..
Rating: ★★☆☆☆
THE DREADNOUGHT · Issue 140 · 30/1/1915 · Amalgamated Press · 1d
Illustrator: Unknown
Other content: Unknown
Notes: This is a reprint of SEXTON BLAKE IN AMERICA which appeared in THE BOYS' FRIEND issues 252 to 268 in 1906 ((see those issues for the story review)..
Rating: ★★☆☆☆
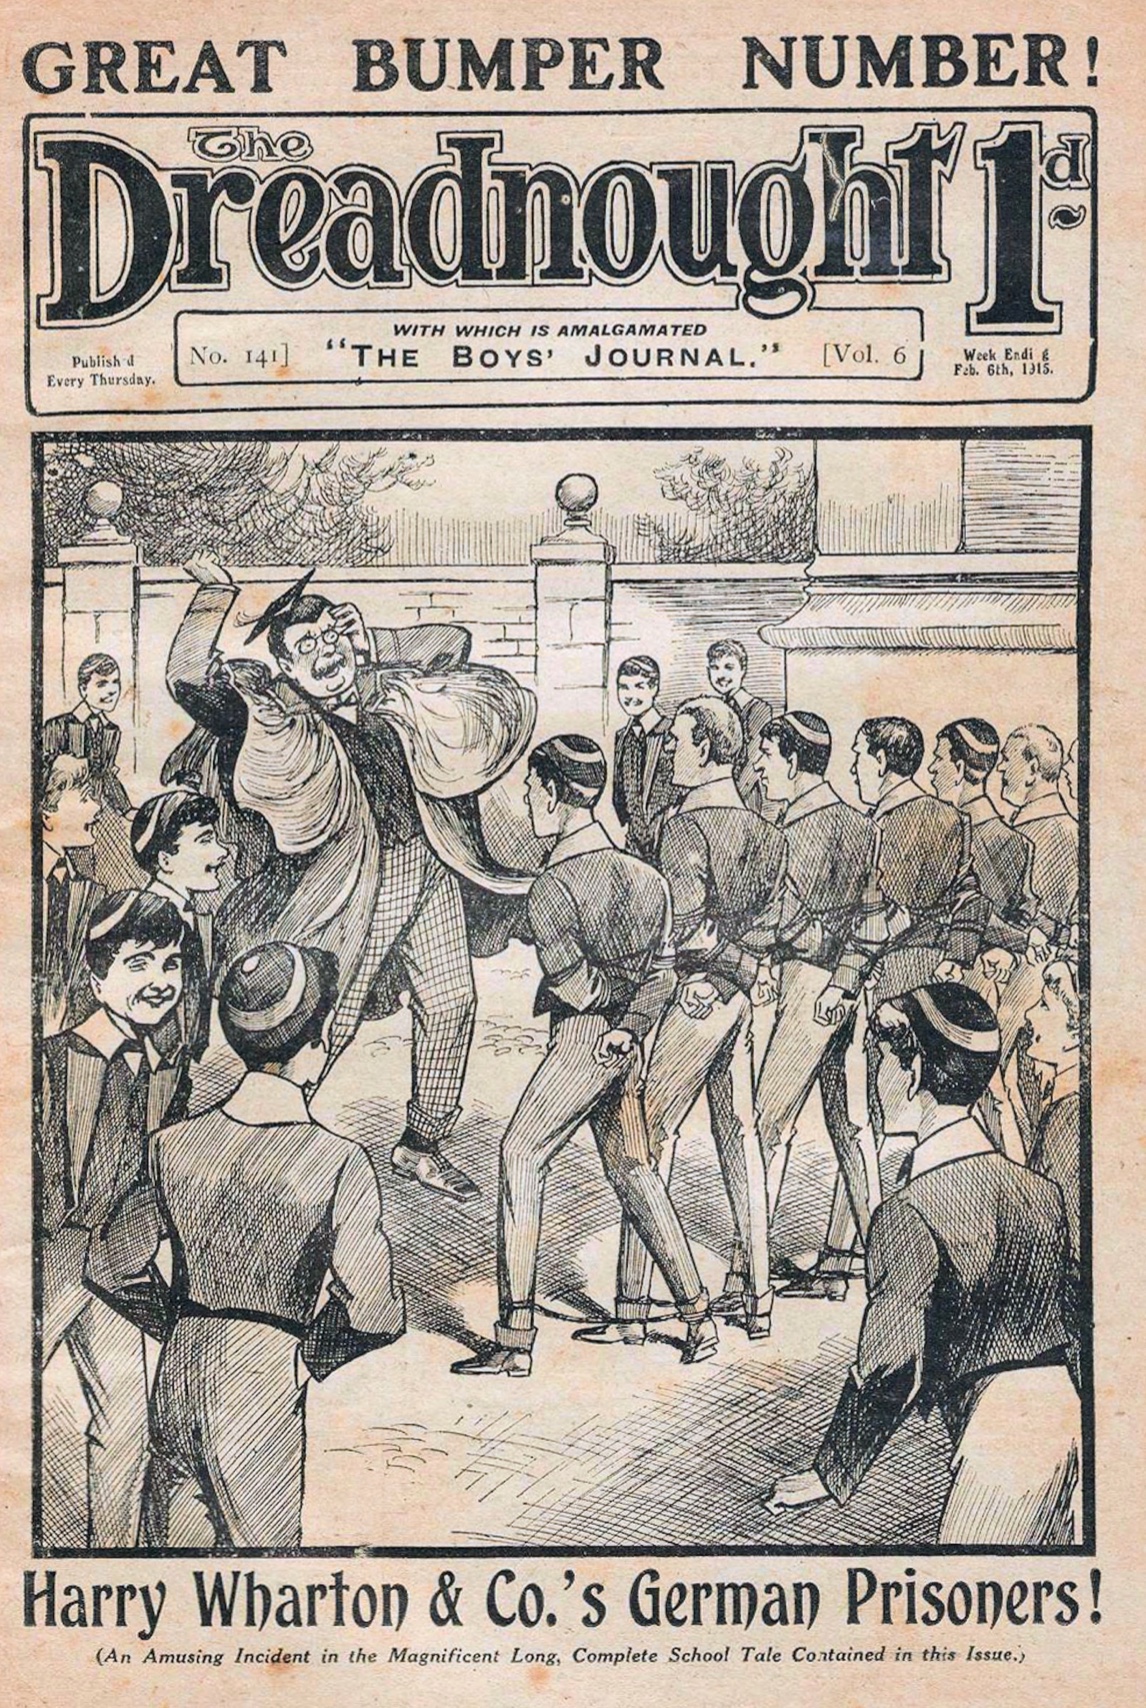
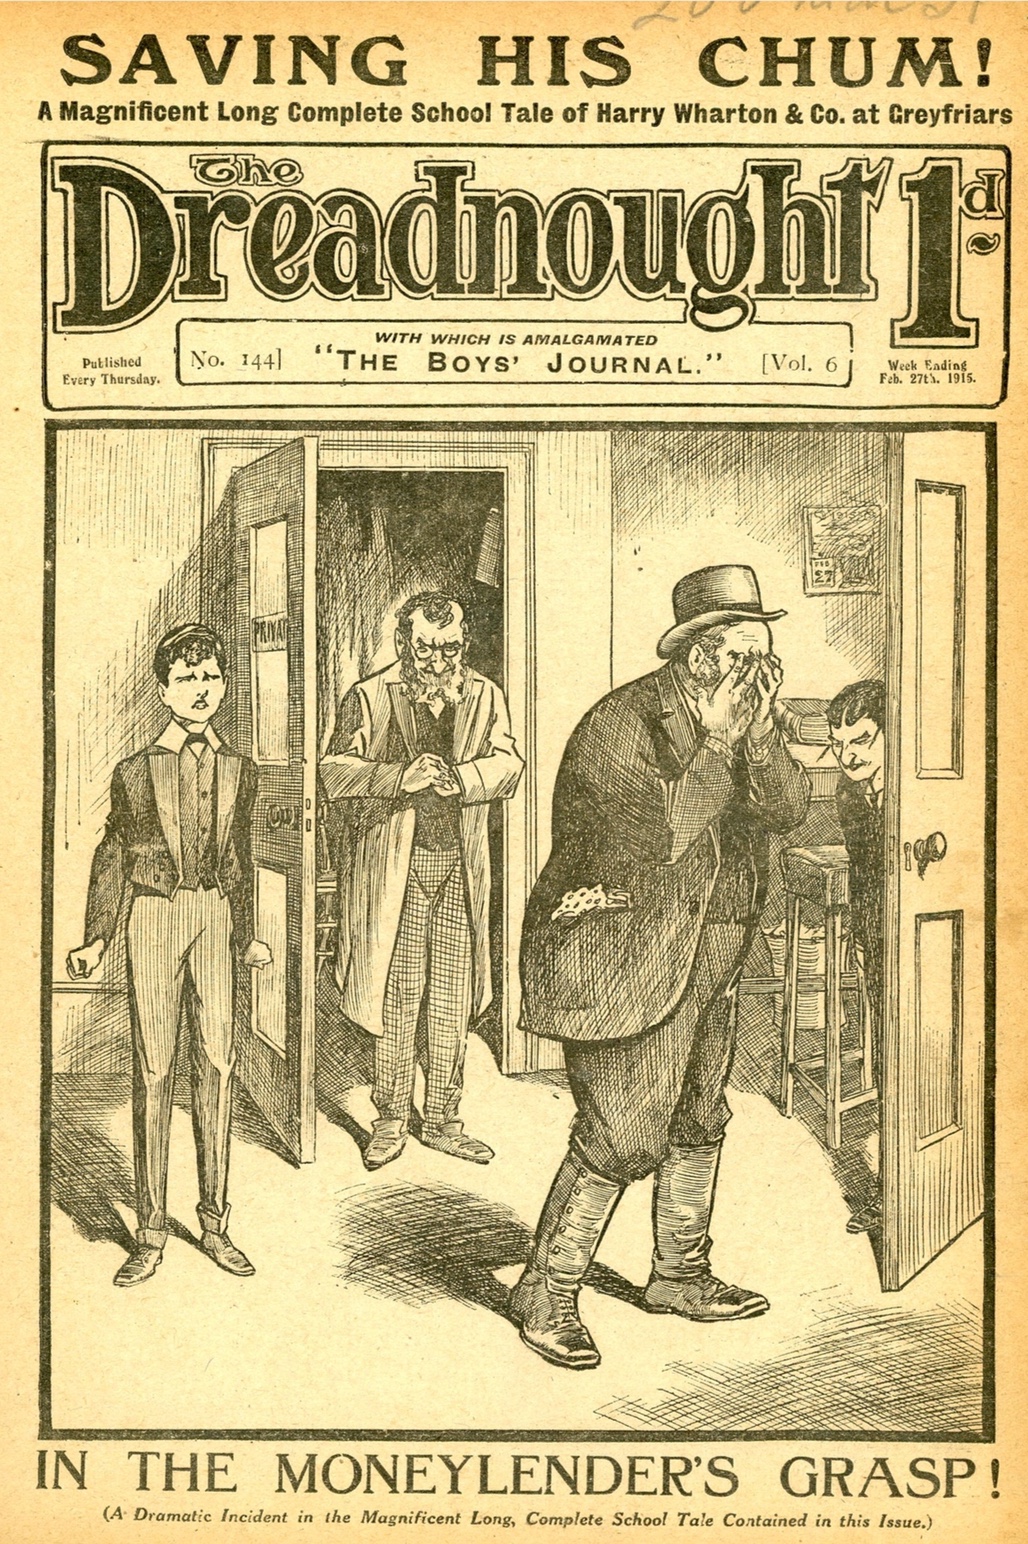
THE DREADNOUGHT · Issue 141 · 6/2/1915 · Amalgamated Press · 1d
Illustrator: H. M. Lewis
Other content: Chums in Council (ed.); The Remove-Form's Riot! by Frank Richards.
Notes: This is the first issue to include the newly absorbed BOYS' JOURNAL. The initial instalment of THE MERCHANT'S SECRET had appeared in the final issue of that periodical but was reprinted here for the convenience of the DREADNOUGHT readers. The story features Fenlock Fawn, Ezra Q. Maitland and Broadway Kate.
Unrated
(part 8)
Illustrator: None
Notes: This is a reprint of SEXTON BLAKE IN AMERICA which appeared in THE BOYS' FRIEND issues 252 to 268 in 1906 ((see those issues for the story review)..
Rating: ★★☆☆☆


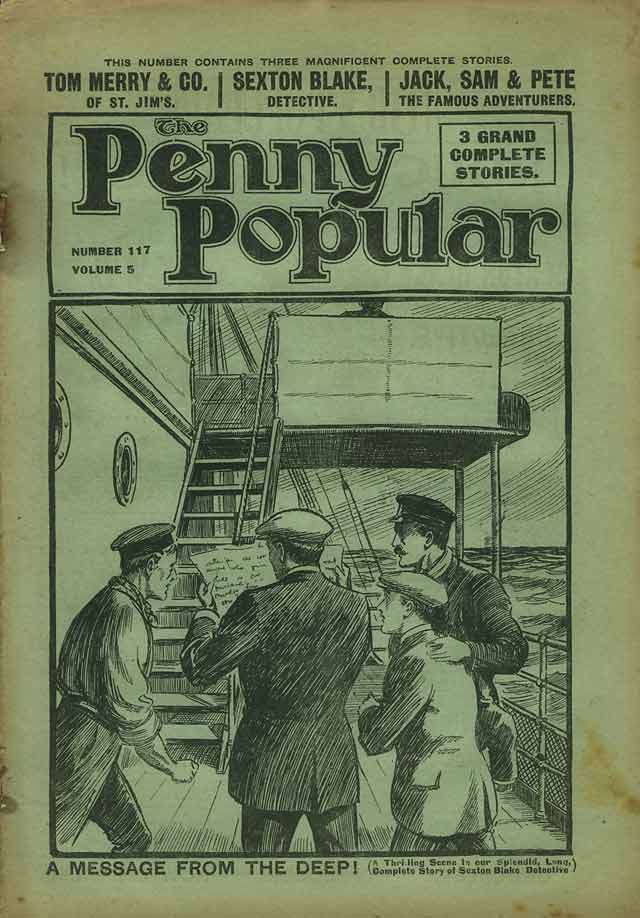
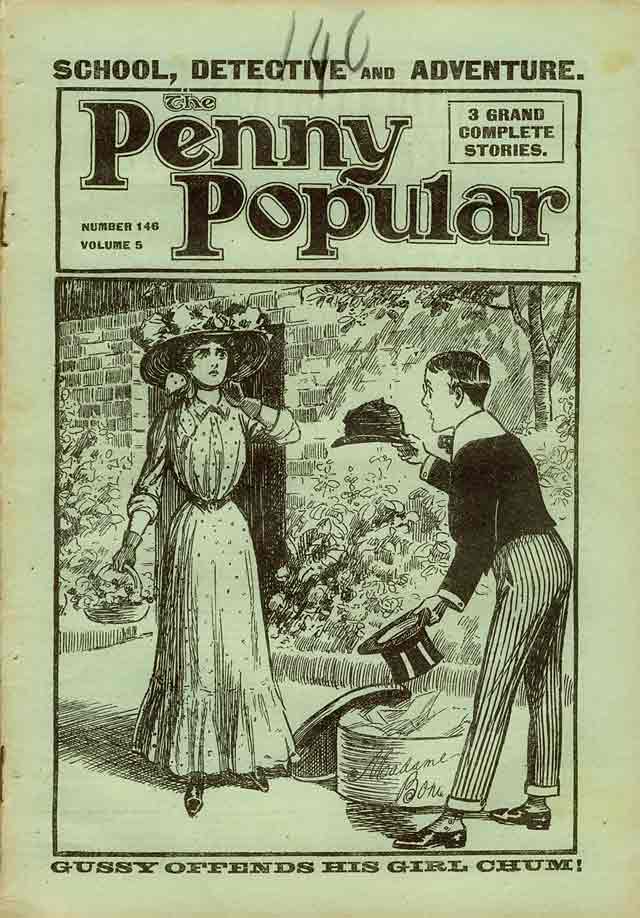
THE PENNY POPULAR · Vol. 5 Issue 117 · 2/1/1915 · Amalgamated Press · 1d
Illustrator: Harry Lane
Other content: Trapped By Three! by Martin Clifford; Major Jenson's Misadventures! by S. Clarke Hook.
Notes: This is a reprint of the second half of UNION JACK issue 266 THE STOLEN BLOODHOUND (1908).
Unrated
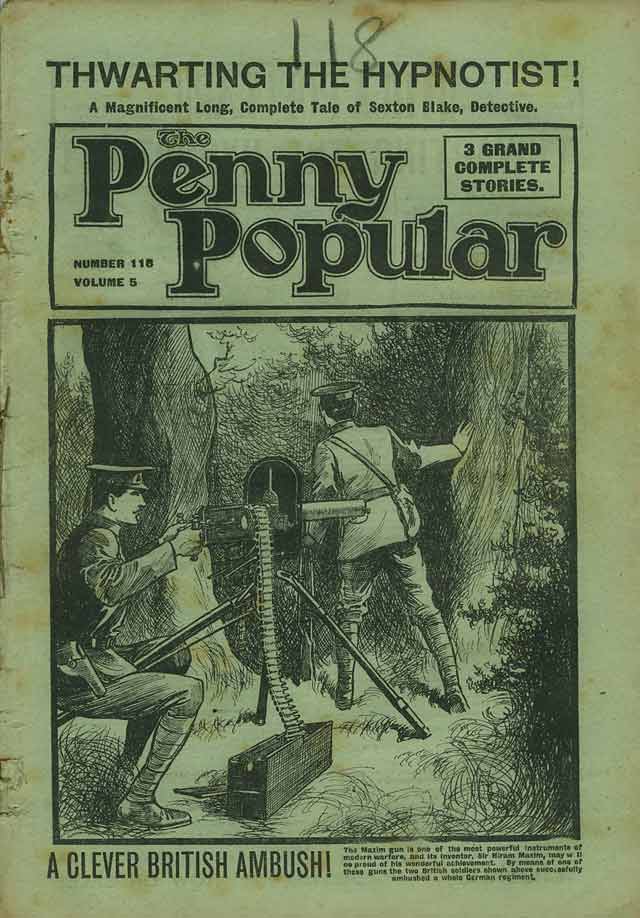
THE PENNY POPULAR · Vol. 5 Issue 118 · 9/1/1915 · Amalgamated Press · 1d
Illustrator: Harry Lane
Other content: Nipped in the Bud! by Martin Clifford; Pete's Flirtation! by S. Clarke Hook.
Notes: This is a reprint of the first half of UNION JACK issue 268 THE HYPNOTIST (1908).
Unrated
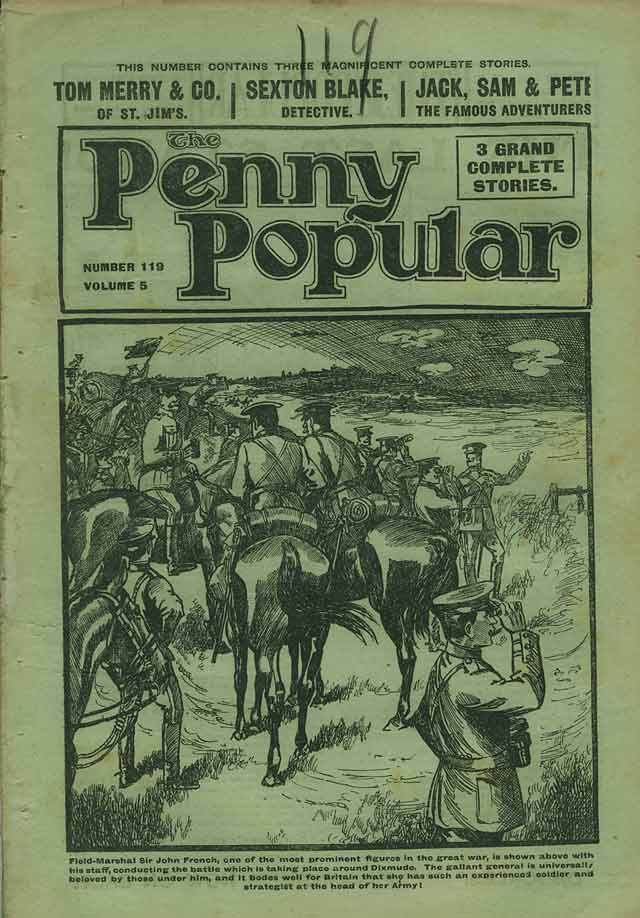
THE PENNY POPULAR · Vol. 5 Issue 119 · 16/1/1915 · Amalgamated Press · 1d
Illustrator: Harry Lane
Other content: The Circus Chums! by Martin Clifford; The King's Sentence! by S. Clarke Hook.
Notes: This is a reprint of the second half of UNION JACK issue 268 THE HYPNOTIST (1908).
Unrated
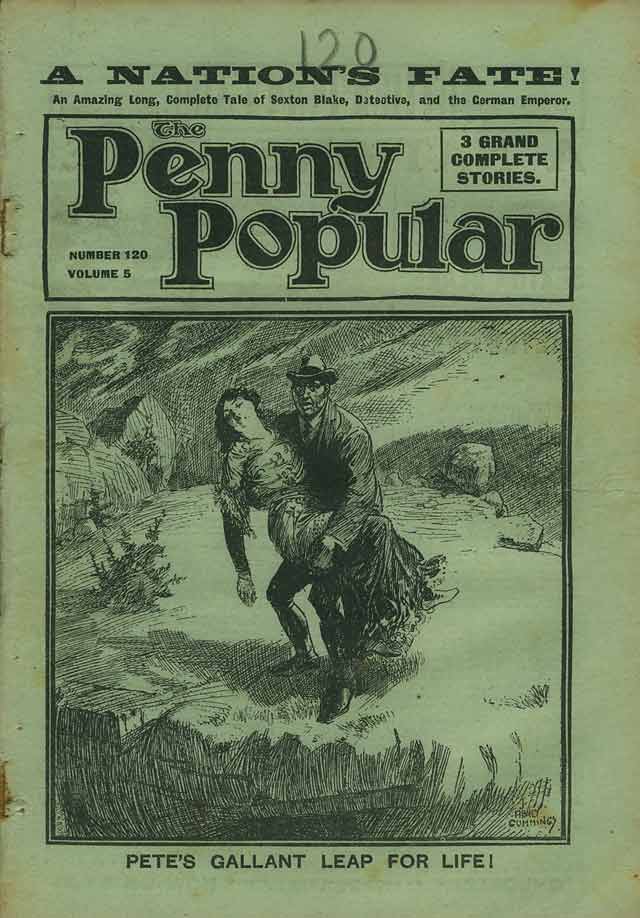
THE PENNY POPULAR · Vol. 5 Issue 120 · 23/1/1915 · Amalgamated Press · 1d
Illustrator: Harry Lane
Other content: Checkmated by Martin Clifford; Laying Down the Law! by S. Clarke Hook.
Notes: This is a reprint of the first half of UNION JACK issue 271 THE KAISER'S MISTAKE (1908).
Unrated
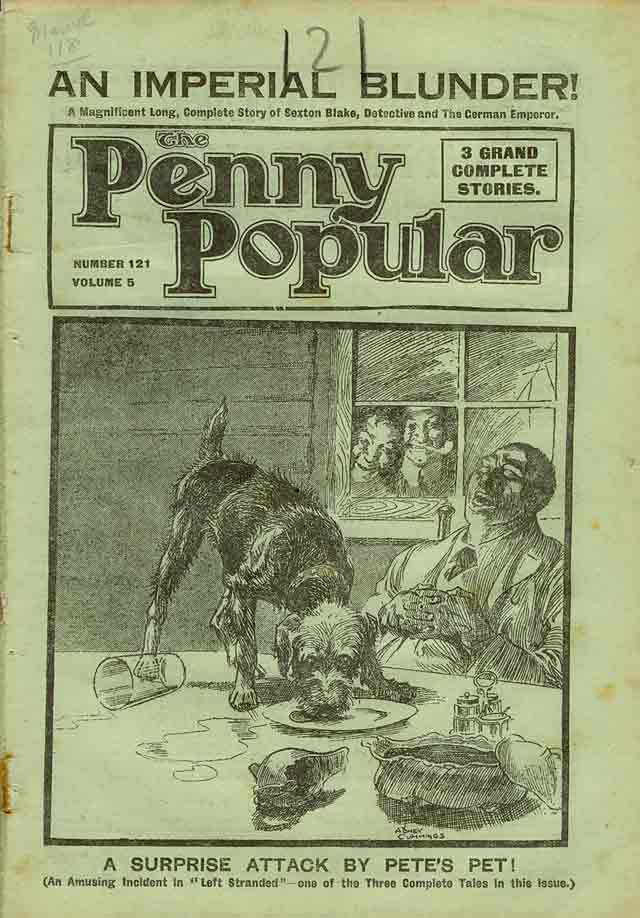
THE PENNY POPULAR · Vol. 5 Issue 121 · 30/1/1915 · Amalgamated Press · 1d
Illustrator: Harry Lane
Other content: Friends in Need! by Martin Clifford; Left Stranded! by S. Clarke Hook.
Notes: This is a reprint of the second half of UNION JACK issue 271 THE KAISER'S MISTAKE (1908).
Unrated

THE PENNY POPULAR · Vol. 5 Issue 122 · 6/2/1915 · Amalgamated Press · 1d
Illustrator: Harry Lane
Other content: The Runaways Return! by Martin Clifford; Getting Rid of Rufus! by S. Clarke Hook.
Notes: This is a reprint of the first half of UNION JACK issue 274 THE ADVENTURERS (1909).
Unrated
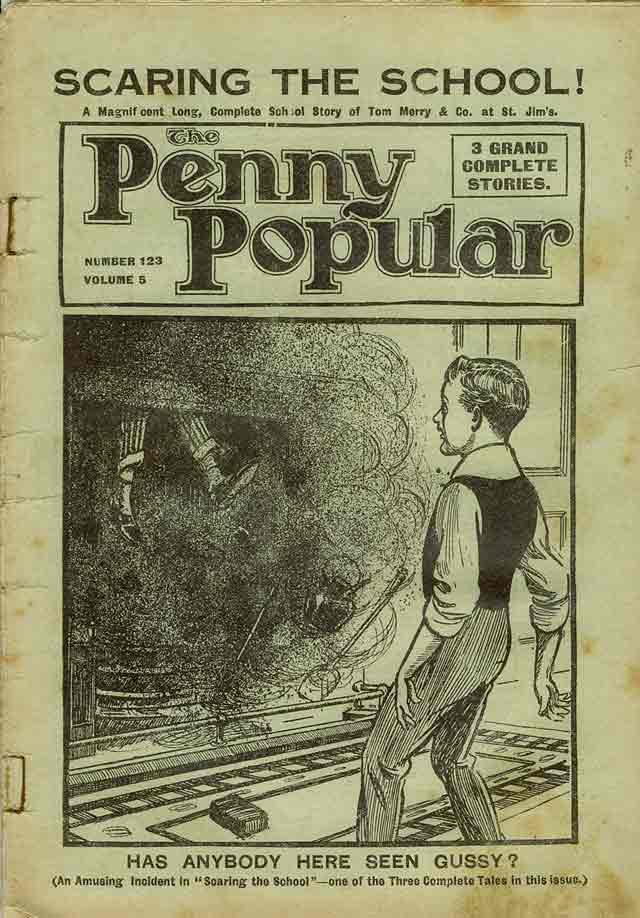
THE PENNY POPULAR · Vol. 5 Issue 123 · 13/2/1915 · Amalgamated Press · 1d
Illustrator: Harry Lane
Other content: Scaring the School! by Martin Clifford; Banished from the Camp! by S. Clarke Hook.
Notes: This is a reprint of the second half of UNION JACK issue 274 THE ADVENTURERS (1909).
Unrated
THE PENNY POPULAR · Vol. 5 Issue 124 · 20/2/1915 · Amalgamated Press · 1d
Illustrator: Harry Lane
Other content: Trouble in the Third! by Martin Clifford; A Fight For Freedom! by S. Clarke Hook.
Notes: This is an abridged reprint of UNION JACK issue 276 SEXTON BLAKE IN BORNEO (1909).
Unrated
THE PENNY POPULAR · Vol. 5 Issue 125 · 27/2/1915 · Amalgamated Press · 1d
Illustrator: Harry Lane
Other content: For the Honour of the House! by Martin Clifford; Buried Alive! by S. Clarke Hook.
Notes: This is an abridged reprint of UNION JACK issue 275 £.s.d. (1909).
Unrated

THE PENNY POPULAR · Vol. 5 Issue 126 · 6/3/1915 · Amalgamated Press · 1d
Illustrator: Harry Lane
Other content: Football Heroes! by Martin Clifford; Lonely Island! by S. Clarke Hook.
Notes: This is an abridged reprint of UNION JACK issue 278 THE MANHUNT (1909).
Unrated
THE PENNY POPULAR · Vol. 5 Issue 127 · 13/3/1915 · Amalgamated Press · 1d
Illustrator: Harry Lane
Other content: A Test of Honour! by Martin Clifford; Rounding up the Raiders! by S. Clarke Hook.
Notes: This is an abridged reprint of UNION JACK issue 281 £20,000 BAIL (1909).
Unrated
THE PENNY POPULAR · Vol. 5 Issue 128 · 20/3/1915 · Amalgamated Press · 1d
Illustrator: Harry Lane
Other content: A Lucky Escape! by Martin Clifford; Don Jose's Dilemma by S. Clarke Hook.
Notes: This is an abridged reprint of UNION JACK issue 280 THE THREE BROTHERS (1909).
Unrated
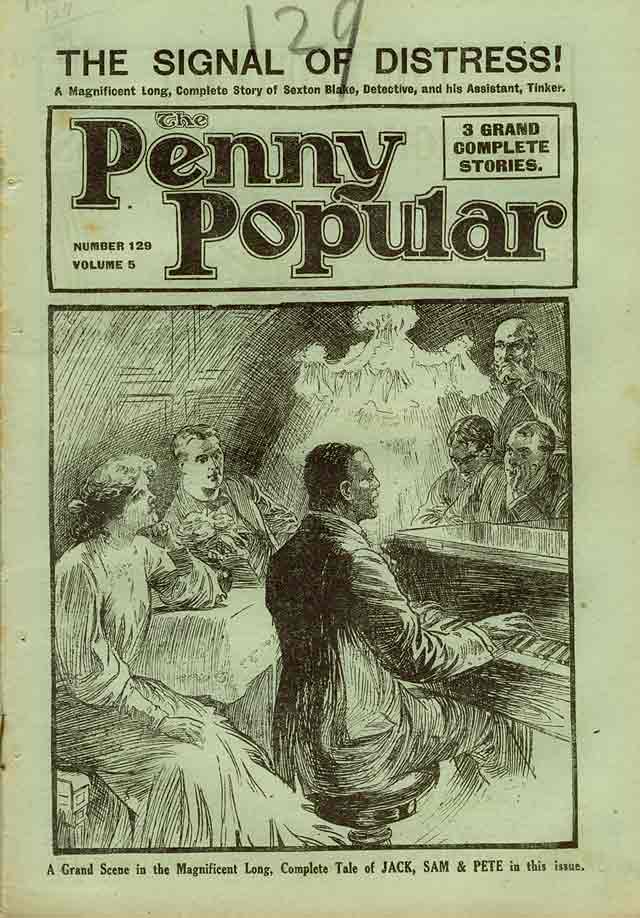
THE PENNY POPULAR · Vol. 5 Issue 129 · 27/3/1915 · Amalgamated Press · 1d
Illustrator: Harry Lane
Other content: Holding Their Own! by Martin Clifford; Sentenced By Pete! by S. Clarke Hook.
Notes: This is an abridged reprint of UNION JACK issue 285 C.Q.D. (THE SIGNAL OF DISTRESS) (1909).
Unrated
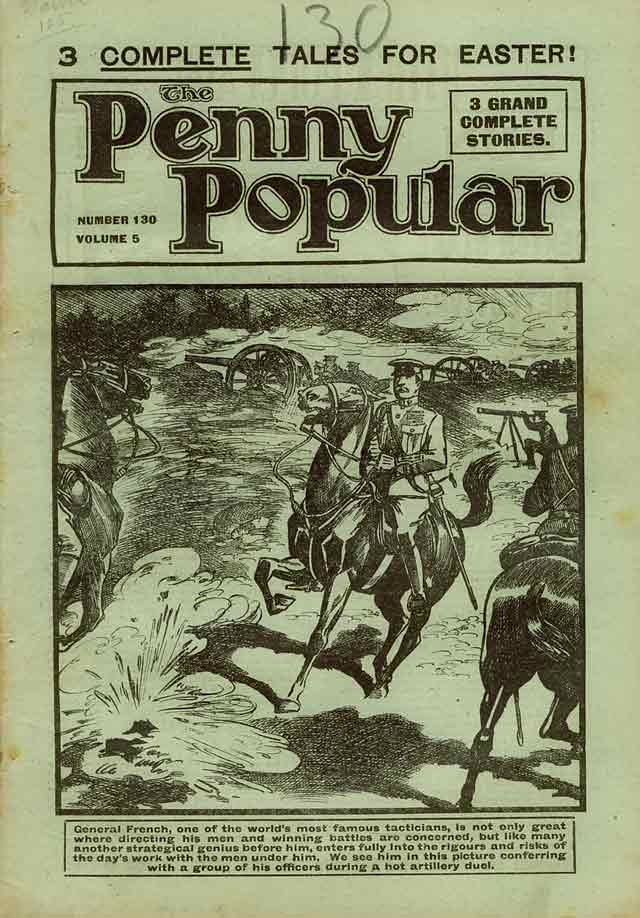
THE PENNY POPULAR · Vol. 5 Issue 130 · 3/4/1915 · Amalgamated Press · 1d
Illustrator: Harry Lane
Other content: The Fags Triumph! by Martin Clifford; For the Sake of a Comrade! by S. Clarke Hook.
Notes: This is an abridged reprint of UNION JACK issue 284 EAST AND WEST (1909).
Unrated
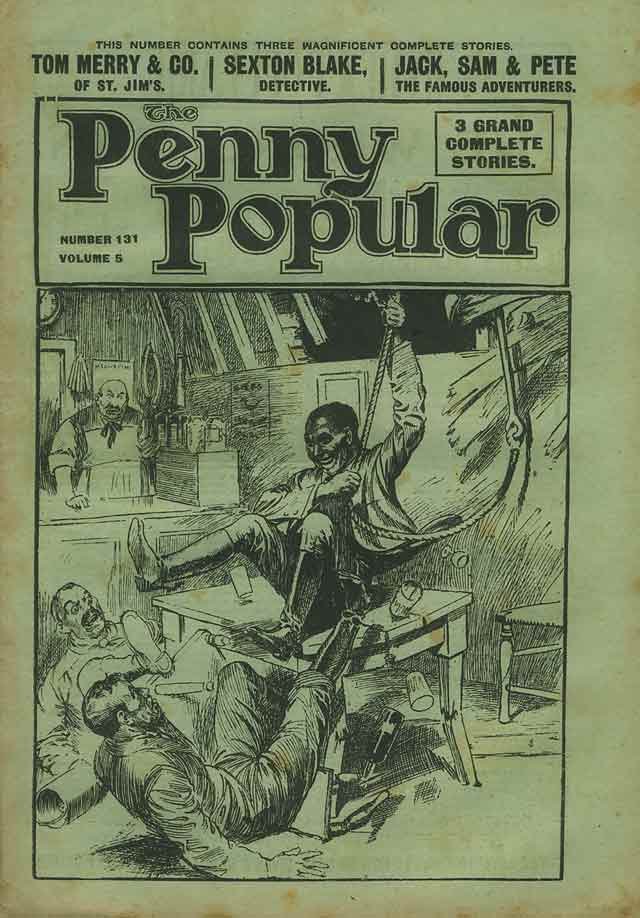
THE PENNY POPULAR · Vol. 5 Issue 131 · 10/4/1915 · Amalgamated Press · 1d
Illustrator: Harry Lane
Other content: Top Dog! by Martin Clifford; The Fortune Finders! by S. Clarke Hook.
Notes: This is an abridged reprint of UNION JACK issue 289 THE FIVE TOWNS (1909).
Unrated

THE PENNY POPULAR · Vol. 5 Issue 132 · 17/4/1915 · Amalgamated Press · 1d
Illustrator: Harry Lane
Other content: The St. Jim's Investigators! by Martin Clifford; The Mutineers of the Mary Ann! by S. Clarke Hook.
Notes: This is an abridged reprint of UNION JACK issue 291 THE CASE OF THE PUBLIC TRUSTEE (1909).
Unrated
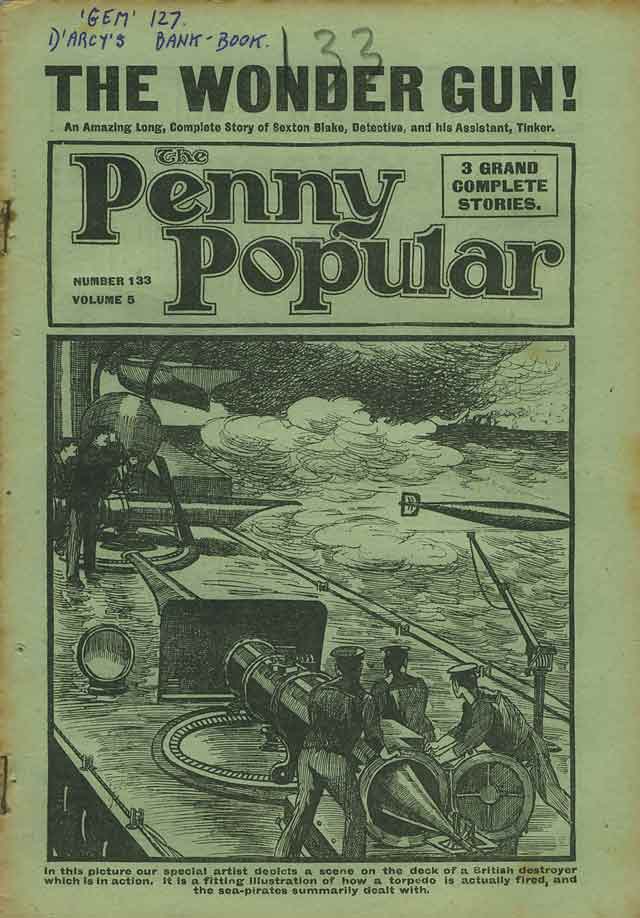
THE PENNY POPULAR · Vol. 5 Issue 133 · 24/4/1915 · Amalgamated Press · 1d
Illustrator: Harry Lane
Other content: The Schoolboy Spendthrift! by Martin Clifford; Barred by the Boarders by S. Clarke Hook.
Notes: This is an abridged reprint of UNION JACK issue 292 THE NOISELESS GUN (1909).
Unrated

THE PENNY POPULAR · Vol. 5 Issue 134 · 1/5/1915 · Amalgamated Press · 1d
Illustrator: Harry Lane
Other content: Shaming the School! by Martin Clifford; The Spectre Ship! by S. Clarke Hook.
Notes: This is an abridged reprint of UNION JACK issue 293 GREGORY SANDERSON'S WILL (1909).
Unrated
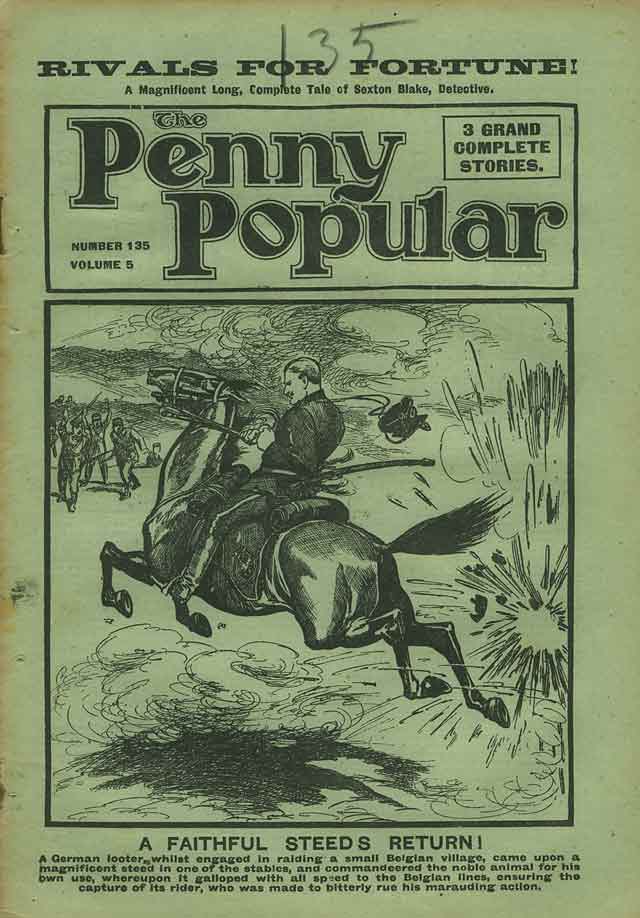
THE PENNY POPULAR · Vol. 5 Issue 135 · 8/5/1915 · Amalgamated Press · 1d
Illustrator: Harry Lane
Other content: D'Arcy's Dilemma! by Martin Clifford; The Gold Raiders! by S. Clarke Hook.
Notes: This is an abridged reprint of UNION JACK issue 294 THE GREAT PEERAGE ROMANCE (1909).
Unrated

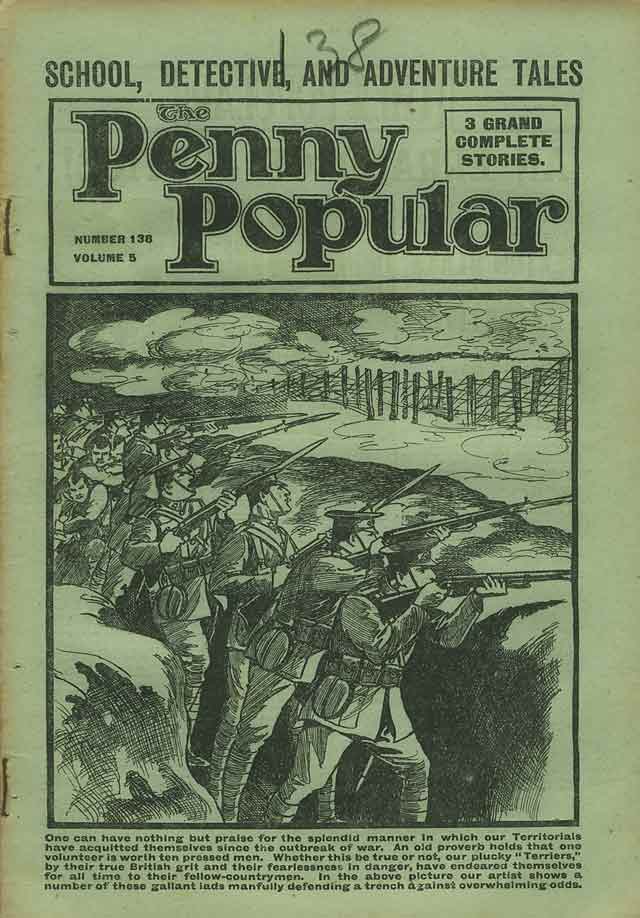
THE PENNY POPULAR · Vol. 5 Issue 136 · 15/5/1915 · Amalgamated Press · 1d
Illustrator: Harry Lane
Other content: Bowling Out the Bounder! by Martin Clifford; Pete's Submarine! by S. Clarke Hook.
Notes: This is an abridged reprint of UNION JACK issue 295 THE EMIGRANTS (1909).
Unrated
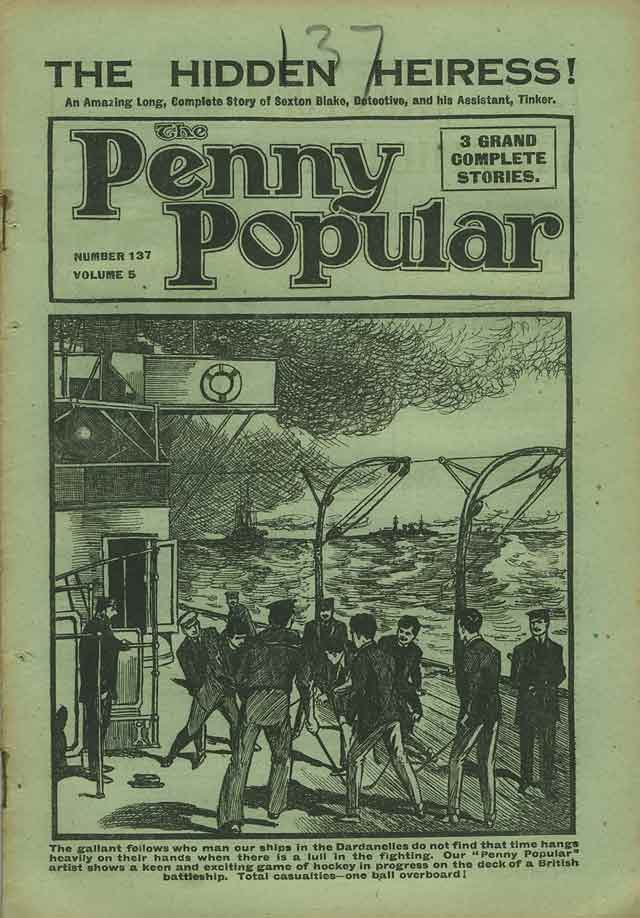
THE PENNY POPULAR · Vol. 5 Issue 137 · 22/5/1915 · Amalgamated Press · 1d
Illustrator: Harry Lane
Other content: Glyn's Monster Sensation! by Martin Clifford; Routing the Rebels by S. Clarke Hook.
Notes: This is an abridged reprint of UNION JACK issue 297 SEXTON BLAKE, PUBLICAN (1909).
Unrated
THE PENNY POPULAR · Vol. 5 Issue 138 · 29/5/1915 · Amalgamated Press · 1d
Illustrator: Harry Lane
Other content: Under Suspicion! by Martin Clifford; Scheming for a Fortune! by S. Clarke Hook.
Notes: This is a reprint of the first half of UNION JACK issue 298 SEXTON BLAKE, SHOWMAN (1909).
Unrated

THE PENNY POPULAR · Vol. 5 Issue 139 · 5/6/1915 · Amalgamated Press · 1d
Illustrator: Harry Lane
Other content: Tracking a Truant! by Martin Clifford; Pete's Great Race! by S. Clarke Hook.
Notes: This is a reprint of the second half of UNION JACK issue 298 SEXTON BLAKE, SHOWMAN (1909).
Unrated
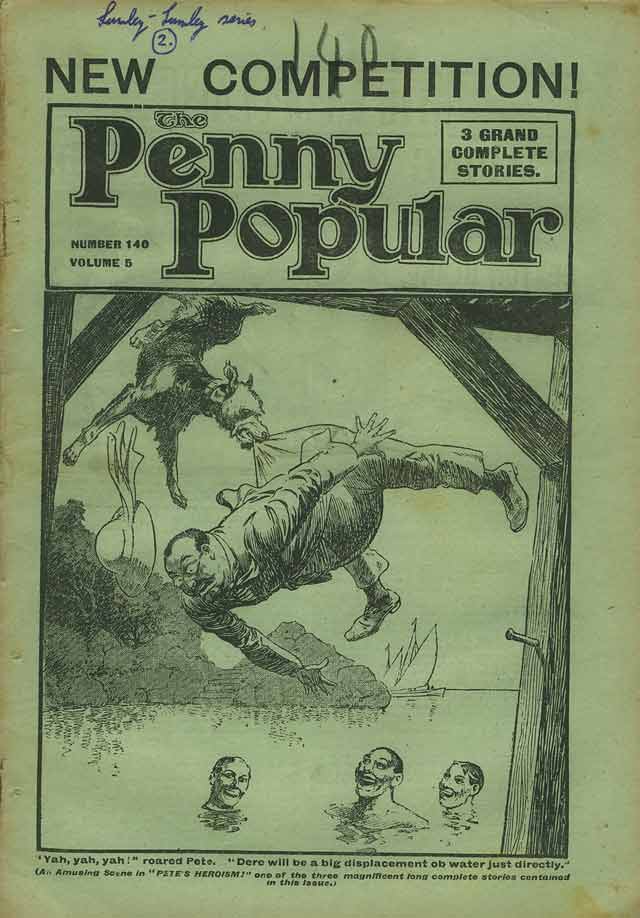
THE PENNY POPULAR · Vol. 5 Issue 140 · 12/6/1915 · Amalgamated Press · 1d
Illustrator: Harry Lane
Other content: Barred from the Team! by Martin Clifford; Pete's Heroism! by S. Clarke Hook.
Notes: This is a reprint of the first half of UNION JACK issue 299 THE BLUE ROOM MYSTERY (1909).
Unrated
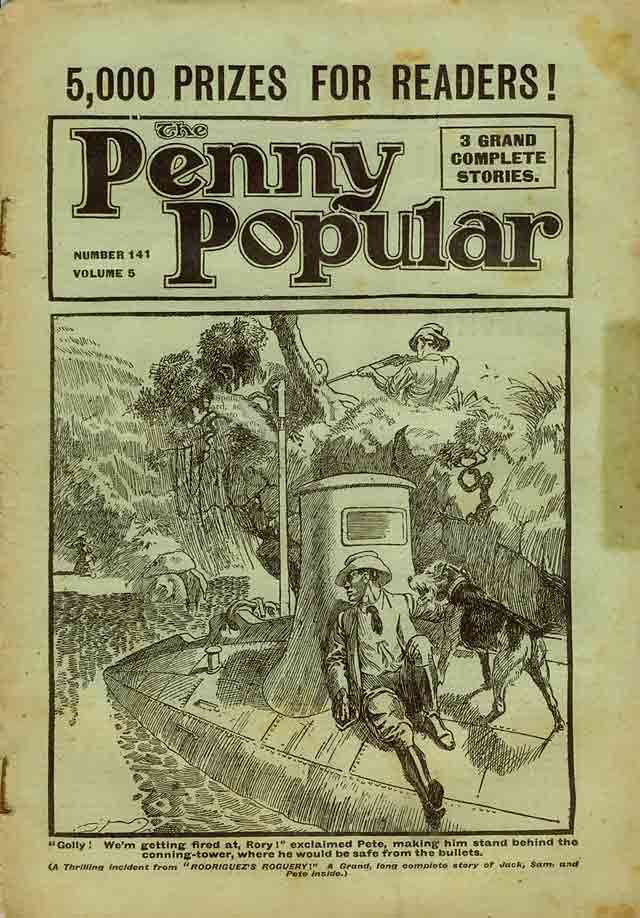
THE PENNY POPULAR · Vol. 5 Issue 141 · 19/6/1915 · Amalgamated Press · 1d
Illustrator: Harry Lane
Other content: The Rylcombe Steeplechase by Martin Clifford; Rodriguez's Roguery! by S. Clarke Hook.
Notes: This is a reprint of the second half of UNION JACK issue 303 THE STEPNEY MYSTERY (1909).
Unrated
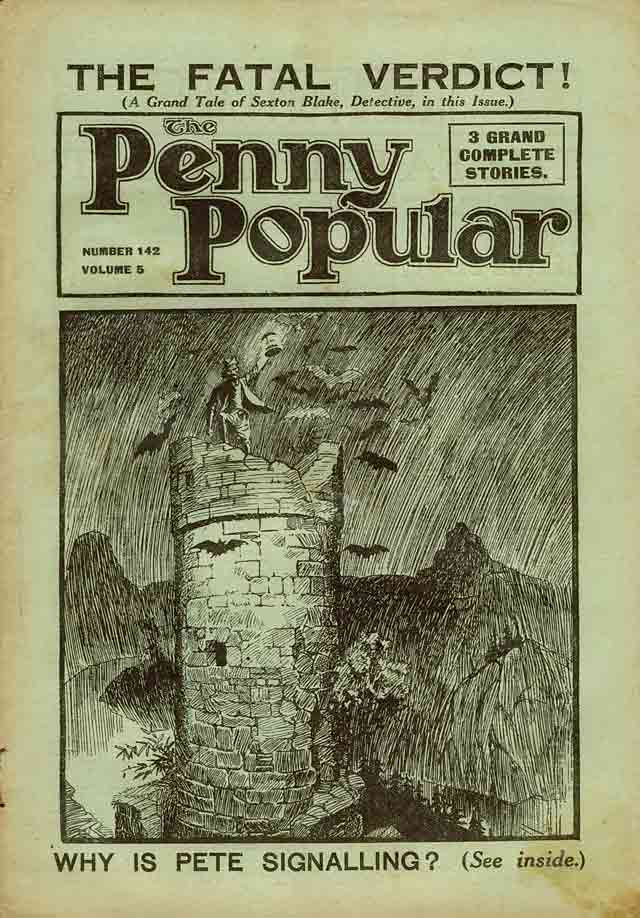
THE PENNY POPULAR · Vol. 5 Issue 142 · 26/6/1915 · Amalgamated Press · 1d
Illustrator: Harry Lane
Other content: The Outsider's Daring! by Martin Clifford; Spoofing the Savages! by S. Clarke Hook.
Notes: This is a reprint of the first half of UNION JACK issue 300 UNFROCKED (1909).
Unrated
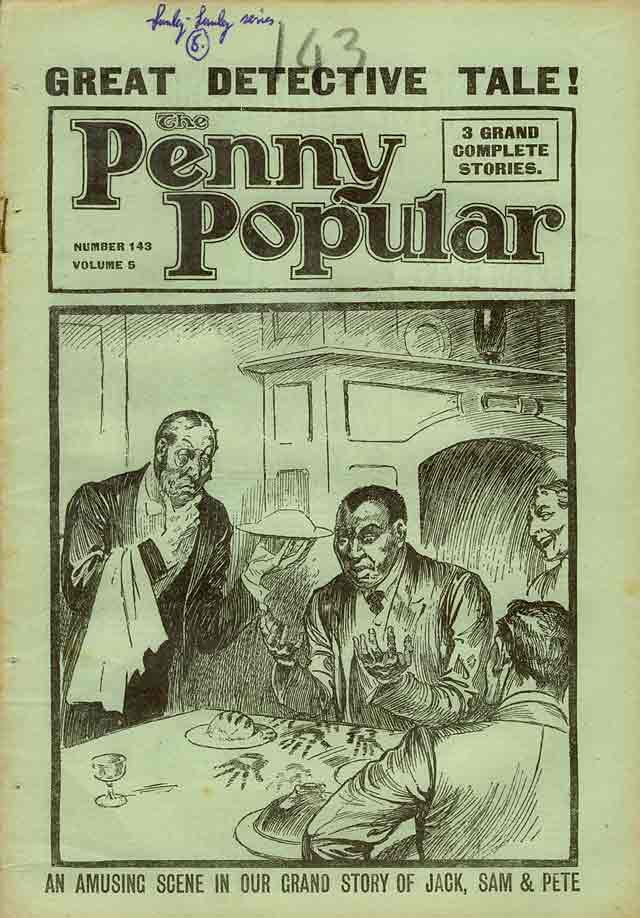
THE PENNY POPULAR · Vol. 5 Issue 143 · 3/7/1915 · Amalgamated Press · 1d
Illustrator: Harry Lane
Other content: The Haunted Mill! by Martin Clifford; A Mistaken Identity! by S. Clarke Hook.
Notes: This is a reprint of the second half of UNION JACK issue 300 UNFROCKED (1909).
Unrated
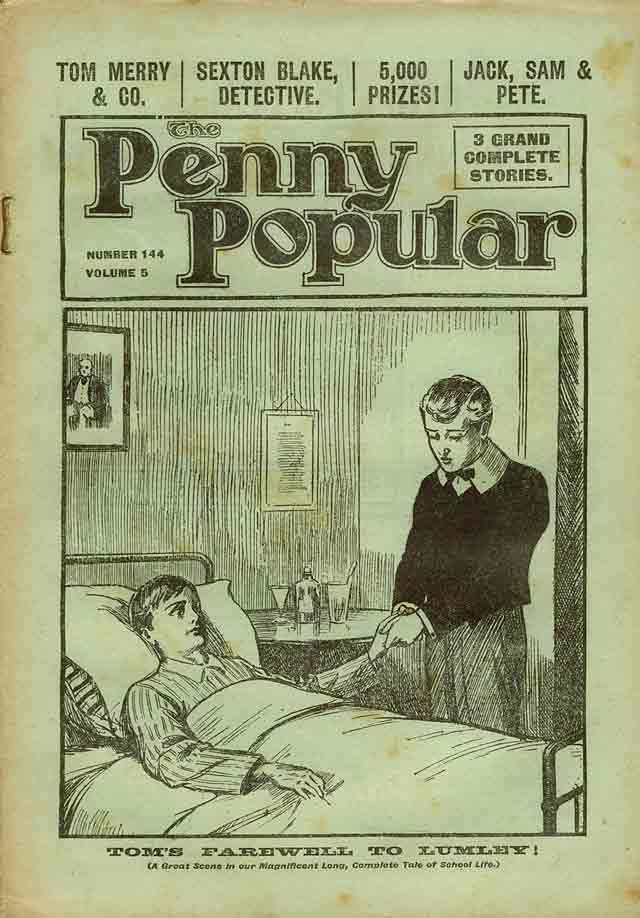
THE PENNY POPULAR · Vol. 5 Issue 144 · 10/7/1915 · Amalgamated Press · 1d
Illustrator: Harry Lane
Other content: Redeeming the Past! by Martin Clifford; The Sorrows of Soames! by S. Clarke Hook.
Notes: This is a reprint of the first half of UNION JACK issue 314 SEXTON BLAKE, PLAYWRIGHT (1909).
Unrated

THE PENNY POPULAR · Vol. 5 Issue 145 · 17/7/1915 · Amalgamated Press · 1d
Illustrator: Harry Lane
Other content: A Box of Mystery! by Martin Clifford; The Feud Against the Blacks! by S. Clarke Hook.
Notes: This is a reprint of the second half of UNION JACK issue 314 SEXTON BLAKE, PLAYWRIGHT (1909).
Unrated
THE PENNY POPULAR · Vol. 5 Issue 146 · 24/7/1915 · Amalgamated Press · 1d
Illustrator: Harry Lane
Other content: Broken Bonds! by Martin Clifford; Rogues of the Road by S. Clarke Hook.
Notes: This is a reprint of the first half of UNION JACK issue 305 SEXTON BLAKE, LOCK-KEEPER (1909).
Unrated
THE PENNY POPULAR · Vol. 5 Issue 147 · 31/7/1915 · Amalgamated Press · 1d
Illustrator: Harry Lane
Other content: Suspects All! by Martin Clifford; A Stroke of Luck! by S. Clarke Hook.
Notes: This is a reprint of the second half of UNION JACK issue 305 SEXTON BLAKE, LOCK-KEEPER (1909).
Unrated

THE PENNY POPULAR · Vol. 5 Issue 148 · 7/8/1915 · Amalgamated Press · 1d
Illustrator: Harry Lane
Other content: Rolling in Wealth by Martin Clifford; His Just Deserts by S. Clarke Hook.
Notes: This is a reprint of the first half of UNION JACK issue 302 IN DEADLY GRIP (1909). See that issue for the review.
Unrated
THE PENNY POPULAR · Vol. 5 Issue 149 · 14/8/1915 · Amalgamated Press · 1d
Illustrator: Harry Lane
Other content: Fatty Wynn's Failure by Martin Clifford; Sold Into Slavery by S. Clarke Hook.
Notes: This is a reprint of the second half of UNION JACK issue 302 IN DEADLY GRIP (1909). See that issue for the review.
Unrated
THE PENNY POPULAR · Vol. 5 Issue 150 · 21/8/1915 · Amalgamated Press · 1d
Illustrator: Harry Lane
Other content: Squaring Accounts by Martin Clifford; The Man Without a Memory! by S. Clarke Hook.
Notes: This is a reprint of the first half of UNION JACK issue 319 SEXTON BLAKE, SCOUTMASTER (1909).
Unrated
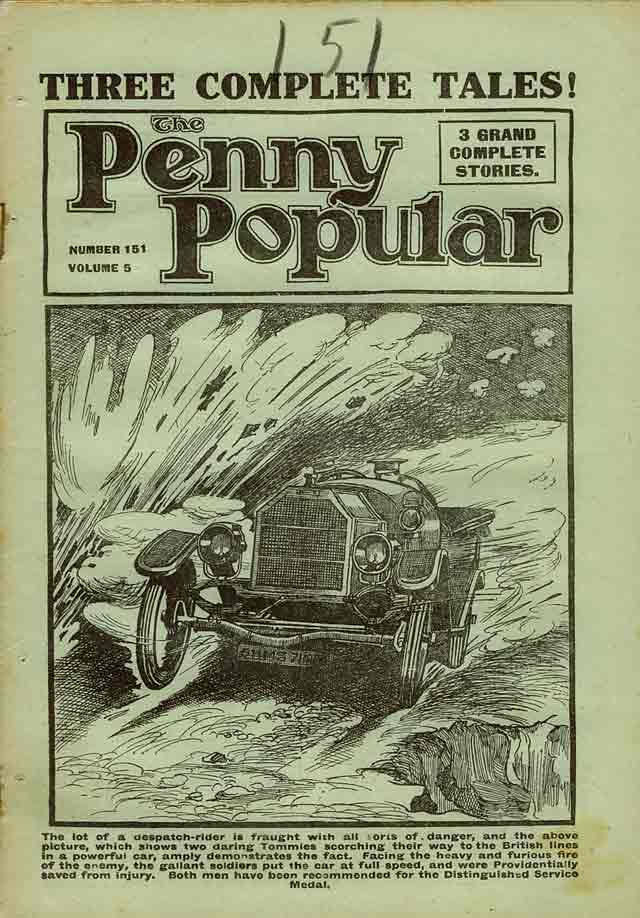
THE PENNY POPULAR · Vol. 5 Issue 151 · 28/8/1915 · Amalgamated Press · 1d
Illustrator: Harry Lane
Other content: Cosin Ethel's Prize! by Martin Clifford; The Captive of the Caves! by S. Clarke Hook.
Notes: This is a reprint of the second half of UNION JACK issue 319 SEXTON BLAKE, SCOUTMASTER (1909).
Unrated
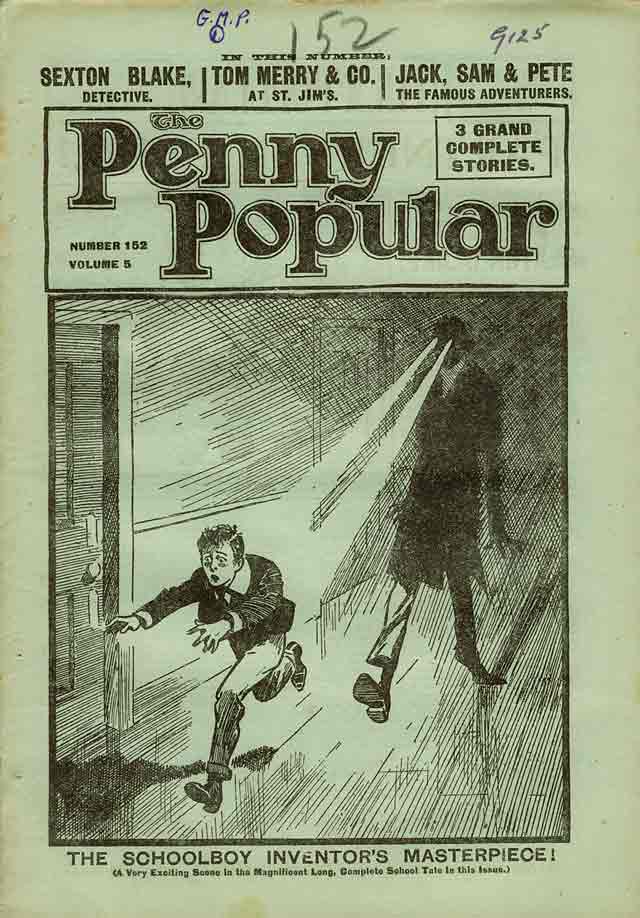
THE PENNY POPULAR · Vol. 5 Issue 152 · 4/9/1915 · Amalgamated Press · 1d
Illustrator: Harry Lane
Other content: Ten with a Secret! by Martin Clifford; Rank Cowardice! by S. Clarke Hook.
Notes: This is a reprint of the first half of UNION JACK issue 315 THE SWELL MOBSMAN (1909). See that issue for the review.
Unrated
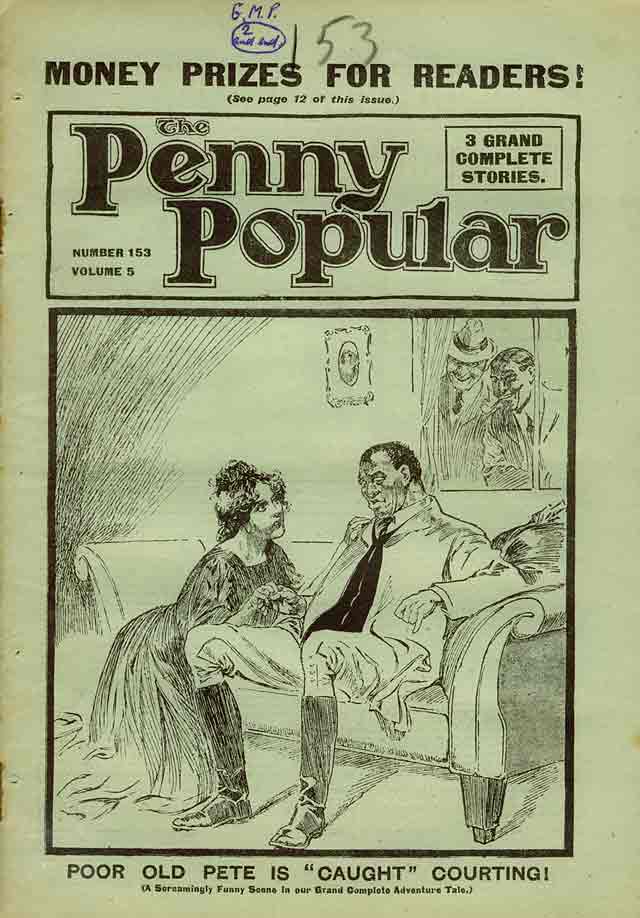
THE PENNY POPULAR · Vol. 5 Issue 153 · 11/9/1915 · Amalgamated Press · 1d
Illustrator: Harry Lane
Other content: A School Run Riot! by Martin Clifford; At Daggers Drawn! by S. Clarke Hook.
Notes: This is a reprint of the second half of UNION JACK issue 315 THE SWELL MOBSMAN (1909). See that issue for the review.
Unrated
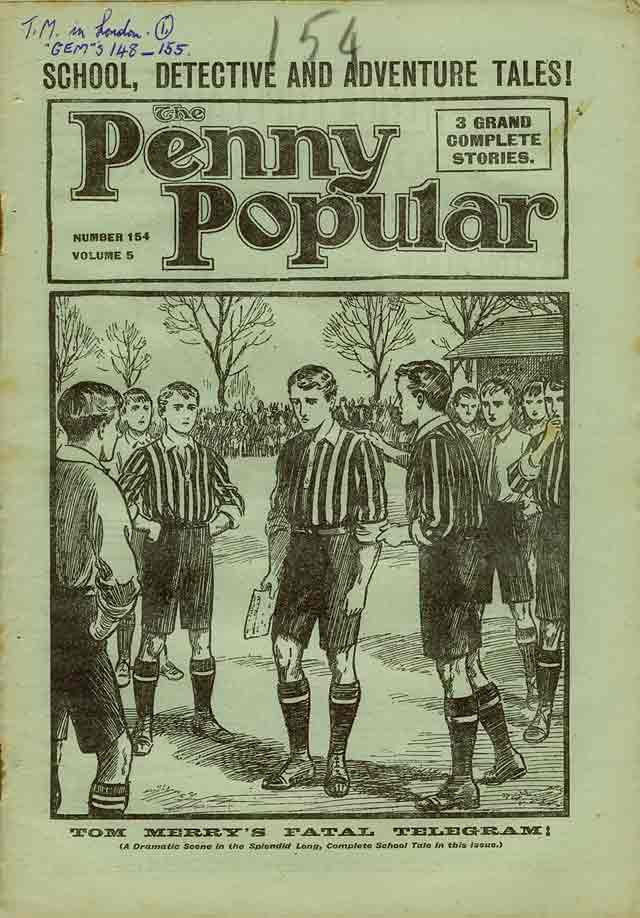
THE PENNY POPULAR · Vol. 5 Issue 154 · 18/9/1915 · Amalgamated Press · 1d
Illustrator: Harry Lane
Other content: Tom Merry's Last Term! by Martin Clifford; The Wonder Cavern! by S. Clarke Hook.
Notes: This is a reprint of the first half of UNION JACK issue 318 BRIDGE (1909).
Unrated
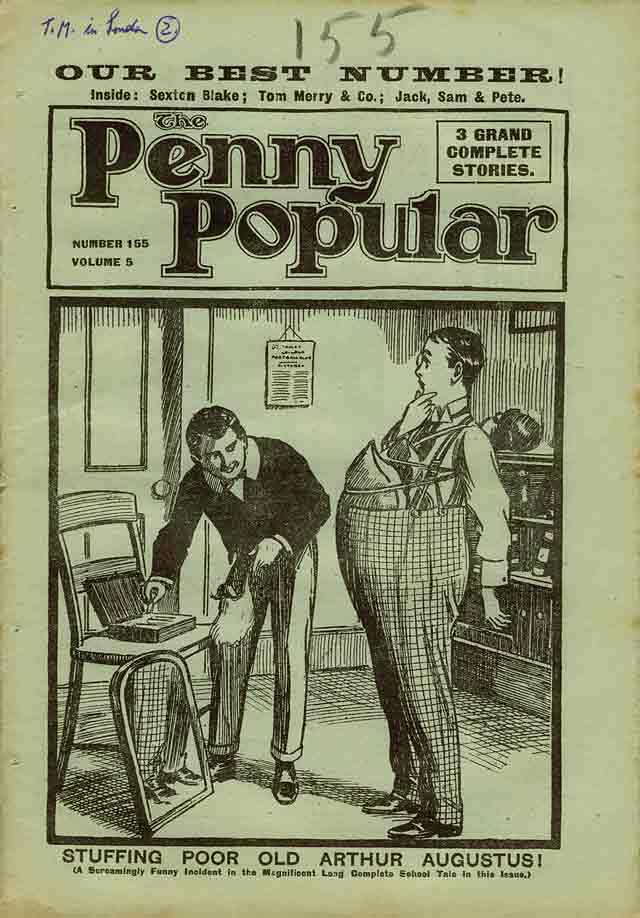
THE PENNY POPULAR · Vol. 5 Issue 155 · 25/9/1915 · Amalgamated Press · 1d
Illustrator: Harry Lane
Other content: Farewell to St. Jim's by Martin Clifford; The Palace of Fear! by S. Clarke Hook.
Notes: This is a reprint of the second half of UNION JACK issue 318 BRIDGE (1909).
Unrated
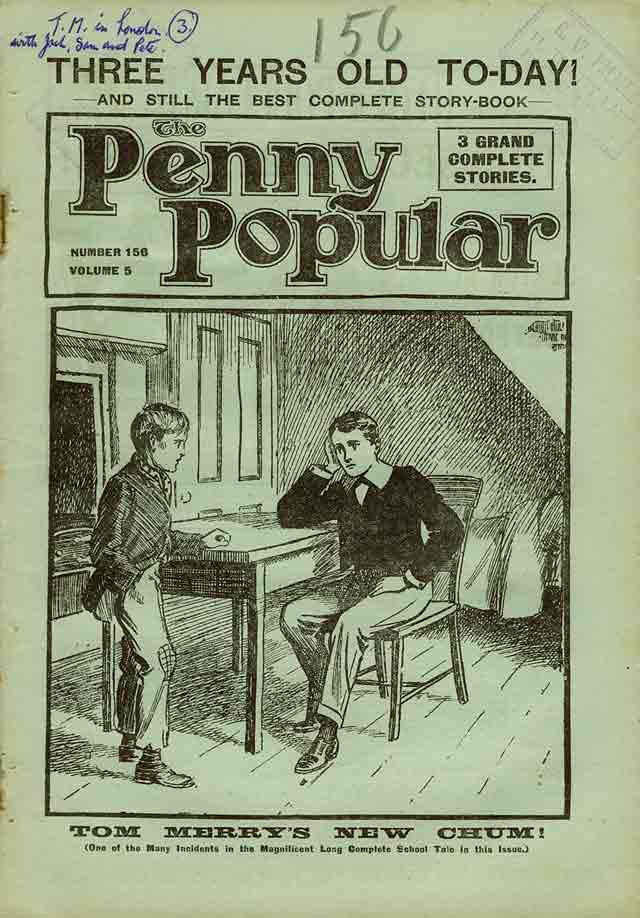
THE PENNY POPULAR · Vol. 5 Issue 156 · 2/10/1915 · Amalgamated Press · 1d
Illustrator: Harry Lane
Other content: Facing the World! by Martin Clifford; Doctor Pete! by S. Clarke Hook.
Notes: This is a reprint of the first half of UNION JACK issue 307 THE MYSTERY OF DUCHY HOLLOW (1909).
Unrated
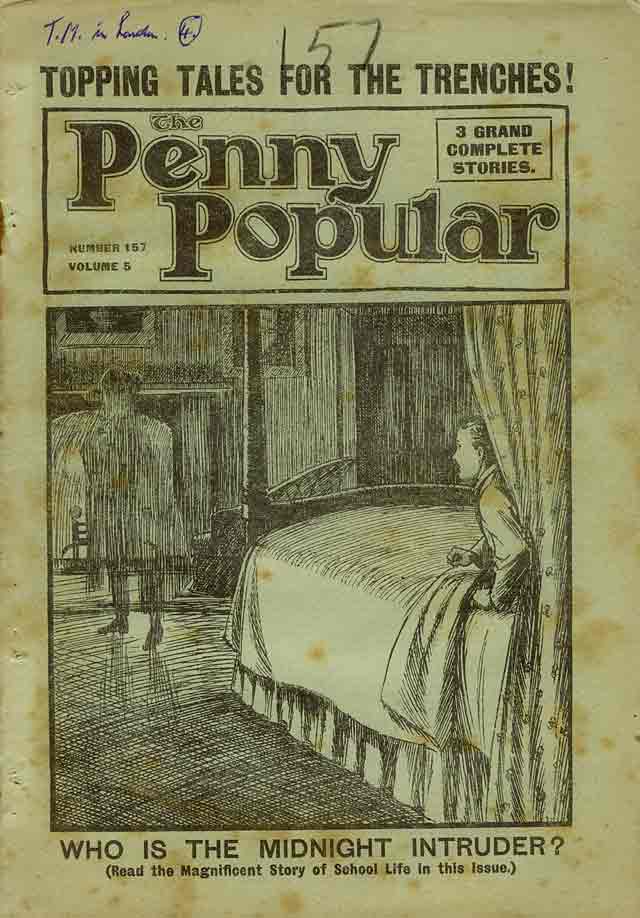
THE PENNY POPULAR · Vol. 5 Issue 157 · 9/10/1915 · Amalgamated Press · 1d
Illustrator: Harry Lane
Other content: Seeking His Fortune! by Martin Clifford; The Unseen Foe! by S. Clarke Hook.
Notes: This is a reprint of the second half of UNION JACK issue 307 THE MYSTERY OF DUCHY HOLLOW (1909).
Unrated
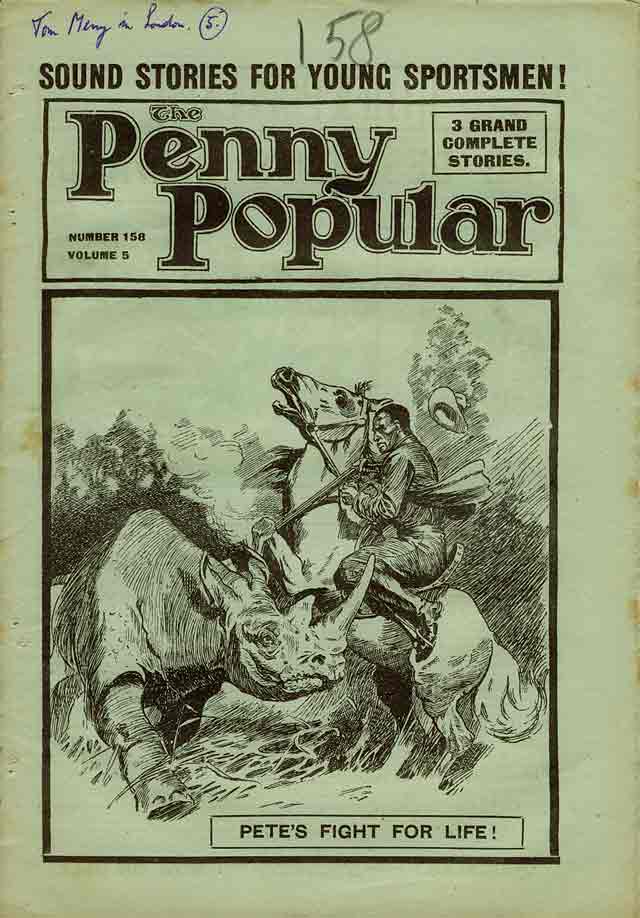
THE PENNY POPULAR · Vol. 5 Issue 158 · 16/10/1915 · Amalgamated Press · 1d
Illustrator: Harry Lane
Other content: The Shadow of Guilt! by Martin Clifford; The Arab's Vengeance! by S. Clarke Hook.
Notes: This is a reprint of the first half of UNION JACK issue 322 SEXTON BLAKE, SANDWICH MAN (1909).
Unrated

THE PENNY POPULAR · Vol. 5 Issue 158 · 23/10/1915 · Amalgamated Press · 1d
Illustrator: Harry Lane
Other content: Tom Merry, Form-Master! by Martin Clifford; The Hindu's Honour! by S. Clarke Hook.
Notes: This is a reprint of the second half of UNION JACK issue 322 SEXTON BLAKE, SANDWICH MAN (1909).
Unrated
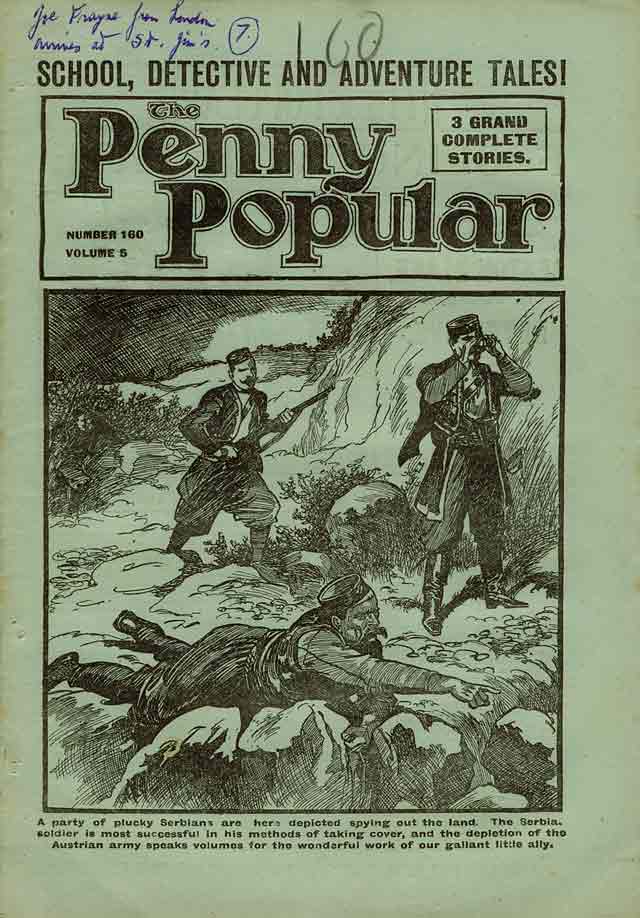
THE PENNY POPULAR · Vol. 5 Issue 160 · 30/10/1915 · Amalgamated Press · 1d
Illustrator: Harry Lane
Other content: Tom Merry's Protege! by Martin Clifford; Meeting His Match! by S. Clarke Hook.
Notes: This is a reprint of the first half of UNION JACK issue 308 SEXTON BLAKE, BOOKMAKER (1909).
Unrated
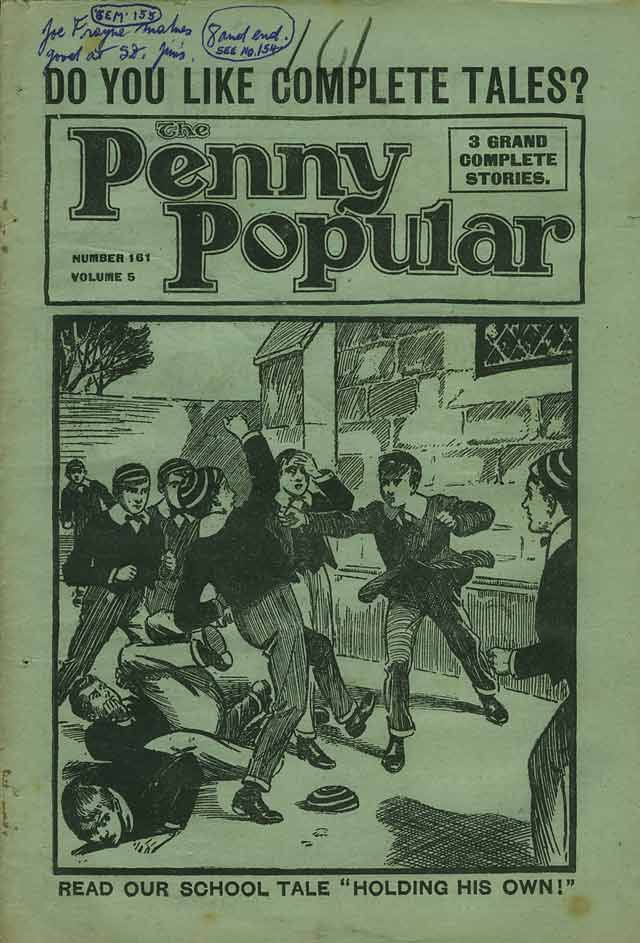
THE PENNY POPULAR · Vol. 5 Issue 161 · 6/11/1915 · Amalgamated Press · 1d
Illustrator: Harry Lane
Other content: Holding His Own! by Martin Clifford; The Golden Talisman by S. Clarke Hook.
Notes: This is a reprint of the second half of UNION JACK issue 308 SEXTON BLAKE, BOOKMAKER (1909).
Unrated
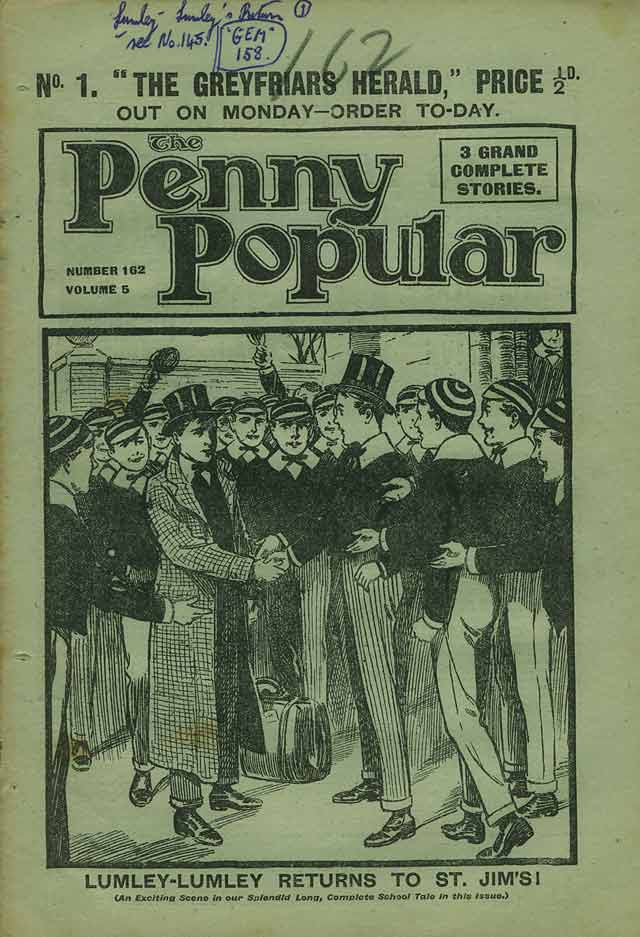
THE PENNY POPULAR · Vol. 5 Issue 162 · 13/11/1915 · Amalgamated Press · 1d
Illustrator: Harry Lane
Other content: The Outsider's Return! by Martin Clifford; Freed From Bondage! by S. Clarke Hook.
Notes: This is a reprint of the first half of UNION JACK issue 323 THE THIRD DEGREE (1909).
Unrated
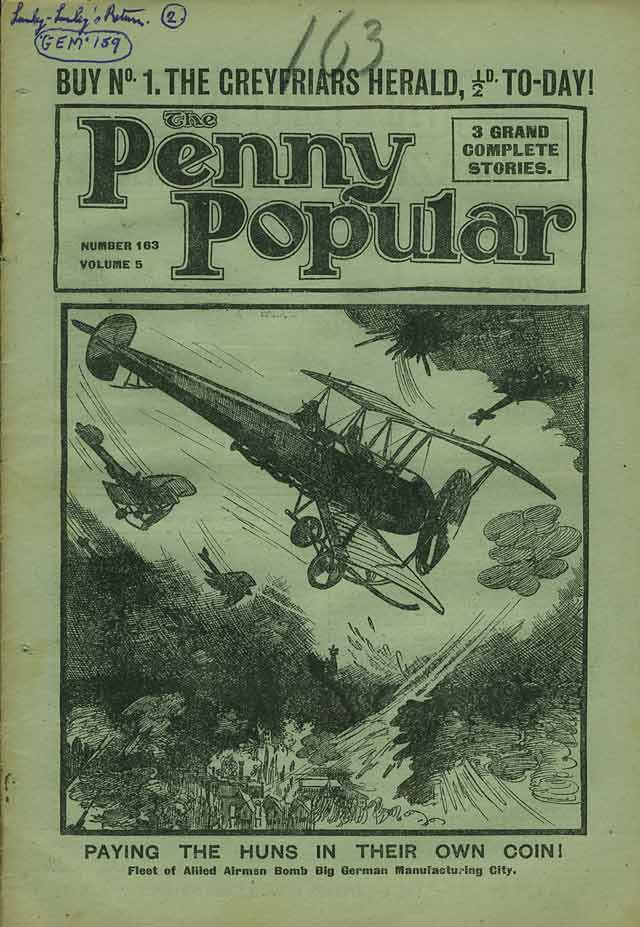
THE PENNY POPULAR · Vol. 5 Issue 163 · 20/11/1915 · Amalgamated Press · 1d
Illustrator: Harry Lane
Other content: The Black Sheep! by Martin Clifford; Prisoners At Large! by S. Clarke Hook.
Notes: This is a reprint of the second half of UNION JACK issue 323 THE THIRD DEGREE (1909).
Unrated
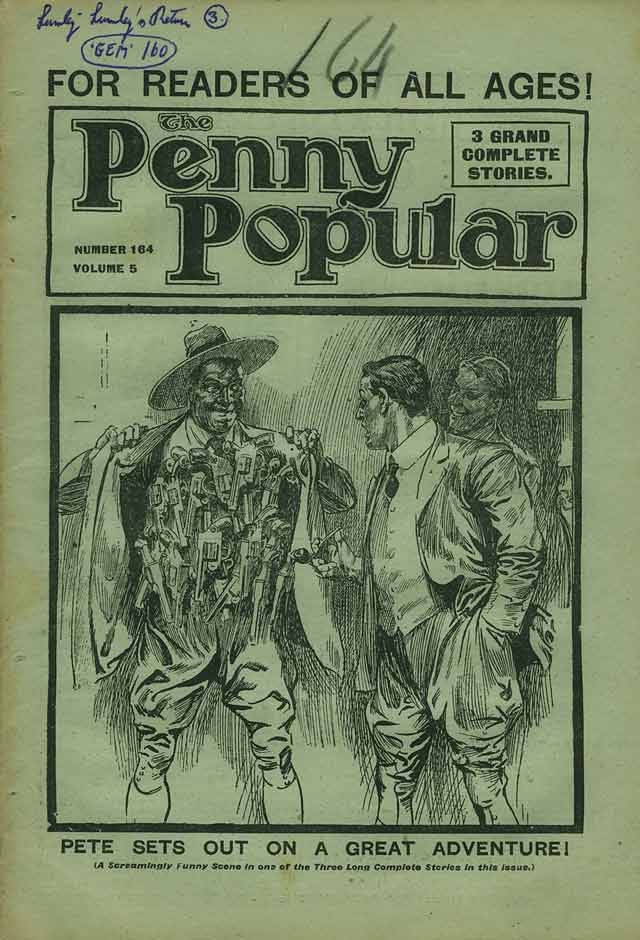
THE PENNY POPULAR · Vol. 5 Issue 164 · 27/11/1915 · Amalgamated Press · 1d
Illustrator: Harry Lane
Other content: Lumley-Lumley's Plot! by Martin Clifford; Baffling the Bushranger! by S. Clarke Hook.
Notes: This is a reprint of the first half of UNION JACK issue 301 THE GREAT MOTOR CAR MYSTERY (1909).
Unrated
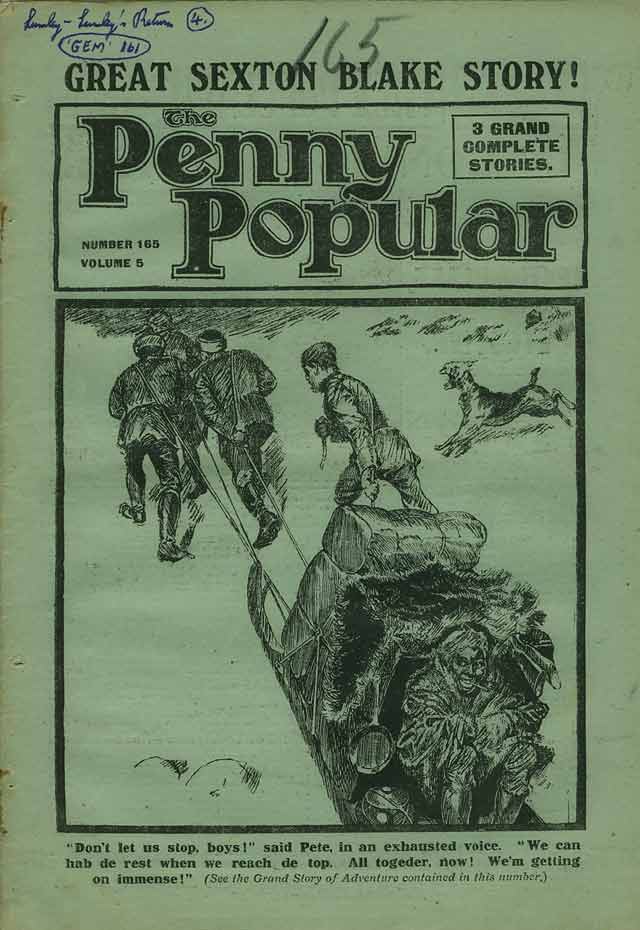
THE PENNY POPULAR · Vol. 5 Issue 165 · 4/12/1915 · Amalgamated Press · 1d
Illustrator: Harry Lane
Other content: The Terrible Three's Task! by Martin Clifford; A Secret Mission by S. Clarke Hook.
Notes: This is a reprint of the second half of UNION JACK issue 301 THE GREAT MOTOR CAR MYSTERY (1909).
Unrated
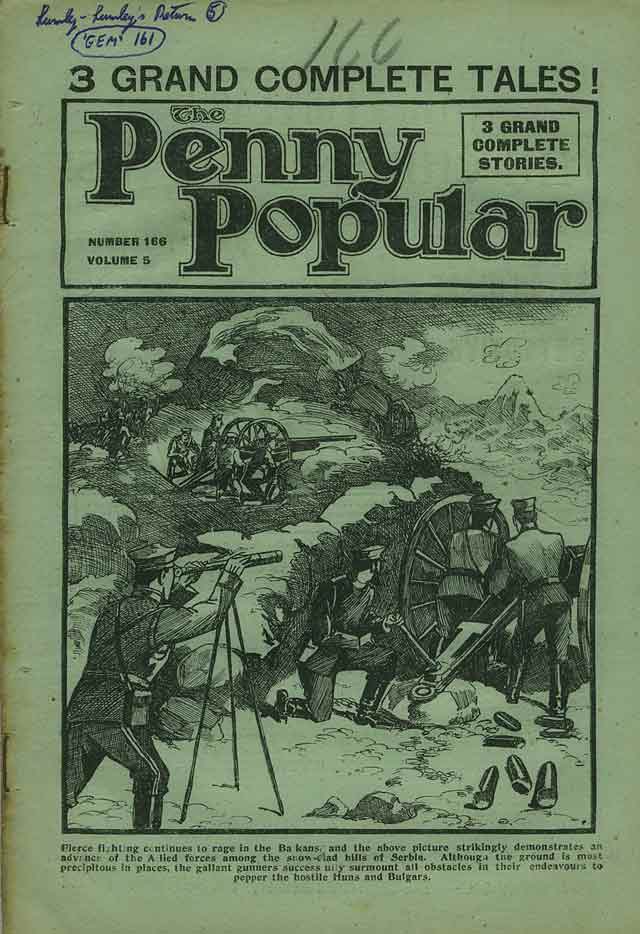
THE PENNY POPULAR · Vol. 5 Issue 166 · 11/12/1915 · Amalgamated Press · 1d
Illustrator: Harry Lane
Other content: The Outsider's Reformation! by Martin Clifford; Bowled Out! by S. Clarke Hook.
Notes: In Chicago, a Chinaman named Li Fong boards a train bound for New York. From there, he will voyage to England where his daughter, Lotus Flower, is waiting. En route, after being robbed of his ticket and money, he is ejected from the train and left on the American prairie. In New York, Fenlock Fawn is asked to locate and arrest him. Apparently, Li Fong had been caught embezzling the Chinese Government and was sent the Yellow Cord. Rather than following the custom and strangling himself with it, he'd taken flight and is now thought to be hiding in New York's Chinese quarter. A week goes by and Fawn makes no progress, so the Chinese Minister issues an edict that no countryman of Li Fong's should harbour him, on pain of death. Four months later, weak and ill, Li Fong arrives in the quarter and is shunned by all until he is found by his faithful servant, Wang, whom he had long ago left in charge of Lotus Flower. After assuring him that his child is safe in England, Wang smuggles him onto a London-bound ship. A newspaper report alerts Sexton Blake to the fugitive's imminent arrival. He knows Li Fong, having once had his life saved by him, and, owing him a debt of gratitude, manages to get him off the ship before it docks. Directed by Wang, they go to the house where Lotus Flower has been staying, only to find her gone. She has been taken by Chen Ling, Li Fong's enemy, who in China had requested to marry the girl, was refused, and in revenge framed Li Fong for embezzlement. Leaving the house, Blake and his companions are set upon by Chen Ling's hired assassins. They manage to evade their assailants. Blake sends Li Fong to a country manor where he will be safe. He then sets out to locate Lotus Flower.
Trivia: This is a reprint of the first half of UNION JACK issue 310 THE YELLOW CORD (1909).
Rating: ★★★★★

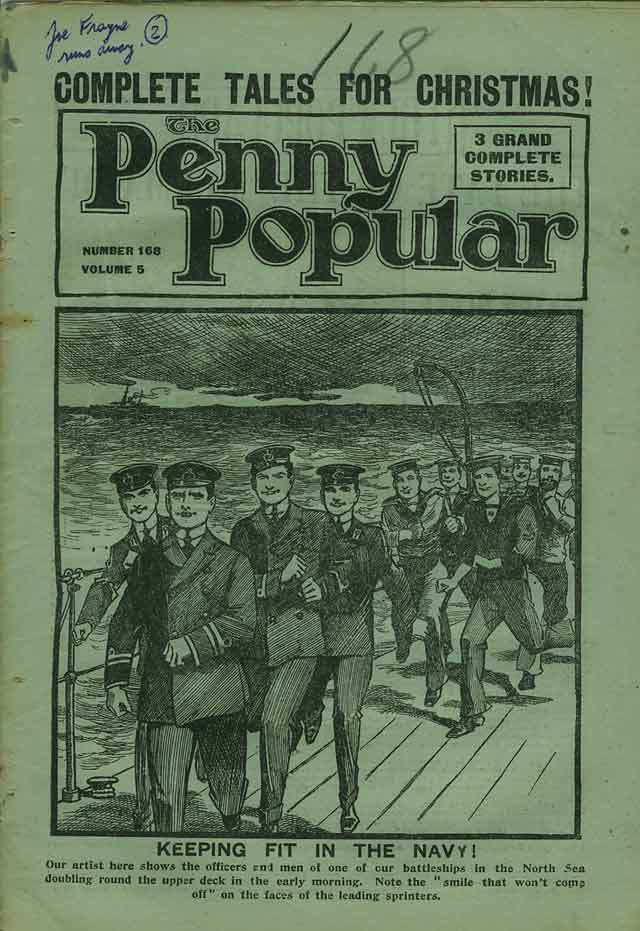
THE PENNY POPULAR · Vol. 5 Issue 167 · 18/12/1915 · Amalgamated Press · 1d
Illustrator: Harry Lane
Other content: A Credit to the School! by Martin Clifford; The Ghost at the Grange! by S. Clarke Hook.
Notes: Disguised as a Chinaman, Sexton Blake encounters Chen Ling in an opium den. The detective is overcome by the drug and recognised by the villain. He recovers to find himself prisoner aboard a docked ship. Pedro leads Tinker and Wang to his rescue. During the ensuing fight, Chen Ling escapes while Blake, Tinker, Pedro and Wang jump overboard to avoid a fire. Wang slips away, preferring to search for Chen Ling on his own. The bloodhound, however, already has the villain's scent and, with Tinker, sets off after him. Blake is shot at by the captain of the ship. The bullet grazes his head and he doesn't recover consciousness until the next day. He returns to Baker Street and recruits Detective-Inspector Widgeon. Pedro enters the house showing all the signs of having escaped from captivity. Blake and Widgeon follow the hound to where Tinker has been imprisoned by Chen Ling but the villain's henchmen drive them away. The captive is taken elsewhere. Five days pass, then Wang comes to Baker Street and reports that he's located Lotus Flower and Tinker and that Chen Ling intends to leave the country with the girl that night. Blake, Wang and Widgeon race to attack the new hideout. Wang is shot and falls through a trapdoor. Blake and Widgeon are captured but Wang returns with a force of men and the enemy is defeated. Lotus Flower and Tinker are rescued. Chen Ling receives a yellow cord. He takes poison and dies. The girl is reunited with her father, who receives a pardon from the Chinese Empress.
Trivia: This is a reprint of the second half of UNION JACK issue 310 THE YELLOW CORD (1909).
Rating: ★★★★★
THE PENNY POPULAR · Vol. 5 Issue 168 · 25/12/1915 · Amalgamated Press · 1d
Illustrator: Harry Lane
Other content: Led Astray! by Martin Clifford; The Persian Plotters! by S. Clarke Hook.
Notes: This is a reprint of the first half of UNION JACK issue 325 SEXTON BLAKE IN NEWFOUNDLAND (1910).
Unrated
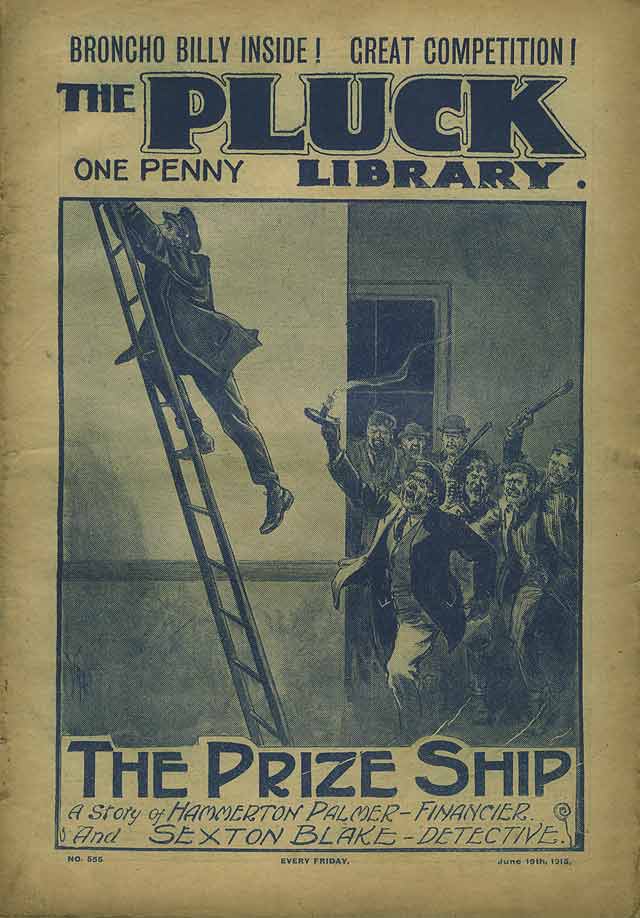
PLUCK · Issue 555 · 19/6/1915 · Amalgamated Press · 1d
Illustrator: G. M. Dodshon
Other content: Broncho Billy and the Rustlers by Edgar West; The Hidden Marksman by Anon.
Notes: Having fled the country after Sexton Blake broke up THE DEATH CLUB (UNION JACK issue 558, 1914), Hammerton Palmer has now returned to England under cover of the war. Down on his luck, and under the assumed name of Henderson, he takes a job as a shipping clerk. One day, he overhears the company owner, John Freeborn, instructing his son Jack to travel to Southampton to bid on a "prize ship." This vessel had been seized while transporting contraband and is now up for auction. The Serbian government wants to purchase it to use as a patrol ship but their agent, Dedogatch, has fallen out of favour with his American counterpart and suspects that he will be bid against by that person. Therefore, he has employed Freeborn & Son Shipping to make the bid for him, promising a large sum of money with whatever remains of it after the vessel is purchased guaranteed in settlement for services rendered. Palmer follows John Freeborn to a meeting with Dedogatch but is almost caught eavesdropping. He manages to get away with sufficient information that he can formulate a scheme and set it into motion. First, heavily disguised, he intercepts Jack Freeborn as the young man is en route for Southampton, captures him, and imprisons him in a hut at an abandoned quarry. Next, he spreads a rumour that the prize ship is unsound, and finally he bids on it, wins it for an extraordinarily low price, passes ownership to Dedogatch, and receives the bulk of the budget in payment. The morning after the auction, John Freeborn visits Sexton Blake and commissions him to find his missing son.
Rating: ★★★★☆
Illustrator: H. M. Lewis
Notes: This is one of the Will Spearing stories that frequently featured in PLUCK (see the FRIENDS AND ENEMIES MINI-BIBLIOGRAPHY for further details.) It is included here because Spearing is assisted in this tale by Tinker and Pedro.
Unrated
PLUCK · Issue 556 · 26/6/1915 · Amalgamated Press · 1d
Illustrator: Unknown
Other content: Unknown
Notes: I don't own this issue but know that the story ends with Sexton Blake allowing Hammerton Palmer to keep eight thousand pounds providing he leaves the country.
Unrated
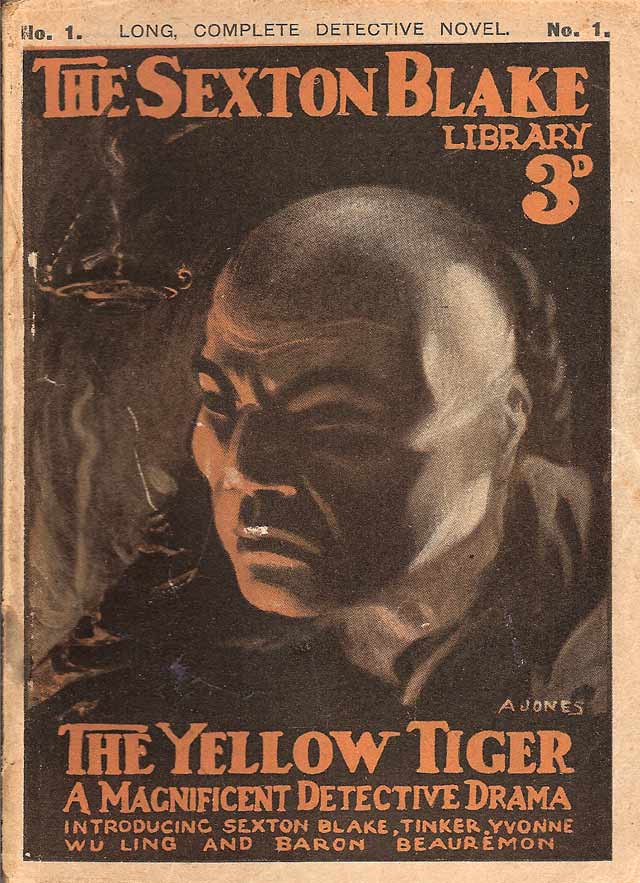
THE SEXTON BLAKE LIBRARY · 1st series · Issue 1 · Sept. 1915 · Amalgamated Press · 3d
Illustrator: Arthur Jones
Other content: The Great Cup-Tie by Anon.Other content: The Great Cup-Tie by Anon.
Notes: Prince Wu Ling, working as an agent for Germany, employs Baron Robert de Beauremon and the Council of Eleven to help him kidnap the British Munitions Minister and his friend, Sir Hector Amworth. They are snatched from a golf course in Devon and flown away in a biplane. Commissioned by the Secret Service to find the men, Sexton Blake and Tinker head to the west country; Tinker in the Grey Panther, Blake's self-designed monoplane, while the detective follows in the car. But Blake arrives first; Tinker is delayed after engine trouble forces him to make a landing on a remote island where he is shot at before taking off again only to be pursued by a biplane. Unknowingly, he has stumbled upon de Beauremon's base. He and Blake return there the next day. They find and rescue the two prisoners and discover evidence that suggests the Council of Eleven and the Brotherhood of the Yellow Beetle have joined forces. Wu Ling, in response to Blake's interference, vows to sacrifice the detective to the god Mo. When Blake tracks the oriental master criminal to an opium den, Wu Ling captures him and plans to transport him to Kaitu, his island base in China. Tinker, meanwhile, falls in with Mademoiselle Yvonne and they set off in pursuit of Wu Ling's steamship. En route to the island, Blake manages to jump ship. Caught in a raging storm in a sinking lifeboat, exposure and lack of food get the better of him and he falls into a fever. Fortunately, Tinker and Mlle. Yvonne rescue him but they are then attacked by Wu Ling's ship and taken prisoner. Blake evades capture and is picked up by a British warship which follows Wu Ling. On Kaitu, Baron de Beauremon objects to Wu Ling's plan to sacrifice Tinker and place Yvonne into his harem. He breaks off his alliance with the oriental and leads Blake and the naval men to the temple where a fierce fight ensues. Blake rescues Tinker and Yvonne but Wu Ling escapes.
Trivia: Wu Ling evidently worships the god Mo. This is a real deity; the Chinese god of martial valour.
This was anthologised in THE SEXTON BLAKE DETECTIVE LIBRARY (1989).
Rating: ★★★★★ The first ever edition of the Sexton Blake Library is a fine example of Blake at his best. This case has everything: chases by air, road and sea; edge-of-death escapades; rough-housing and shoot-outs; evil villains and a strong love interest. The detective's relationship with Mademoiselle Yvonne is intense and moving; they are obviously in love with one another but his dedication to work holds him back, adding much poignancy to the story. Another point of interest: by the 1920's 'the Grey Panther' would be established as the name of Blake's car, rather than of his monoplane.

THE SEXTON BLAKE LIBRARY · 1st series · Issue 2 · Oct. 1915 · Amalgamated Press · 3d
Illustrator: Arthur Jones
Other content: Unknown
Notes: Tinker meets a young man named Hector MacLeod whose mentor, a banker named James Phillips, has inexplicably banished him from his home. When Hector receives a plea for help from the banker's daughter, Ruth, whom he loves, he learns that her father has gone into hiding. It seems he is terrified of a man named Marle who is about to be released from gaol. Meanwhile, in Laidstone Prison, Marle dies after revealing to a fellow inmate, Professor Kew (who has been in the gaol for two years), that many years ago he took the rap for £20,000 which was swindled from Hector's now-deceased father. The money was placed in the bank but Phillips used it to pay off an equal amount which he had embezzled. Kew conspires with another prisoner, Count Ivor Carlac to obtain this money. They escape from the gaol and track down Phillips. With Carlac disguised as Marle, they insist that Phillips pays them £20,000 — plus interest. Phillips escapes their clutches and catches a merchant ship to San Francisco. He hopes to make his way to Salcoth Island off the coast of Alaska where evidence is hidden which will prove Marle was the perpetrator of the original crime rather than himself. Ruth engages Sexton Blake to find her father and he discovers that Kew and Carlac intend to sail after Phillips in the Anastor. The detective sends Hector to watch over the ship and, later, sneaks aboard himself. Both are present when the vessel leaves port, as are the two villains. When the latter men overpower Blake and heave him overboard, Hector manages to throw a lifebuoy out to the detective. After spending a day lost at sea, Blake rescued and sets off in pursuit accompanied by Tinker and Ruth Phillips. Meanwhile, in San Francisco, Hector is captured and left bound hand and foot in a flooding sewer. Carlac and Kew make their way to Salcoth Island where they find James Phillips who has yet to discover the evidence. The criminals have better luck and, after recovering the records of the original crime, they depart leaving Phillips for dead. Sexton Blake rescues Hector and saves the injured Phillips. When all the parties return to Britain the two villains try to resume their blackmailing of the banker but are defeated when Blake snatches the evidence from Kew. The criminals get away but their plot is foiled.
Trivia: This was anthologised in THE SEXTON BLAKE DETECTIVE LIBRARY (1989).
Rating: ★★★★☆
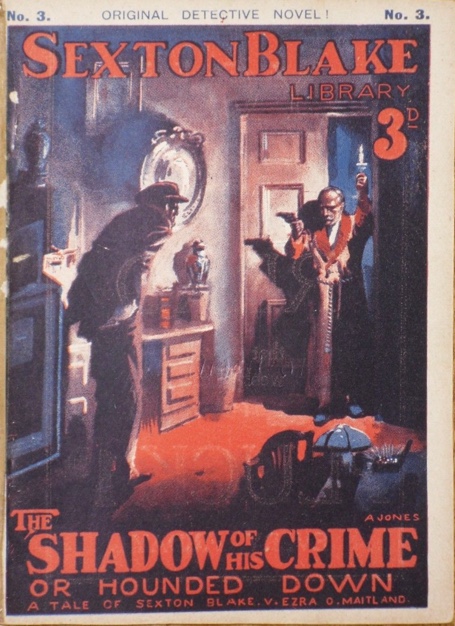
THE SEXTON BLAKE LIBRARY · 1st series · Issue 3 · Nov. 1915 · Amalgamated Press · 3d
Illustrator: Arthur Jones
Other content: Unknown
Notes: Swindler Richard Cavendish betrays his partner, Jasper Clench, and flees the country with their ill-gotten gains. Clench, arrested and imprisoned, vows revenge. Twenty years later, Ezra Q. Maitland and his wife, Broadway Kate, rob Sir Digby Cranston of his collection of precious stones. Sexton Blake and Detective-Inspector Martin attend the crime scene and quickly pick up Maitland's trail. It leads to the Royal Hotel, where their investigations are overheard by a man named Melson. A half-burned note takes Blake from the hotel to a shop owned by a fence named Israel Samuels. Entering in disguise, he finds Maitland offloading the gems and tries to capture him but the criminal flees into the street. Melson appears in a car, urges Maitland to jump in, and drives him to safety. Melson reveals his real identity — he is Jasper Clench. After being released from prison some eleven years ago, he had taken his daughter, Violet, to America where he had amassed a fortune. In the meantime, Richard Cavendish had repented, anonymously returning almost all of the swindled money to its rightful owners. Cavendish had then changed his name to John Riverton and had become a race horse owner. He is now hoping that one of his horses will win the Gold Cup, which will earn him enough money to pay the last of his debts. However, his son, Laurence, is to become the means of Melton's revenge. The ex-swindler wants Maitland to alter a cheque which will make it seem as if Riverton junior is embezzling the bank at which he's employed. This is done and Laurence is duly arrested while visiting his sweetheart, Violet, at the stables which Melson has purchased close to Cavendish's own. Sexton Blake discovers Maitland's fingerprints on the evidence and, after Sir Henry Fairfax gives him permission to interview the imprisoned Laurence, he hears the story of Cavendish and Clench and learns that a disguised Maitland is a guest at Melson's. When the criminal's servant, Wang is spotted lurking at the Riverton stables, Blake pounces but is knocked cold by Maitland and left bound and gagged to starve to death in a nearby quarry. The next day, John Riverton's horse wins the Gold Cup and he can finally pay the last of his debts. After the race, Tinker misses his Guv'nor and uses Pedro to trace him. Blake is rescued and he rushes to Riverton's place where Maitland is in the process of blackmailing the ex-swindler. Maitland is arrested and handed over to the police from whom he then escapes. Riverton and Melson — Cavendish and Clench — are reunited and forgive one another. Laurence and Violet get married.
Trivia: Blake has a friend on Villiers Street who keeps a collection of disguises handy for the detective. At Blake's Baker Street house, there are nine pictures on the wall of the Consulting Room. There are twenty stairs leading up from the hall to the landing and five from the hall down to Mrs Bardell's domain. There is also a cellar in which the detective has stored over twenty years worth of newspaper clippings. Sexton Blake claims that he was 'just a lad' twenty years ago (1895). This is plainly untrue, since he was an adult at the time of THE MISSING MILLIONAIRE which was published in 1893.
This was anthologised in THE SEXTON BLAKE DETECTIVE LIBRARY (1989).
Rating: ★★★★☆
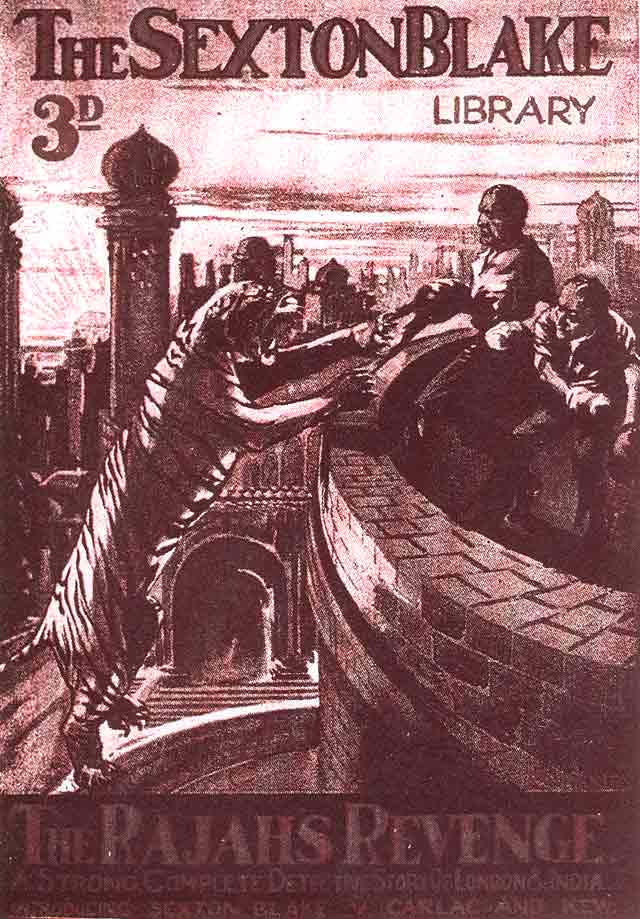
THE SEXTON BLAKE LIBRARY · 1st series · Issue 4 · Dec. 1915 · Amalgamated Press · 3d
Illustrator: Arthur Jones
Other content: Unknown
Notes: The Rajah of Puljara is donating an antique chest filled with gold to Britain's war effort. It is to be transported from India by Colonel Bryce and the Rajah expects to follow his envoy to London a week later. Bryce hires two men as bodyguards — Count Kaldross and Doctor Kay — little realising that they are, in fact, Count Ivor Carlac and Professor Kew. Upon arrival in London, the chest is placed in the Colonel's house in Downe Square. That night, chance takes Tinker to the square where he encounters Bryce's daughter and witnesses the murder of a taxi driver. The passenger, who unknown to Tinker, was Kew, had panicked at the sight of Sexton Blake's assistant. Blake starts investigating the murder and the trail leads him to an antiques shop where a facimile war chest has been recently built to order. This, in turn, leads him back to Downe Square where, together with their cohort, Flash Harry, Carlac and Kew have taken the house next door to the Colonel's. Digging through the fireplace, they steal the chest, replacing it with the forgery. While they prepare to leave the country, Blake exposes the burglary and recovers the chest from the neighbouring house. The Rajah arrives and learns of Carlac and Kew's crime. He vows revenge and sets a trap for them. They fall into it and, captured, are transported to India. Sexton Blake pieces together what happened from the clues and, despite the fact that they are his great enemies, decides to rescue the two villains. He travels to India and there establishes himself in the guise of a wise fakir near the Rajah's palace. Within, Carlac and Kew endure long days of torture as they are tormented by a starved man-killing tiger while the Rajah looks on. As they weaken, their ability to avoid the beast's claws lessens, and they realise that death is not far away. Unknown to them, neither is Sexton Blake. He concocts a clever plan by which he gains entry to the palace, poisons the tiger, and frees the two men. Their successful escape is reported to the Rajah who grudgingly admits that he admire's the detective's audacity. Finally, en route to England, Carlac and Kew flee from Blake leaving him with a note: they have taken back their vow to kill him and now consider that their relationship with him is starting from a clean slate.
Trivia: According to the author, Pedro does not live at the Baker Street house but in kennels in the East End. This issue was later adapted as a non-Blake tale (he was replaced by Nelson Lee) entitled THE BEGGAR OF KASHAPORE which appeared in THE BOYS' FRIEND LIBRARY second series issue 646 (1938).
This was anthologised in THE SEXTON BLAKE DETECTIVE LIBRARY (1989).
Rating: ★★★★★
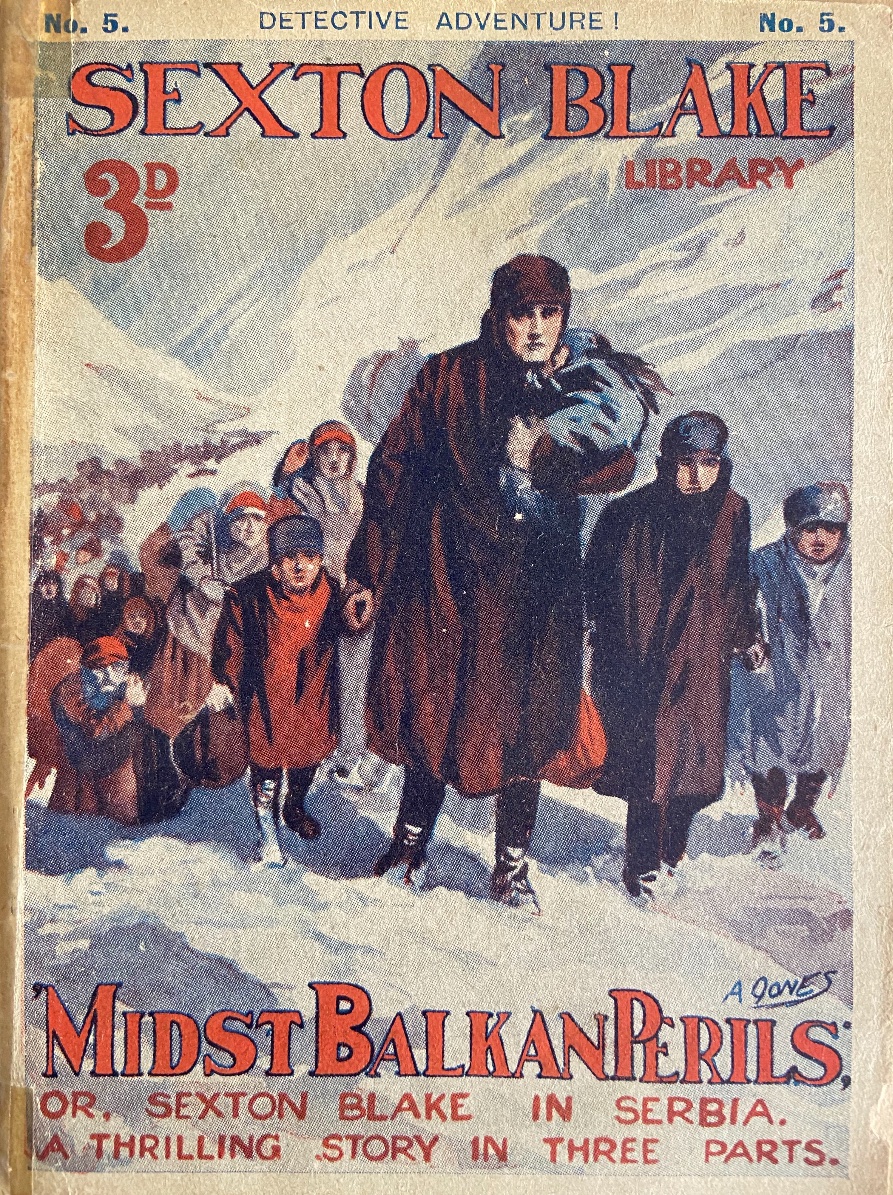
THE SEXTON BLAKE LIBRARY · 1st series · Issue 5 · Dec. 1915 · Amalgamated Press · 3d
Illustrator: Arthur Jones
Other content: The Case of the Shrivelled Fingers by Anon.
Notes: After serving a three-year sentence, Laban Creed is released from gaol. Sexton Blake correctly presumes that the crook will straightaway make for Vienna, where he had previously stolen and hidden valuable documents detailing the defences of Belgrade. The detective attempts to stop him but finds himself trapped in a burning house. He is rescued by Creed’s daughter, Torfrida, who now calls herself Princess Florizel. Blake and Tinker pursue Creed to Vienna and engage in a sequence of tussles with him but, in the end, he slips away. Six months pass, during which the Great War erupts. One day, Blake is astounded to find Creed in his consulting room. The crook reveals that his daughter has fallen into the hands of Baron Rudulf Von Furstenberg, a man of unsavoury reputation. He asks Blake to rescue her, and offers the documents as a reward. The detective reluctantly agrees. He and Tinker set off through war torn Europe. In Vienna, they save Torfrida and make a perilous escape, travelling along the Danube. For a week, they drift southward through enemy territory. After many close shaves, they pass through the Carpathians, but a storm causes the river to flood and Blake is swept away. His companions are captured by Austrian soldiers. By amazing coincidence, the detective encounters Von Furstenberg, leaves him bound and gagged, and adopts his identity. By equally good fortune, he then stumbles across the soldiers holding Tinker and Torfrida captive. He liberates his friends, and they continue on to Belgrade, which is being bombarded by artillery. Blake meets with Creed but circumstances occur that convince the crook that he has been betrayed. Under cover of the continuous bombing, he flees the city with Torfrida. Blake and Tinker also escape, mere hours before Belgrade falls. Having lost track of Creed amid the chaos, they return to London. Much time passes. Then, in November of 1915, they return to the Balkans to seek a missing nurse, and by chance find themselves again on the crook's trail. Joining a huge throng of Serbian refugees, they head toward Monastir, the only safe city for miles around. Tinker runs into Creed and is captured, bound to a tree, and left for the wolves. Torfrida comes to his rescue but refuses to remain with him. After a run-in with Bulgarian soldiers, Blake and Tinker reach Monastir. There, they locate the missing nurse, and also Creed, who they find in a high fever. He hands over the stolen documents. Blake allows him to go free. Torfrida is given the choice to remain with her father or start a new, honest life without him. She chooses to stay.
Trivia: This story makes it plain that Laban Creed can match, or even outmatch, Sexton Blake in strength.
The case spans well over a year in duration and is completed just a month (at most) before its publication.
In the official records at Amalgamated Press, this story was attributed to Edwy Searles Brooks. The reason for this is unclear — the tale is plainly by W. M. Graydon.
Rating:★★☆☆☆ As he so often does, the author employs coincidence as a plot device, and stretches it beyond the bounds of credulity. His descriptions of war-torn Europe are evocative but, as a whole, the story is sprawling and rather flat.


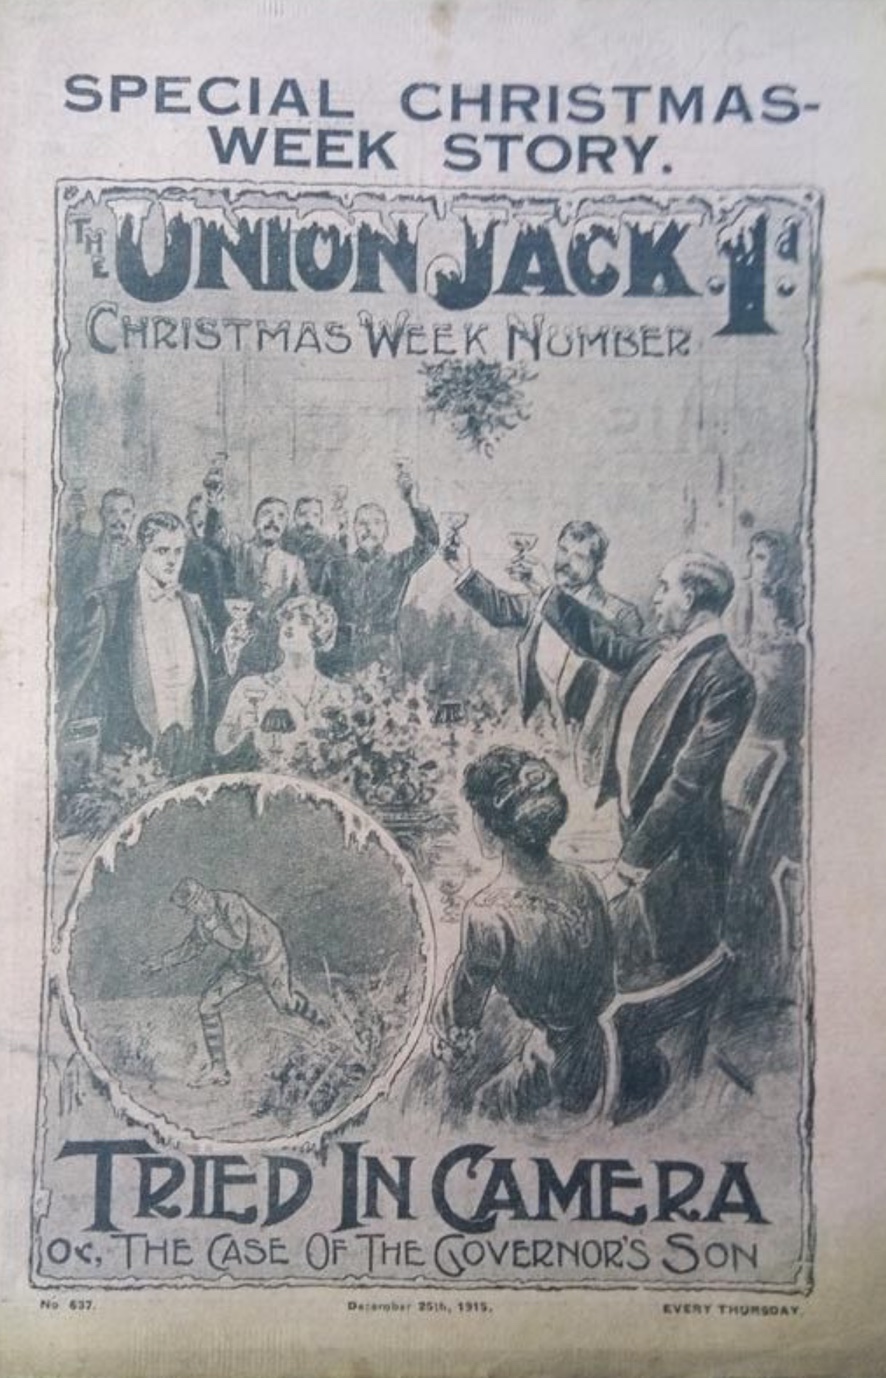
UNION JACK · New series · Issue 587 · 9/1/1915 · Amalgamated Press · 1d
Illustrator: Unknown (The signature looks like Eric Parker but the style is different and surely this is too early?)
Other content: None
Notes: Story features George Marsden Plummer.
Unrated
UNION JACK · New series · Issue 589 · 23/1/1915 · Amalgamated Press · 1d
Illustrator: Harry Lane
Other content: A Word from the Skipper (ed.)
Notes: With war raging in Europe, Blake and Tinker are being kept busy hunting unregistered aliens, many of whom are spies. One day, in London, they encounter a naval lieutenant who is on his way to deliver to the Admiralty an important despatch from the commander of the fleet. However, the man is weak from injuries suffered during his previous tour of duty, and when he nearly collapses, he agrees to let Tinker carry the message in his stead. This, however, is witnessed by a German spy who a few minutes later steals the document from Tinker. The lad is distraught and imagines Blake's disappointment with him. When he meets a friend, Jack Rokeby, who has joined up but can't go because his wife has been taken seriously ill, Tinker impulsively takes his place, leaving a brief letter for Blake. Some days later, the detective is occupied at a recruitment post, where he's watching for enemy agents, when Rokeby, whose wife has by now died, tries to join up under an assumed name. Blake quickly gets to the bottom of it and realises where his assistant has gone. The following day, the detective is commissioned to locate a soldier, Colonel Chumleigh, at the Front, and have him sign a will. Tinker, meanwhile, is in a truck that's been separated from a convoy, has drifted close to the enemy lines, and is almost hit by a shell. His companions are killed with the exception of his commander, Lieutenant Drake. They flee into nearby woods and make their way to a cottage where they shelter with a French peasant. The next morning, they steal a motor-omnibus packed with German supplies and drive it back to the British lines. Sexton Blake arrives at the Front just as heavy fighting commences. He is caught by a bullet, which passes through his silver cigarette case and lodges between his ribs. He recovers consciousness in a field-hospital with Tinker at his bedside. When the detective explains his mission, his assistant tells him that Colonel Chumleigh is missing and presumed to have been taken a prisoner. While Blake remains in hospital, Tinker joins with Drake, who has been ordered to fly a reconnaissance mission. Their plane is shot down and crash lands behind enemy lines. They evade cavalry troops, board a train carrying supplies to the German Army, set fire to it, then jump clear, leaving it to crash into a troop-carrying train, causing much loss of life. Later, they find an abandoned chateau and settle down for the night. In the morning, German troops arrive with prisoners — all French but one, who happens to be Colonel Chumleigh. When the company sets out to search the region for the two fugitives, leaving only a couple of guards, Tinker and Drake manage to overpower them. The French captives are set free. The three Britishers appropriate a car and race away with cavalrymen in pursuit. Chumleigh takes a bullet to the shoulder just as they reach a river and escape in a boat. They make their way back to British troops. The colonel is left with a medical unit while Tinker travels twenty miles to be reunited with Blake. He then drives the detective back to Chumleigh only to find that the colonel is now on a hospital train heading north. They speed off to intercept the train but are captured by Germans who have planted a bomb on the track. Blake and Tinker break loose and save the train. Chumleigh signs the will. Tinker's real identity is exposed but, due to his heroics, he's permitted to return to Baker Street without being charged for his deception.
Trivia: "It's funny how one gets used to killing men, isn't it?" — Tinker.
This story very ably illustrates how WW1 was a deadly mixture of outmoded warfare conventions and new, powerful armaments. The notion of horse-mounted troops holding lances and fluttering pennons being mown down by artillery shells and machine guns is shocking but, at least during the first year of the conflict, is exactly what happened.
This was anthologised in SEXTON BLAKE AND THE GREAT WAR (2020) with slight edits for racially insensitive language.
Rating: ★★★★★
UNION JACK · New series · Issue 591 · 6/2/1915 · Amalgamated Press · 1d
Illustrator: Val Reading
Other content: The 21st F. A. Review (article); A Word from the Skipper (ed.)
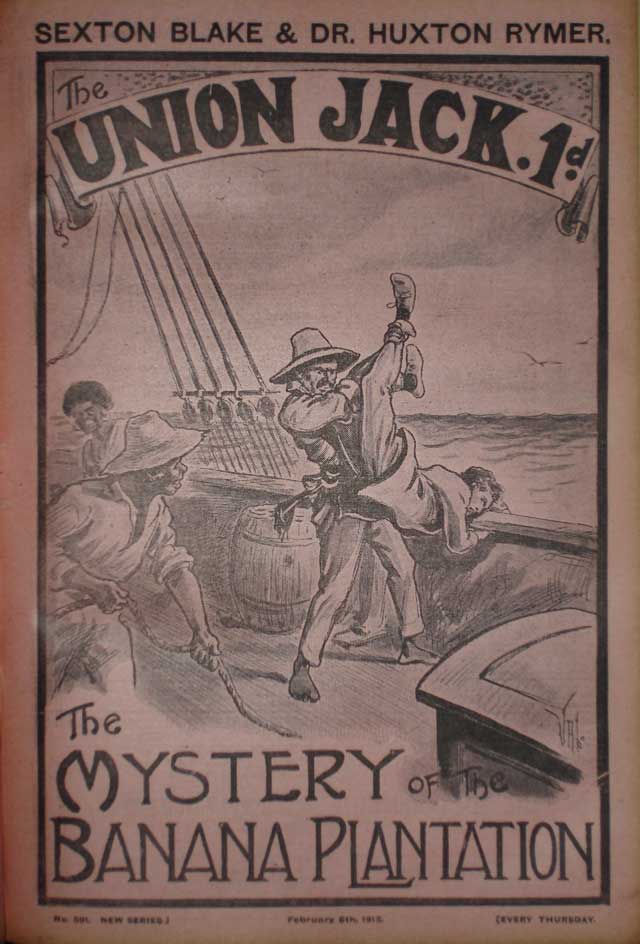
Notes: Financier Jacob Thornhill catches a bedraggled and down-on-his-luck Dr Huxton Rymer breaking into his safe. Rather than turning him over to the police, Thornhill commissions Rymer to do a job for him in Costa Rica. In that country, some weeks later, Britisher David Grieg arrives to take possession of a banana plantation he has purchased on Negrito Island — but finds that a Spaniard named Sancho has already claimed it. Sailing to the island, Grieg meets with Sancho and learns that the Spaniard bought the island a month ago from its owners, Thornhill and Meyer. Grieg, though, purchased it six weeks ago from a man named Gilbert, who had been an agent for Thornhill and Meyer. Sancho claims that Gilbert is a crook and has swindled Grieg but invites the Britisher to stay on the island for the night. During the hours of darkness, Grieg is awakened when a deadly snake is thrown onto his bed from the window. He survives, little suspecting that Sancho had arranged the attack. The next morning he leaves the island but, en route to Costa Rica, is thrown overboard. He is picked up by a ship bound for Bristol and, from there, makes his way to Baker Street. Sexton Blake, taking up the case, disguises himself as Grieg and visits Thornhill and Meyer. He is informed by Jacob Thornhill that Gilbert is considered a criminal and had no right to sell the plantation. However, Blake catches sight of Gilbert in the building. Back at Baker Street, he instructs Grieg to return to the Carribean, not knowing that Thornhill wants this and has sent Gilbert there to team up with Sancho in order to kill the young Britisher. All parties gather at Negrito Island — Blake and Tinker disguised as natives, and here the detective learns that his opponent, Sancho, is none other than Dr Huxton Rymer. During the night, Blake creeps into Rymer's house and steals papers which prove his and Gilbert's guilt. However, the black foreman of the plantation, intent on thievery, also sneaks into the house and, when Blake runs for it, gives chase. The two engage in a terrific fight which the detective eventually wins only to find that the noise has attracted Rymer and Gilbert and he must now face them. He manages to knock Rymer unconscious after a fairly fought boxing match but is then, in turn, sent into oblivion when Gilbert, in an unsportsmanlike move, strikes him with the butt of a pistol. Tinker and Grieg arrive in time to overpower Gilbert while Blake recovers and Rymer escapes. Gilbert makes a full confession. Thornhill finds himself facing criminal charges and Grieg finally gets his island.
Trivia: This was rewritten for DETECTIVE WEEKLY issue 346 as THE CASE OF THE BLAZING ISLAND (1939).
Rating: ★★★★★
UNION JACK · New series · Issue 592 · 13/2/1915 · Amalgamated Press · 1d
Illustrator: H. L. Shindler
Other content: A Word from the Skipper (ed.)
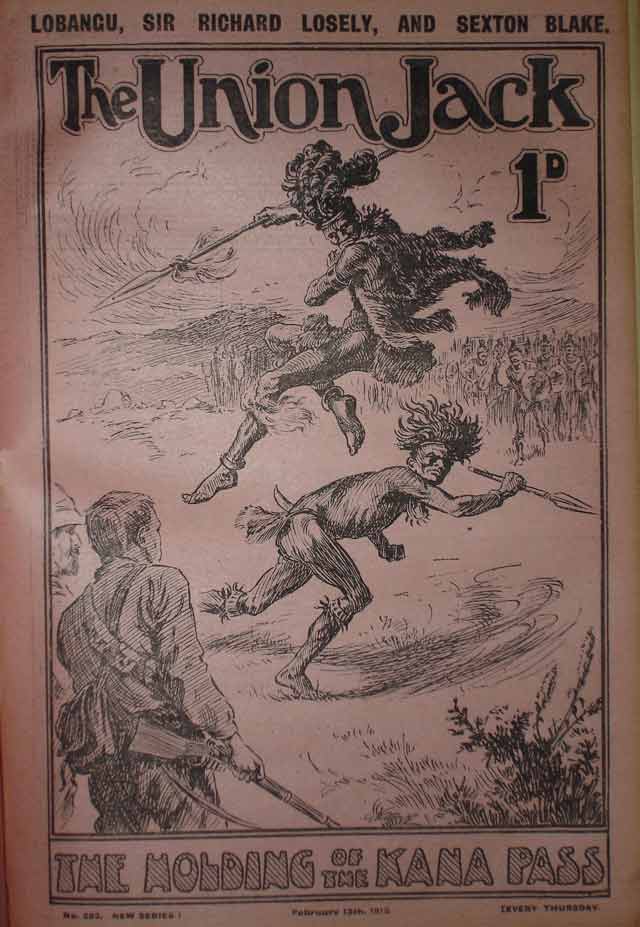
Notes: Sexton Blake and Tinker are in Africa with Sir Richard Losely and Lobangu when word reaches them that war has been declared in Europe. They receive a message asking them to gather an army of natives and hold the Kana Pass in south western Africa — on the edge of the Kalahari desert — against the Germans until British troops arrive. Lobangu scouts ahead and finds a German outpost. He also discovers that the Sangani tribe has sided with the enemy. Lobangu suggests that they attack the fort and empty it of its large stockpile of guns. These should be taken to the Mokala tribe — enemies of the Sangani — who should be called upon to help Blake and Co. defend the pass. The plan is agreed and the raid goes ahead successfully. Among the captured Germans is Von Bernstein, who seems an honourable man and who concedes defeat after he is beaten in a duel with Sexton Blake. Lobangu also fights and wins a duel, in this case against a warrior of the Mokala, thus gaining that tribe's respect. The Englishmen and the Zulu train the Mokala in the use of modern firearms and plan a strategy whereby the pass can be defended. When Sexton Blake returns to the fort to check on enemy movements, he is captured but manages to escape and flees back to the Kana Pass with German regiments and Sangali warriors in hot pursuit. The battle is joined and the allied forces manage to hold the Germans at bay despite being pummelled by shrapnel bombs. When they are on the verge of being beaten by the overwhelming odds, the British arrive and the enemy is defeated.
Rating: ★★★★★
UNION JACK · New series · Issue 593 · 20/2/1915 · Amalgamated Press · 1d
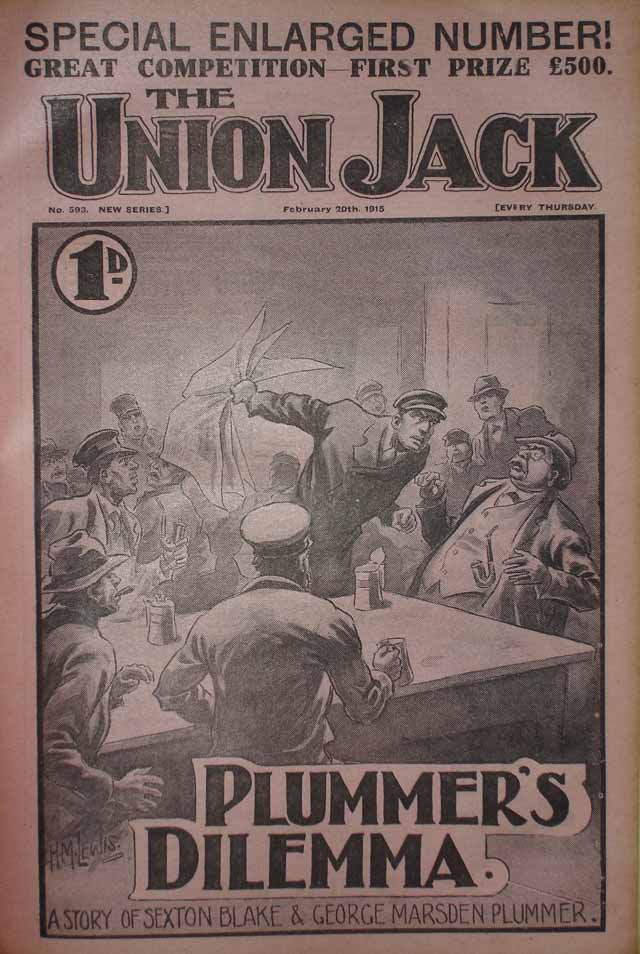
Illustrator: H. M. Lewis
Other content: A Word from the Skipper (ed.)
Notes: Auther J. W. Bobin takes over the Plummer character from Lewis Jackson. Story features George Marsden Plummer.
Unrated
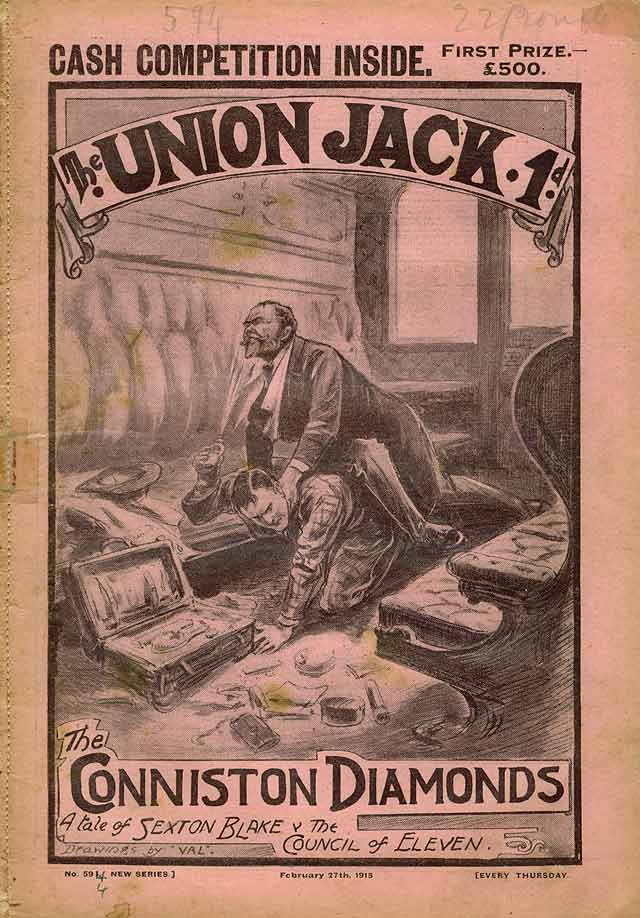
UNION JACK · New series · Issue 594 · 27/2/1915 · Amalgamated Press · 1d
Illustrator: Val Reading
Other content: A Word from the Skipper (ed.); The Bogus Policeman (featuring Detective Spearing) by Anon.
Notes: To celebrate the coming of age of his eldest son — who is away fighting on the Front — Lord Conniston is planning a lavish party at the family estate in Devon. On the occasion, the Conniston diamonds — a priceless necklace — will be worn by Lady Conniston. What the family don't know is that The Council of Eleven intend to use the occasion to steal the jewels. Sexton Blake is among the invited but, during his journey to Devon, he is inexplicably attacked by a stranger on the train. The man escapes. Shrugging it off as the act of a lunatic, the detective arrives at Conniston Hall and meets his fellow guests who are helping to prepare the banquet. Among them is a Mr Gordon who is wheelchair-bound. There is also a beautiful young woman named Miss Farquhar, who seems strangely familiar to Blake. Later, while strolling in the woods, the detective is nearly hit by a bullet fired from a rifle. Once again, his mystery assailant gets away. That night, the banquet is held and during its course the lights go out and the diamond necklace is stolen. While investigating, another shot narrowly misses Blake. The rifleman flees but leaves behind a knife which was taken from the room in which Gordon is staying. This raises Blake's suspicions and he suddenly pierces the disguises and realises that Gordon is Duke Paul Servitch and Miss Farquhar is Madame Rénée Montara of the Council of Eleven. He sends for Tinker and Pedro but his cablegram is intercepted and his assistant is captured en route. Pedro escapes and, later that night, finds Blake and leads him to the house where the boy is being held captive. There, Blake engages in a terrific fight with Baron Robert de Beauremon. The detective triumphs and takes the Baron and other members of the Council prisoner. He rescues Tinker and recovers the diamonds but, at the last moment, all the Council members escape thanks to a bungling police officer.
Trivia: Blake uses his pseudonym of John Carter. This tale was reprinted in DETECTIVE WEEKLY issue 365 as THE CASE OF THE CONISTON DIAMONDS (1940).
Rating: ★★★★☆

UNION JACK · New series · Issue 596 · 13/3/1915 · Amalgamated Press · 1d
Illustrator: H. M. Lewis
Other content: A Word from the Skipper (ed.); The Bogus Policeman (featuring Detective Spearing) by Anon.
Notes: A Japanese inventor named Soto has developed a light ray — the H-ray — through which airplanes can be guided remotely. The ray also causes blindness when directed at a person. When his co-inventor, Colonel Temple, is found dead and the blueprints are stolen, Soto calls in Sexton Blake. The investigator discovers that death was caused by a fine poisonous dust placed in the telephone receiver. He also discovers that Temple had frequently visited a woman named Madam Tressidar at a nearby hotel. When Blake goes there, he finds that the woman has been killed. He also discovers that she had travelled extensively in China and that she had rented her house, near the Colonel's, to some Chinamen. Tinker and Soto are both captured and taken to this house — its tenants being Wu Ling and The Brotherhood of the Yellow Beetle. The prisoners are tightly bound and left in a room where wireless equipment has been set up. They manage to get free long enough to transmit a message to Sexton Blake before being recaptured. Meanwhile, at Baker Street, an intruder places poison dust in Blake's telephone but is caught in the act and made a captive. The detective receives the radio message from Tinker and Soto, so leaves the Chinese prisoner guarded by Pedro while he rushes off on a rescue mission. With policemen led by Inspector Thomas, he raids the house, rescues the prisoners and retrieves the H-ray blueprints.
Trivia: The author accurately predicts laser technology in this story. The layout of part of the Baker Street house is revealed when Blake passes 'down the corridor running from the laboratory past Tinker's room to the consulting room.' Also, Blake's dressing room is said to adjoin the consulting room.
Rating: ★★☆☆☆ A disappointing tale which seems rather too dry and lacking in thrills.

UNION JACK · New series · Issue 597 · 20/3/1915 · Amalgamated Press · 1d
Illustrator: E.A.S.(?)
Other content: A Word from the Skipper (ed.); The Bogus Policeman (featuring Detective Spearing) by Anon.
Notes: Story features Mlle. Yvonne Cartier.
Unrated

UNION JACK · New series · Issue 599 · 3/4/1915 · Amalgamated Press · 1d
Illustrator: Val Reading
Other content: A Word from the Skipper (ed.); The Bogus Policeman (featuring Detective Spearing) by Anon.
Notes: Double Easter issue. Upon his marriage, Sir Henry Phildrake receives a gift of precious rubies from an Indian Rajah whose life he once saved. These gems are delivered by a courier named Intrab Ahj but while in London he is taken prisoner by the Council of Eleven and placed on a ship bound for the South Seas. A new member of the Council — Gunda Mingh — then impersonates the courier in order to gain access to the jewels. The following day, Sexton Blake and Detective-inspector Thomas of Scotland Yard are called to the Phildrake estate to investigate the mysterious theft. The jewels have vanished from a sealed room. While Blake is making his initial examinations, Intrab Ahj escapes from the ship and returns to the Venetia Hotel in London where he is murdered by Gunda Mingh, who takes the rubies and flees, intending to betray the Eleven and keep the treasure for himself. However, Baron Robert de Beauremon realises what has happened, has Mingh killed, and takes the gems. Sexton Blake finds evidence of the Eleven's involvement and traces them to a house where he is, unfortunately, captured. Taken to the coast of Cornwall, the detective is bound and placed in a booby-trapped plane. It is sent flying out over the sea with a time-bomb in it's tail. Blake manages to wrest control of it long enough to lower its altitude but when the bomb detonates he is thrown out and plummets into the waves. Fortunately, Tinker is on hand to race to the rescue. The Council members flee with the rubies in their possession. Blake's only triumph is that he manages to work out how the gemstones were stolen in the first place.
Trivia: By the time of this story, Herr Schmidt has left the Council of Eleven to join the German army. The Venetia Hotel has featured in the Blake saga before, most notably in THE CASE OF THE POISONED TELEPHONES (UNION JACK issue 596, 1915), which is mentioned in this story.
Rating: ★★★★★
UNION JACK · New series · Issue 600 · 10/4/1915 · Amalgamated Press · 1d
Illustrator: Arthur Jones
Other content: A Word from the Skipper (ed.); The Bogus Policeman (featuring Detective Spearing) by Anon.
Notes: While in Rome, Sexton Blake is approached by the Chancellor and asked to keep an eye on an agent, Guiseppe Gianelli, who is about to deliver top secret documents pertaining to London. An enemy spy named Carl Brunburg is expected to make a play for the documents and the Chancellor wants Blake to ensure that he doesn't succeed. In disguise, the detective traces Gianelli to a cafe where he finds him enjoying the company of Broadway Kate. Also in the cafe and watching this pair are Brunburg and his companion, Ezra Q. Maitland. The American couple are aiding the spy in his attempt to snatch the papers. After the various parties have departed, Maitland's Chinese servant, Wang spots Sexton Blake and sends a trained ape to kill him. The animal stabs the sleeping Blake in the chest but is shot dead by the seriously wounded detective. Bedridden, the injured man gives Tinker the job of following the spies. The lad trails them across Europe to Britain. During the journey, Broadway Kate works her magic on Gianelli and asks him to betray his country in return for £10,000; money they can use to marry and set up life together in a distant country. The Italian agent agrees and sells her the documents. However, he has seen through her game and the papers he hands over are forgeries. Tinker follows Kate as she meets with Maitland and Brunburg and witnesses their discovery of Gianelli's trick. They catch him spying upon them and take him captive. Sexton Blake arrives from Italy and is met by Inspector Martin. In Dover, they discover the dead body of Gianelli; the documents entrusted to him have been stolen, as has the money Kate gave him. A complication causes the finger of suspicion to be pointed at an innocent man but Blake cuts through the fog to reveal the truth that Brunburg was the killer. Realising that Tinker is missing, Blake uses evidence from the crime scene to put Pedro on the scent and arrives at the house where his assistant is held prisoner. The detective organises a police raid during which Ezra Q. Maitland is captured. As a spy, he will face the firing squad. The documents are recovered but Burnburg takes a suicide pill while Broadway Kate and Wang escape.
Trivia: A nice quote from this story:
“My name is Sexton Blake,” the detective said quietly, looking up from the contemplation of his weed. “You may have heard of me?”
Inspector Appleby started, then recovered himself and looked supercilious.
“I have heard of you,” he admitted loftily. “You are a private investigator, I believe?”
“I must plead guilty to the charge,” Sexton Blake murmured. “I sometimes do a little detective work when the police are kind enough to allow it.”
Rating: ★★★★★
UNION JACK · New series · Issue 601 · 17/4/1915 · Amalgamated Press · 1d
Illustrator: Leonard Shields
Other content: A Word from the Skipper (ed.); The Bogus Policeman (featuring Detective Spearing) by Anon.
Notes: None at present.
Unrated

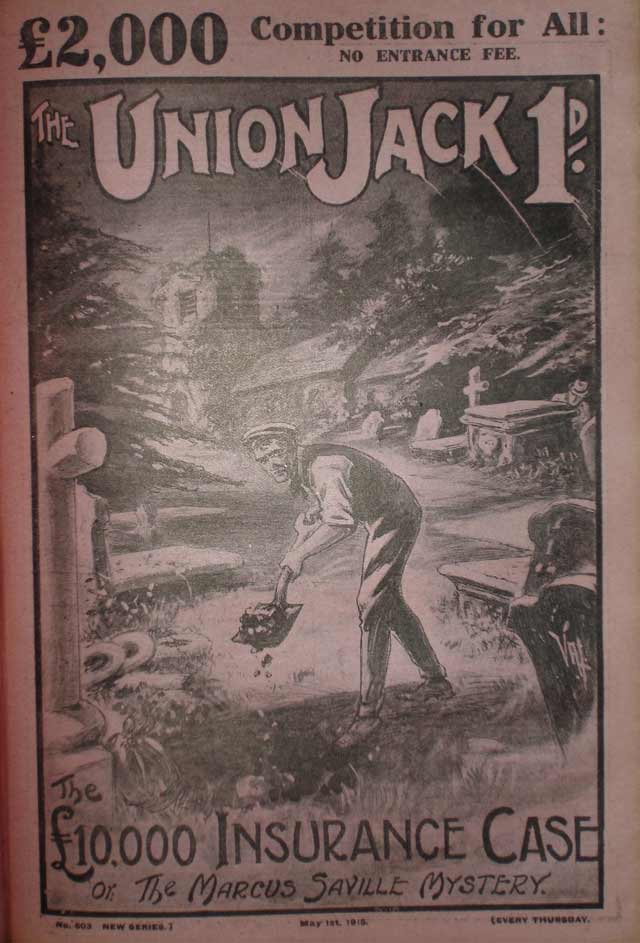
UNION JACK · New series · Issue 603 · 1/5/1915 · Amalgamated Press · 1d
Illustrator: Val Reading
Other content: A Word from the Skipper (ed.); The Bogus Policeman (featuring Detective Spearing) by Anon.
Notes: None at present.
Unrated
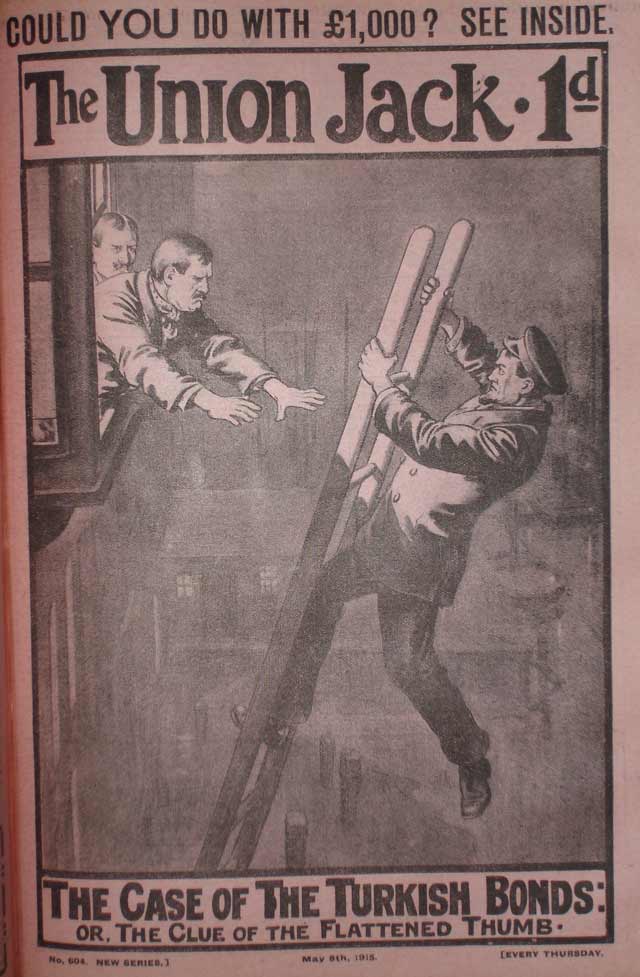
UNION JACK · New series · Issue 605 · 15/5/1915 · Amalgamated Press · 1d
Illustrator: W. Tayler
Other content: A Word from the Skipper (ed.); The Bogus Policeman (featuring Detective Spearing) by Anon.
Notes: Sexton Blake is temporarily living in an isolated studio in Chelsea to draw three men intent on his assassination away from Baker Street. When his neighbour, Richard Gale, learns that his uncle, Sir Everard Trent, has been murdered, the two men travel to Cadgestone Abbey to investigate. There, James, the servant, describes how he found Trent dead with his head battered to a pulp. That night, Blake quietly explores the abbey. In the library, where the murder had been committed, he discovers an un-posted — and steamed open — letter to Gale in which the young engineer is urged to visit and view "some plans." In the darkness, an unseen intruder attacks Blake before making a getaway. The next morning, the detective realises that blank pages in the letter are covered in invisible ink. These reveal that a treasure retrieved from a Spanish galleon is hidden somewhere in the abbey, the key to its location being described in a cipher contained in two books. One of these, Trent apparently found and decoded. The other is missing. While out in the grounds, Blake is shot at from the cover of a thicket. He decides it's time to call for reinforcements, so summons Tinker and Sir Richard Losely. Volume one containing the cipher is found and the code detected. When Blake is again attacked in the library by the still unidentified assailant, a bookshelf is ripped from the wall during the struggle and the detective realises that the second book may be behind one of the others. In the end, though, having dismantled the library, volume two is found in a desk's secret drawer. Tinker and Losely arrive and Blake sends James to fetch supplies from his Chelsea lodgings and warns him to be on the lookout for the three assassins who may be watching the place. The detective and his companions then decode the cipher and find a secret room but are unable to gain access to it. As the day ends, they booby-trap the library with trip wires and lie in wait. Four men invade the chamber and a pitched gun battle erupts. Blake & Co. triumph, thanks to the traps, and the attackers are revealed to be the three assassins who had been tipped off about Blake's whereabouts by ... James, the murderer of Sir Everard Trent! The villainous servant commits suicide and Blake ends the case by solving the problem of the secret room and locating the treasure.
Rating: ★★★★☆ An excellent tale let down only by the fact that the villain's identity is obvious from the outset.
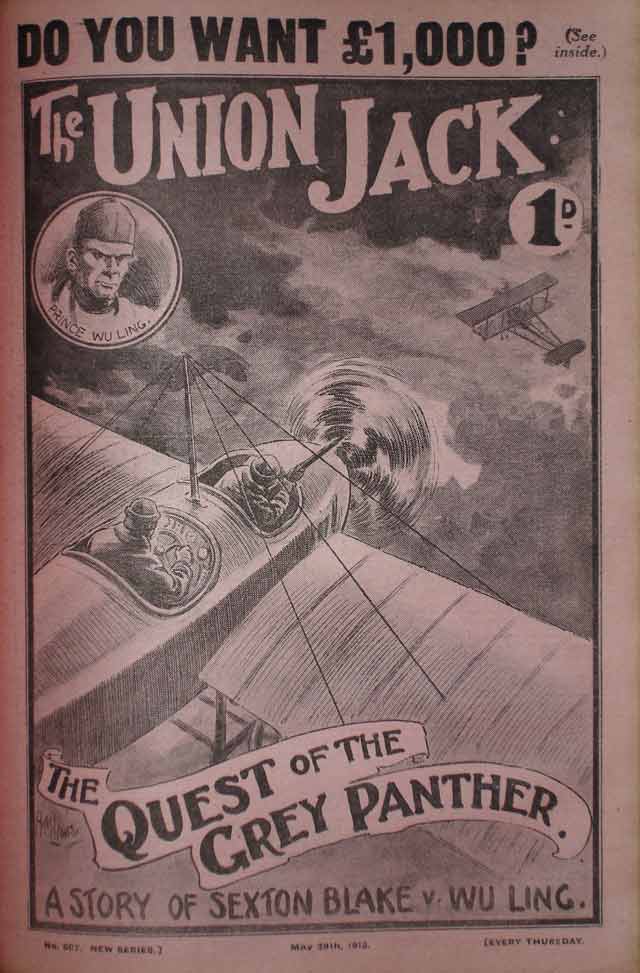
UNION JACK · New series · Issue 607 · 29/5/1915 · Amalgamated Press · 1d
Illustrator: H. M. Lewis
Other content: A Word from the Skipper (ed.); The Bogus Policeman (featuring Detective Spearing) by Anon.
Notes: Sexton Blake and Tinker are flying in the Grey Panther, looking out for enemy submarines, when they spot a biplane which, as they draw close, attacks them. They force it down in a terrible storm which conceals its landing place, though they later find out that it descended onto a large estate in Essex owned by a Spaniard named Guitterrez. Later, they return to the estate by night and observe suspicious activity. Almost caught by guards, they manage to escape after a fight during which Blake recognises one of his assailants as San of The Brotherhood of the Yellow Beetle. Back in London, the head of the Secret Service ('Sir John') informs the detective that a German of immense importance is believed to be in the country. Clues lead Blake to believe that this mysterious visitor might be hidden at Grindley Hall on the Guitterrez estate. Meanwhile, Tinker explores that locale and discovers a secret passage opening into the hollow trunk of an oak tree. Following this, he comes upon a chamber in which sits, to Tinker's astonishment, Wilhelm, Crown Prince of Germany. He watches as Guitterrez arrives with a guest: Wu Ling. Wilhelm offers the Chinaman a deal; if Wu Ling causes an uprising in the Far East it will split the British forces, allowing Germany to win the war. In return, Germany will support Wu Ling as he claims leadership of the Orient. Wu Ling accepts the offer and Tinker retreats to return to Baker Street with his report. Sexton Blake and his assistant try to leave the house to warn the Secret Service of the plan but find themselves besieged by Wu Ling's agents. The detective fetches pickaxes from the cellar and knocks through the wall to the neighbouring house, escaping, in disguise, through its front door. Gathering men from Scotland Yard, he organises a raid on Grindley Hall. Guitterrez is captured and proof of the plot is recovered but Prince Wilhelm and Wu Ling flee in the biplane. With the evidence in hand, the British government is able to warn the Chinese authorities of Wu Ling's intentions.
Trivia: Mrs Bardell's first name is given as Amelia (usually it's 'Martha', though sometimes 'Maria').
Rating: ★★★★☆
UNION JACK · New series · Issue 609 · 12/6/1915 · Amalgamated Press · 1d
Illustrator: H. M. Lewis
Other content: A Word from the Skipper (ed.); The Bogus Policeman (featuring Detective Spearing) by Anon.
Notes: Story features George Marsden Plummer.
Unrated
UNION JACK · New series · Issue 610 · 19/6/1915 · Amalgamated Press · 1d
Illustrator: Arthur Jones
Other content: A Word from the Skipper; The Bogus Policeman (featuring Detective Spearing) by Anon.
Notes: None at present.
Unrated
UNION JACK · New series · Issue 611 · 26/6/1915 · Amalgamated Press · 1d
Illustrator: D. Vine
Other content: A Word from the Skipper; The Bogus Policeman (featuring Detective Spearing) by Anon.
Notes: None at present.
Unrated
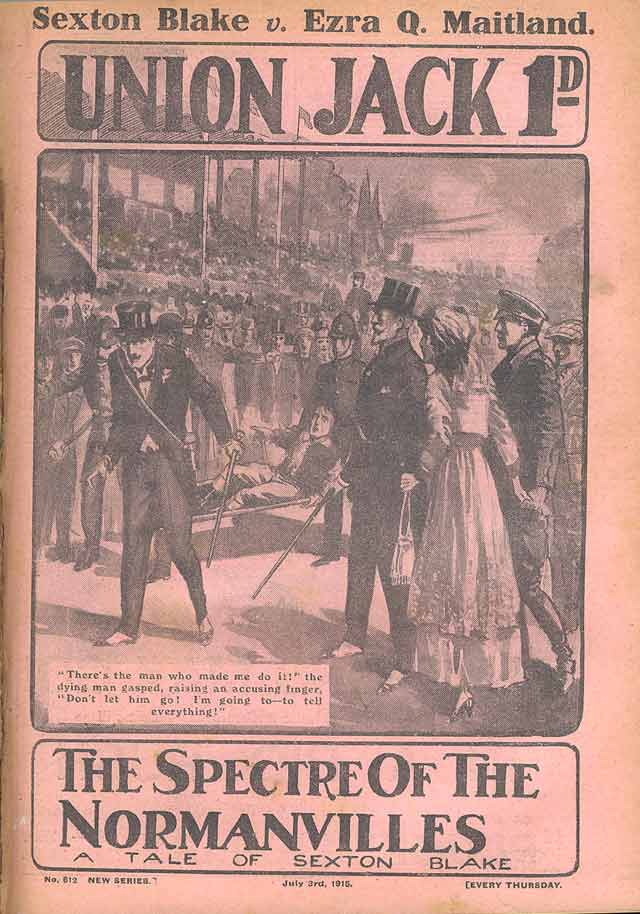
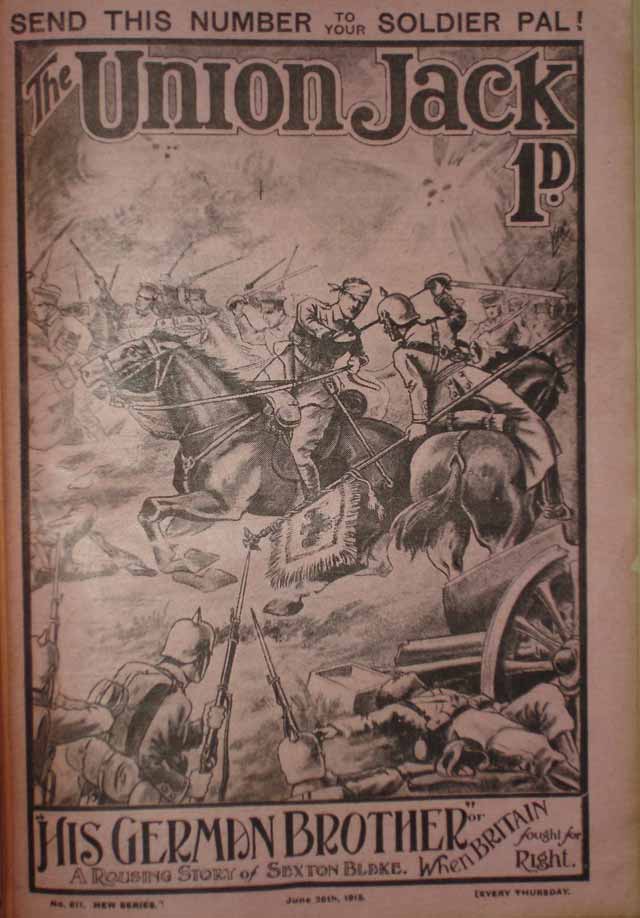
UNION JACK · New series · Issue 612 · 3/7/1915 · Amalgamated Press · 1d
Illustrator: Arthur Jones
Other content: The Bogus Policeman (featuring Detective Spearing) by Anon.
Notes: This story occurs the day after the end of THE CASE OF THE AGENT FROM AUSTRIA (UNION JACK 600). Fenwick Sterling blackmails a jockey into cheating at a race meeting but the jockey is mortally wounded and makes a death bed confession. Disgraced, Sterling is disowned by his uncle, Sir Gregory Normanville. The villain vows revenge not just on Sir Gregory but also on his cousin, Maurice Normanville, who has won the hand of the girl Sterling desires. Meanwhile, an air-raid by a Taube monoplane destroys the wall of a police cell in Dover, allowing Ezra Q. Maitland to escape. Sexton Blake is called and immediately drives to the port with Tinker and Detective-Inspector Martin. They put Pedro on the scent but the criminal manages to evade them by the skin of his teeth and, by sheer  good fortune, finds himself in Normanville Manor where he stumbles upon a secret passage in which Sterling is hiding. The two men are old acquaintances and together plot Sir Gregory's downfall. Two weeks later, Blake hears that Sir Gregory has died of fright having apparently seen the Normanville ghost which is said to appear to members of the family shortly before their demise. The detective becomes convinced that there is a secret passage somewhere in the house and is given, by Maurice Normanville, a 'ritual' which is thought to hold the key to the secret. Unfortunately, a case for the War Office interrupts Blake's investigation and three weeks pass. When he eventually resumes his attempt to decipher the ritual he is visited by Maurice Normanville who claims to have been haunted by the ghost while sleeping in his father's old room. Blake dons a disguise and accompanies the young man back to the manor where Maitland holds sway in the guise of a new butler. A cunning trap laid by the detective exposes Sterling as the ghost and the villain dies while attempting to flee. Maitland has more luck and makes a successful escape.
Rating: ★★★★★
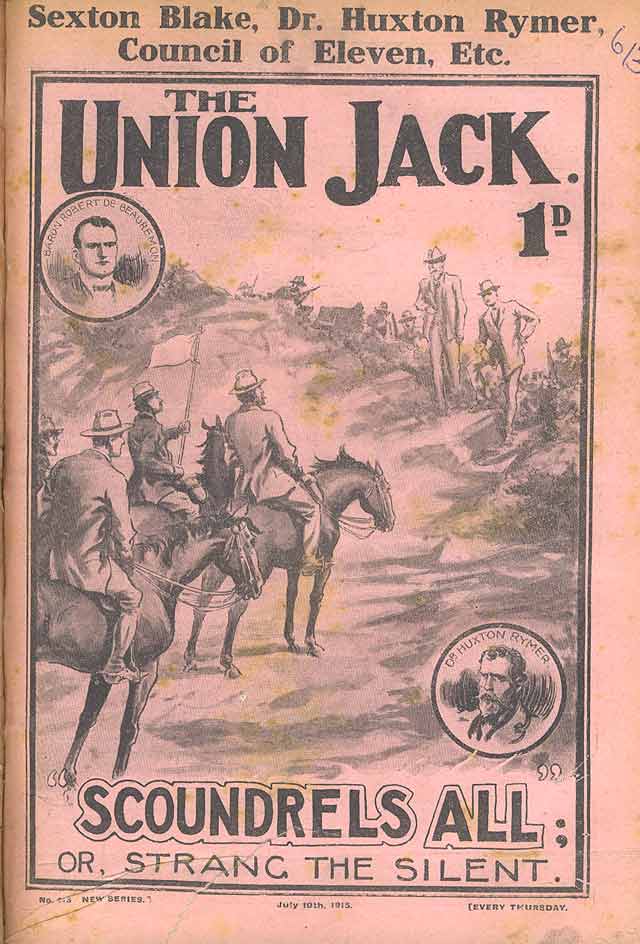
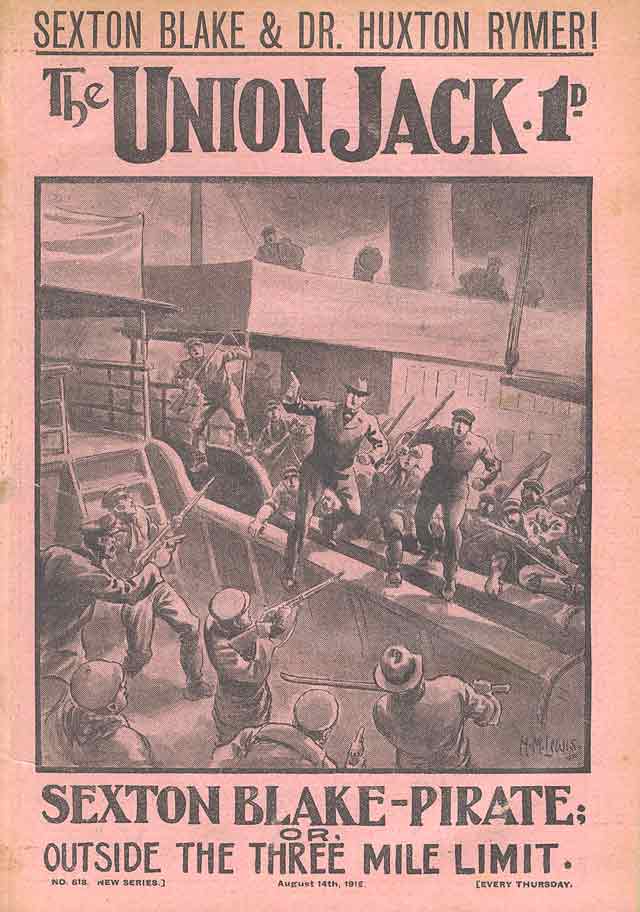
UNION JACK · New series · Issue 613 · 10/7/1915 · Amalgamated Press · 1d
Illustrator: H. M. Lewis
Other content: The Bogus Policeman (featuring Detective Spearing) by Anon.; A Word from the Skipper (ed.)
Notes: An unscrupulous financier employs Baron de Beauremon, of the Council of Eleven, to secure concessions from the troubled South American state of Costa Blanca. The main rival in this endeavour is Dr. Huxton Rymer, who is acting independently. Meanwhile, John Strang — aka Strang the Silent — commissions Sexton Blake to protect his business interests in the revolution-torn country. Blake teams up with New York police officer Captain Kelly to raid a vessel that Beauremon has chartered to illegally ship armaments to Costa Blanca. Unfortunately it manages to get away with Tinker as a prisoner. However, when it reaches the South American coast and unloads its cargo, Tinker sets fire to it and escapes. From hiding, he witnesses Beauremon and Rymer meeting and forming an alliance. The next morning, Blake arrives at the country's main town, Puerto Blanco, in Strang's yacht and Tinker reports to him. The detective allies himself to the country's ousted president and asks him to gather those loyal to him. With this small army, he takes control of the town's water source and cuts off the supply. A poster campaign informs the inhabitants of their current regime's illegal activities and warns that water won't be available until the government is overthrown. Beauremon and Rymer lead the army against Blake but are defeated. They flee and the president surrenders. The ousted president regains his post and the concessions revert to Strang.
Trivia: John Strang appeared in THE YELLOW SPHINX, UNION JACK issue 512 (1913) and in THE ADVENTURE OF THE BOWERY TAR BABY UNION JACK issue 1,170 (1926).
Rating: ★★★★☆
UNION JACK · New series · Issue 614 · 17/7/1915 · Amalgamated Press · 1d
Illustrator: Val Reading
Other content: A Word from the Skipper (ed.); The Bogus Policeman (featuring Detective Spearing) by Anon.
Notes: Story features Mlle. Yvonne Cartier.
Unrated

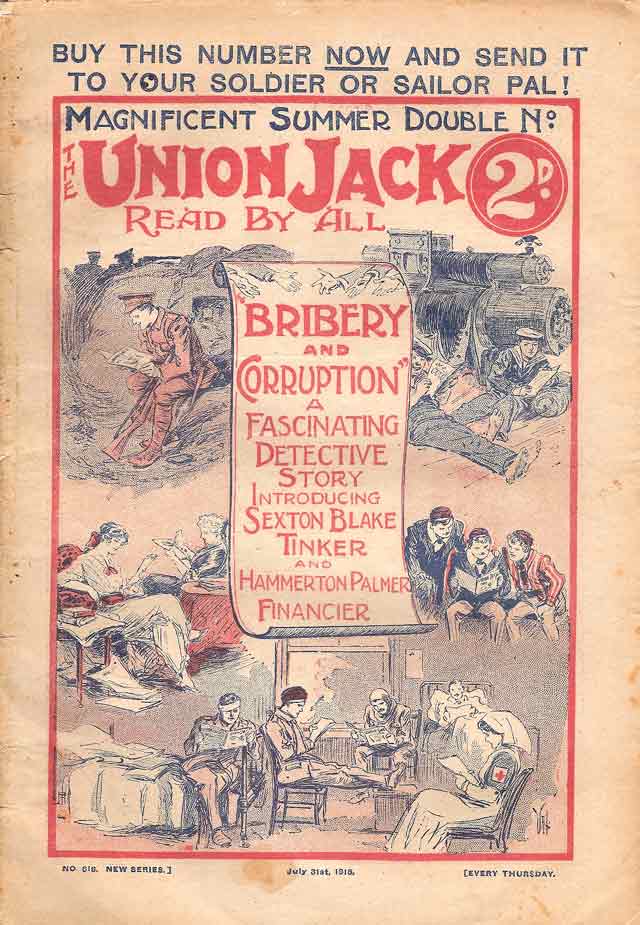
UNION JACK · New series · Issue 616 · 31/7/1915 · Amalgamated Press · 2d
Illustrator: Val Reading
Other content: The Case of the Missing Banknotes by Anon.; The Bogus Policeman by Anon.; A Word from the Skipper (ed.)
Notes: Crooked financier Hammerton Palmer arrives in Williamstown, Canada, oblivious to the fact that Sexton Blake and Tinker are enjoying a fishing holiday nearby. After assessing the decrepit state of the fast-growing town's tram service, Palmer teams up with a local bank manager to buy out the tram company's stock. Together, they intend to pave the way for the building of a power station at the nearby waterfalls to generate electricity for a new transport system. Once all the investments and legal processes are in place, they'll then sell the project to an investor for a tidy profit. They have a problem, though, in that the principal shareholder is a rival banker, Phineas Simms, who has plans of his own and who happens to be the town's mayor. They vie with him to buy sufficient shares to take control of the company until the outcome of the competition comes to depend on a single investor, Peter McLaughlin, who refuses to sell to Palmer and who is liable to throw his support behind Simms. However, Palmer recently saved a boy from drowning and it turns out to be McLaughlin's son. In gratitude, the man reveals that he would sell to Palmer but has a twenty thousand dollar overdraft at Simms's bank. Palmer pays off the debt in return for the shares. He then receives two shocks: the first being that Simms is aware of his criminal past, and the second being that Sexton Blake is in town! Confronting the detective, Palmer accuses him of sabotaging his relationship with Simms. Blake denies it, is called a liar, and responds with a knockout punch to Palmer's jaw. The financier, once he's recovered, now needs the vote of the city council to secure the franchises for his venture. The odds are against him until he learns that one of the councillors, Gideon Tupper, is being blackmailed over incriminating letters he wrote many years ago. Palmer steals the letters from the blackmailer and exchanges them with Tupper in return for his vote. Sexton Blake, by now suspicious of Palmer's activities, throws in his lot with Simms, investing his own money in opposition to the crook, but not long after they've laid their plans, Simms is reported drowned at the waterfalls. In fact, he has been kidnapped and drugged by Palmer and is being held captive in a hut on an island in the river. When Tinker discovers this, he too is captured, but a day later the drug wears off and he is able to liberate himself and Simm. They arrive at the town hall just moments too late — Palmer's scheme is approved. Blake immediately calls a meeting of all the principal players and reveals to them an item of legislation that Palmer had overlooked. It means the crook is left with a difficult choice, he can either commit himself to years of legal wrangling with no certain outcome or he can sell the project and split the profits with Simms and Blake. The latter option is reluctantly chosen, and Palmer departs with just eight thousand pounds.
Trivia: G. H. Teed begins this tale with a breathtaking description of Canadian forests. It's an example of very real literary merit in the Sexton Blake saga; a writer far exceeding the limitations of the genre. Furthermore, he then goes on to spin a yarn that is so bound up in themes of financial skulduggery — of stocks and shares and franchises — that the notion that this is juvenile fiction goes right out of the window.
This is a summer double issue.
Rating: ★★★★★ This is a pretty stunning issue. G. H. Teed at his absolute best!
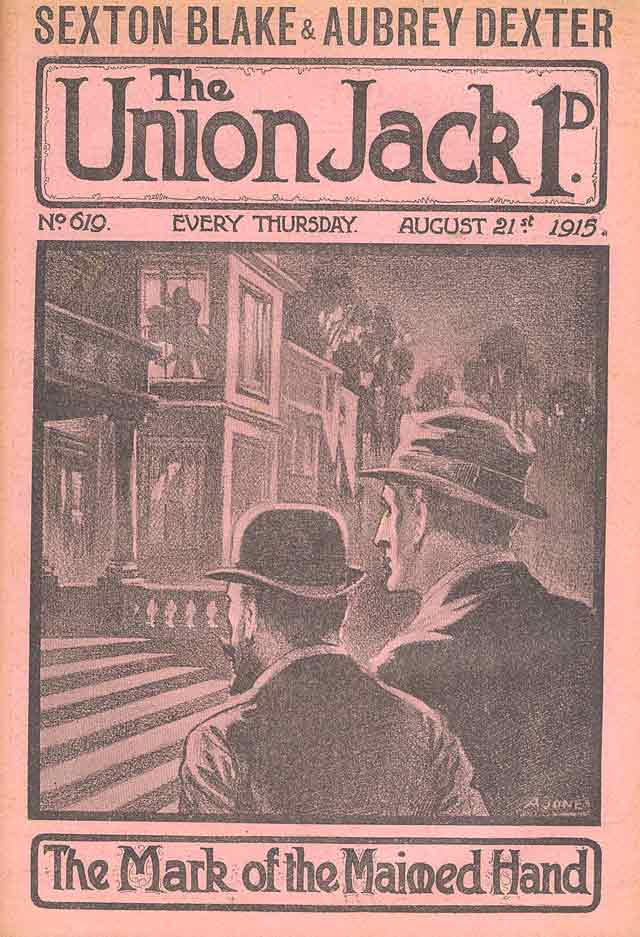
UNION JACK · New series · Issue 619 · 21/8/1915 · Amalgamated Press · 1d
Illustrator: Arthur Jones
Other content: The Bogus Policeman by Anon.; The Diamond Dwarfs by Henry St. John; A Word from the Skipper (ed.)
Notes: Sir James Alastair is the only survivor out of six men who went on an expedition to Africa. At his home, he is confronted by Jack Morton — who intends to marry his ward, Lena Ashford — and is accused of using her inheritance for his own ends. Though this is true, Sir James denies it and the two men argue before Morton is sent from the house. That night, Sir James interrupts Aubrey Dexter in the act of stealing a solid gold African idol from his safe. The same evening, Sexton Blake and Detective-Inspector Martin are passing the house when they see the shadow of two struggling men outlined against the window blinds. When one shadow is seen to stab the other, they rush into the house's garden and apprehend Jack Morton. Sir James is found in his study critically injured and Morton immediately becomes Martin's top suspect. Blake reads the explorer's diary and learns how the other five men of the expedition had been sacrificed by the priests of the Mogwlgir tribe, all of whom possess a maimed hand. Sir James had escaped and had taken with him the golden idol. Now, Blake finds evidence which suggests that one of the priests has arrived in England and attacked the explorer. However, he believes this evidence has been faked. Dexter, who has been hiding in the house, steals a taxi and flees. Morton escapes from custody and pursues him on a bicycle. He catches up and causes the taxi to crash. Blake and Martin follow and find Morton recovering consciousness in the road. The Scotland Yard man immediately arrests him. Blake sets Pedro on the track of Dexter, who is traced to a train station. As the cracksman climbs aboard the train, Tinker tackles him and Blake and Martin make the arrest. Dexter is sentenced to fifteen years in prison. He vows to kill Sexton Blake. Meanwhile, Sir James recovers from his injury and Morton pays off the explorer's debt to Lena.
Trivia: This marks a turning point in Aubrey Dexter's career. His attempted murder of Sir James, followed by his capture and imprisonment, exposes a much uglier side of his character than we have hitherto seen.
Rating: ★★★★★
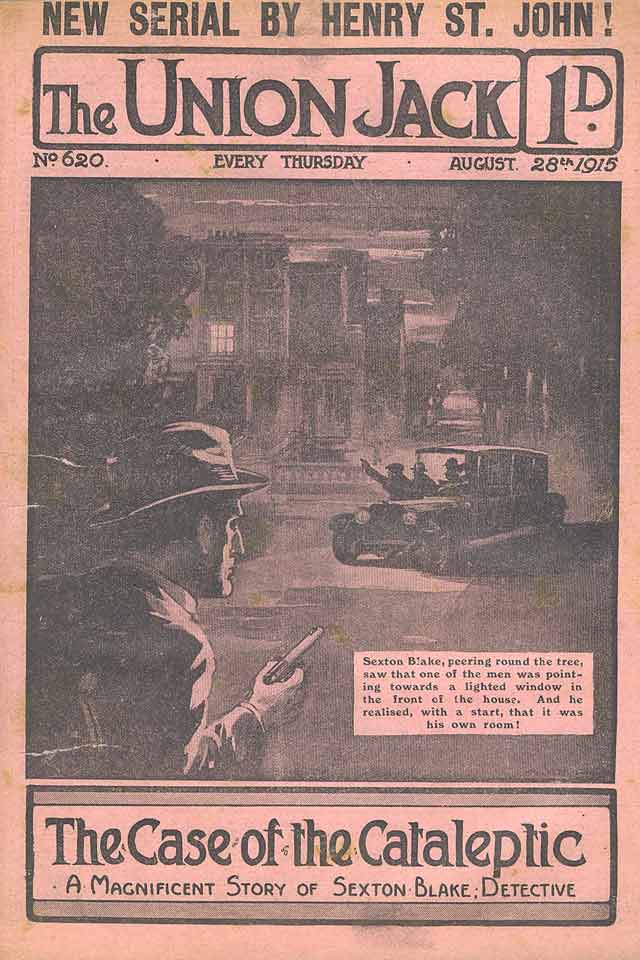
UNION JACK · New series · Issue 620 · 28/8/1915 · Amalgamated Press · 1d
Illustrator: Arthur Jones
Other content: The Diamond Dwarfs by Henry St. John.
Notes: This marks the first appearance of Leon Kestrel, the Master Mummer. A young army medical officer, Norman Grant, consults Sexton Blake after his wealthy uncle is strangled to death. The evening before the murder, Grant had quarrelled with his relative — Ezra Grant — about the man's young ward, Elma Travers, who Norman wants to marry. Because of this, Detective Harker of Scotland Yard suspects him of the crime. Blake travels to Ezra Grant's home and examines the body and the evidence surrounding it. He quickly concludes that someone is actively trying to frame Norman for the murder. Furthermore, the criminal is still in the vicinity, as is proven when someone shoots at the detective when he's walking in the woods. Later that night, Blake encounters a group of shadowy figures gathered around a car in the woods. They capture him and, binding weights to his ankles, throw him into a nearby pond. Norman comes to his rescue and the mysterious men flee. Next morning, at the inquest into Ezra Grant's death, it is discovered that the body has gone missing. Amid the confusion, a figure steps into the room — it is Ezra Grant! The old man explains that he is a cataleptic and had a seizure when he was attacked in his study. Lapsing into unconsciousness, his state was so death-like that his assailant, as well as everybody else, was fooled into thinking him deceased. He makes it clear that Norman was the attacker in question but refuses to prosecute. A few days later, Blake receives a letter from Norman in which the young man explains that his uncle, unable to bear the fact that his nephew tried to murder him, has taken his own life; Norman saw his body in the pond. Blake reveals that he has cracked the case: a criminal gang, working with Ezra Grant's valet, had killed the old man. When the detective had arrived on the scene, they'd tried to throw him off the scent by removing the body. The head of the gang, an incredibly talented actor and master of disguise named Leon Kestrel had entered the house in the guise of the supposedly dead man. The aim of the crime was to have one of Ezra's less reputable relative's inherit the estate; thus the subsequent 'suicide' (it is the real Ezra Grant in the pond). Blake uses this to draw Kestrel into a trap at Ezra's lawyer's office. It works, to an extent ... the detective catches the gang and proves Norman Grant's innocence. Leon Kestrel, however, eludes him.
Trivia: This was reprinted under the same title but in an abridged form in DETECTIVE WEEKLY issue 377 (1940).
Rating: ★★★★★ Impossible to put down, this story is a fantastic debut for one of Sexton Blake's trickiest opponents.
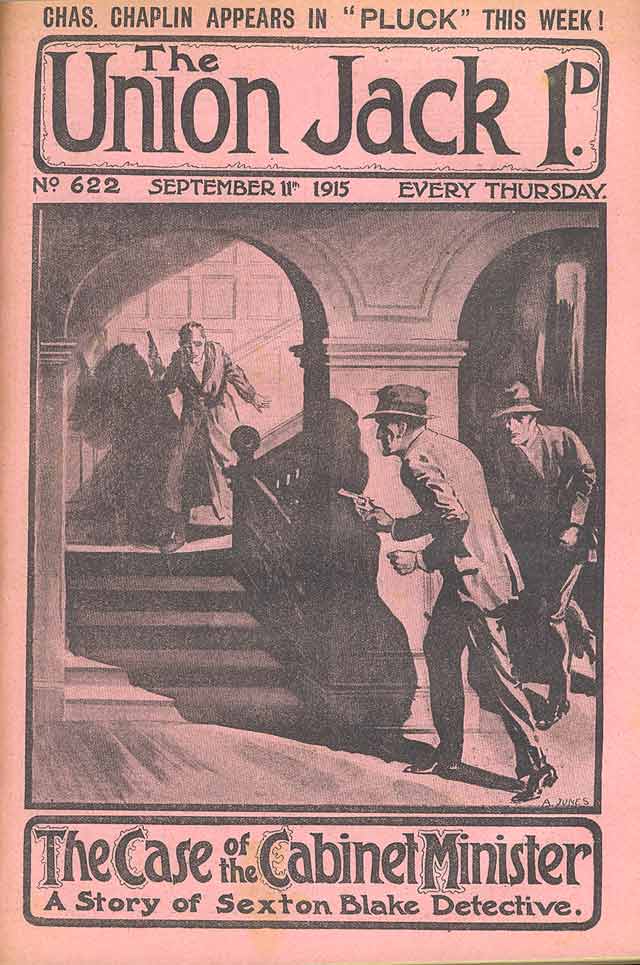
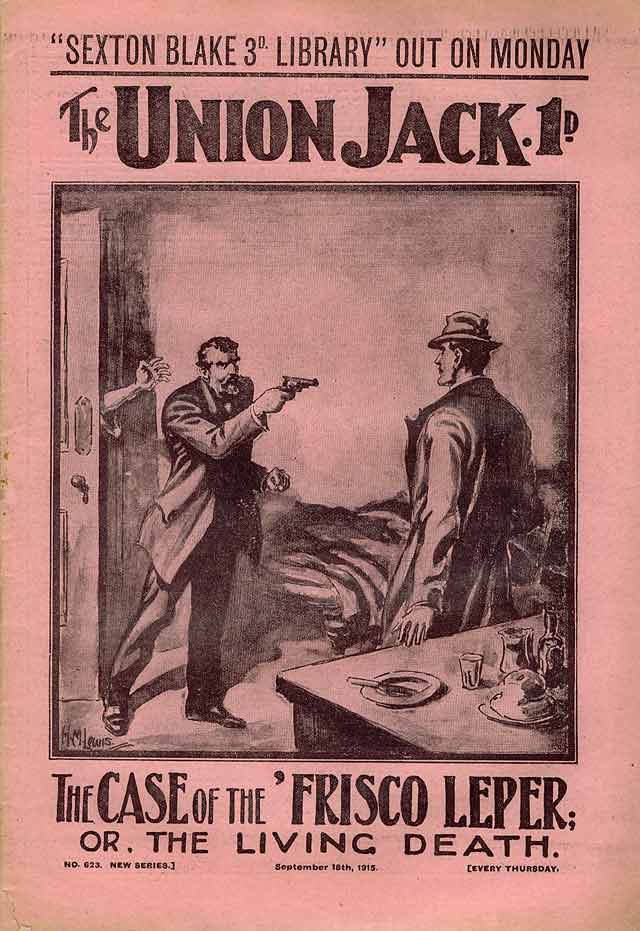
UNION JACK · New series · Issue 623 · 18/9/1915 · Amalgamated Press · 1d
Illustrator: H. M. Lewis
Other content: The Diamond Dwarfs by Henry St. John; A Word from the Skipper (ed.)
Notes: Huxton Rymer arrives penniless in San Francisco, where he rescues a man from a rampaging opium addict. William Creswick is from Chicago, here to visit the exposition, but he's unwittingly brought with him a condition that Rymer instantly recognises — Creswick is a leper! Meanwhile, in England, Sexton Blake helps to recapture a group of escaped German detainees, during which operation he overhears mention of "American munitions" being moved under cover of the 'Frisco event. One of the plotters evades capture and Blake and Tinker follow him to America where they learn that a scheme is being hatched to cause strike action among munitions workers. The German and his co-conspirators are rounded up and the case closed ... however, before he can depart, Blake learns that the city is being held to ransom by a man who will expose the presence of leprosy — ruining the exposition — unless he is paid a hundred thousand dollars. When a newspaper editor gets wind of this, he also demands hush money. The city mayor asks the famous criminologist for help. Blake gathers a force of police officers and raids the newspaper office, destroying the printing plates and arresting the editor. By this point, Blake already suspects that Rymer is the source of the blackmail. He tracks him to his lair and confronts him, revealing that he knows the disease is not leprosy but a curable malady with similar symptoms. Rymer, cornered, raises a pistol to kill his nemesis but William Creswick sneaks up behind him and knocks it from his hand. Blake secures the villain but promises to have him deported — rather than arrested — if he agrees to cure Creswick. Rymer has no option. The inoculation is given and he is then sent packing.
Trivia: Rymer was, for a year, Professor of Therapeutics at Heidelberg. Blake has written several monographs on the subject of rare diseases.
Rating: ★★★☆☆
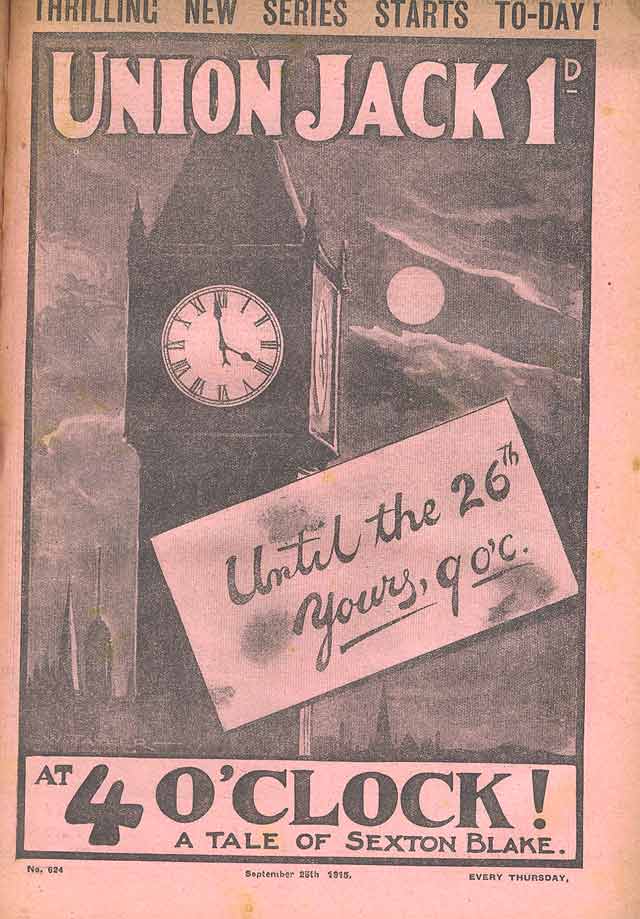
UNION JACK · New series · Issue 624 · 25/9/1915 · Amalgamated Press · 1d
Illustrator: W. Tayler
Other content: The Diamond Dwarfs by Henry St. John.
Notes: Sexton Blake receives a visit from the strange and seemingly timid Humble Begge (here making his first appearance in the Blake saga). Begge runs the Eastern Brethrens' Hostel and has found there a mysterious postcard which seems to suggest that something is going to happen to a man named Julian Wells. Furthermore, ever since finding the postcard, Begge has been repeatedly attacked by Japanese thugs — attacks which he fends off with remarkable ease. The two men visit Wells and discover that he was once part of a consortium of English and Japanese men who invested money and made a vast fortune. However, the Englishmen cheated their Japanese partners (though Wells had objected to this) and made off with the money. These few years later, Wells is the sole surviving Englishman and a man named Yoli Mitsugi the last of the Japanese. The latter is now out for vengeance. Tinker disguises himself as a Lascar and moves into the room next to Yoli Mitsugi's at the hostel. He learns that an attack on Wells is imminent. Meanwhile, Mitsugi's Chinese henchman, Wu Li, plans to kidnap Wells's daughter, Marian. Begge prevents this and Blake, in disguise, takes Wu Li's place, accompanying another of the gang to Wells's home. After the girl is taken, Blake reveals his hand and rescues her. Mitsugi, not knowinbg that his plot has gone awry, informs Julian Wells that unless he signs over his entire fortune, Marian will be forced to marry Wu Li. Before Wells can sign, Begge appears and chases Mitsugi off. The Japanese man returns to his hideaway just in time to witness Blake making his getaway with the girl. Tinker does not fare so well, though, and is captured. The Japanese gang attack Begge, tie him up, and then take Wells prisoner. He is locked in a basement room with Tinker and, when a nearby canal lock is opened, water rushes into it, threatening to drown them both. Blake finds Begge and the two men use Pedro to trace and rescue Wells and Tinker. Yoli Mitsugi is crushed to death by a barge but Wu Li escapes and vows vengeance upon Begge.
Rating: ★★★★★
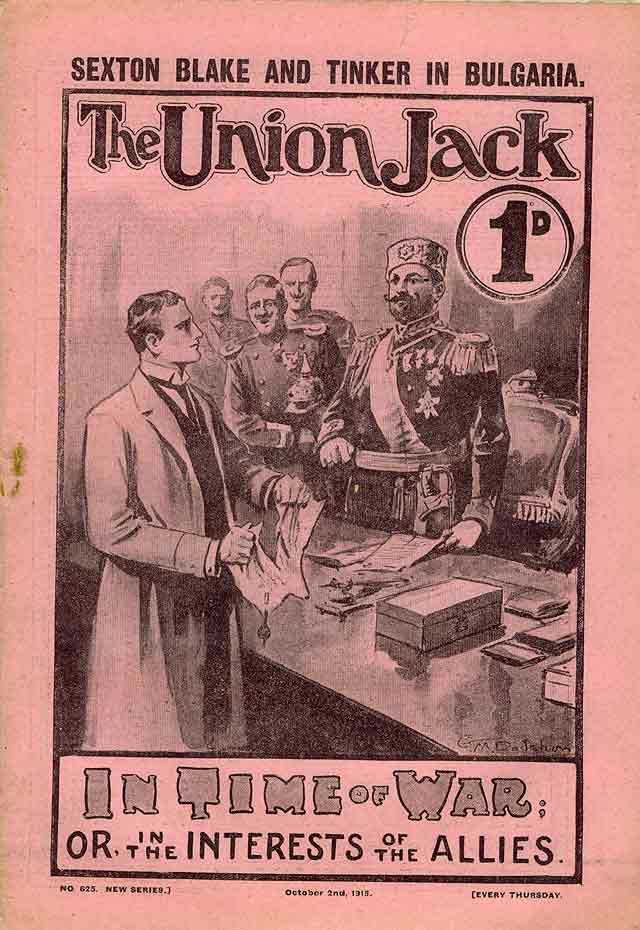

UNION JACK · New series · Issue 626 · 9/10/1915 · Amalgamated Press · 1d
Illustrator: E. E. Briscoe
Other content: In the Amazon Jungle by White Lemton
Notes: A sailor, Captain Ben, seeks out Humble Begge, who happens to have Sexton Blake as a guest. Ben has given passage to England to an ancient Chinese man, who has since been abducted. Blake, Begge and Ben learn that the passenger is Prince Mongchu, in England to sell a fortune in jewels. Blake ascertains that Marco, Ben’s first mate, is responsible for the prince’s removal, and when he and his companions visit the ship, they find Mongchu’s cabin ransacked, and Marco gone. The first mate, meanwhile, meets with members of his gang, which include a beautiful woman named Leonora, and a Chinese physician, Mai Wu. They are holding Mongchu captive but, despite drugging him into the “sleep of death,” which leaves only the brain active, have been unable to get the location of the jewels out of him. Mai Wu theorises that this is because the prince cannot understand them, for they neither know nor speak his native dialect. There is only one man in London who might … a man who spent fifteen years in China … Humble Begge! It is decided that Mai Wu should pose as a sailor and visit Begge’s hostel. Blake, in the meantime, hands a little bag of pebbles to Ben and instructs him to visit the hostel and surreptitiously give it to Begge. The gang, he hopes, will be watching and will think it is the jewels. Tinker discovers the house in which the crooks are holed up. Mai Wu sees the bag handed to Begge, drugs him, takes him captive, and at the house forces him to address Mongchu in all the dialects Begge knows. The prince is unresponsive. Begge, however, spots a clue that suggests the man is of Tibetan origin, and withholds that language until he finds a way to be alone with him. The whereabouts of the jewels are revealed to Begge, but before he can act on the information, the crooks drug him. Sexton Blake, disguised as the butler, infiltrates the house and revives Begge and Mongchu. They make their escape, and the cunning hiding place of the jewels is revealed. The gang flees empty handed, but Begge vows that he and Mai Wu will one day meet again.
Rating: ★★★☆☆
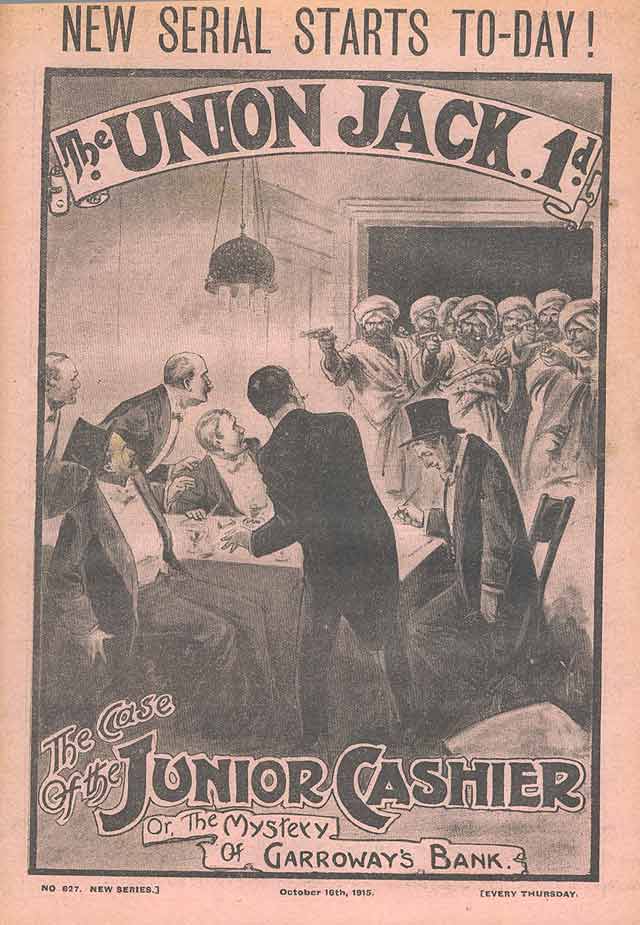

UNION JACK · New series · Issue 628 · 23/10/1915 · Amalgamated Press · 1d
Illustrator: E. E. Briscoe
Other content: A Word from the Skipper (ed.); His Little Lordship by Anon.
Notes: Lieutenant Brian Kildare of the Red Dragoons has a problem: Neville Harcourt, his rival for the love of Daphne Vernon, has tempted him into gambling and now he has debts he can't pay. In desperation, Kildare tries to steal the jewellery he had previously given to Daphne, intending to pawn it. But she catches him in the act and faints with shock. He attempts to escape but is knocked out in the garden. His unseen assailant is Neville Harcourt who takes the jewels and slips away, leaving Kildare to face the music. When the young Lieutenant recovers, he evades the police and goes to Baker Street where he tells the whole story to Sexton Blake. The detective is sympathetic and clears Kildare's debts... but he has also been commissioned to investigate the burglary. Daphne keeps quiet about having witnessed Kildare in her room but her loyalty is to no avail. Harcourt sends letters which denounce the young soldier and Kildare is cast out of society and his regiment. A month later, Blake is still on the trail of Harcourt, who he believes to be responsible for a number of burglaries in high society. He sends Tinker to follow him and the lad overhears Harcourt plotting with two accomplices. But before he can take the news back to his master, he is caught and imprisoned in a warehouse. It takes Blake and Inspector Widgeon three days to find him, doing so in the nick of time, just as Tinker is nearly drowned in the Thames after making his own getaway. Harcourt and his gang are finally caught and sentenced to a long prison sentence. But what has become of Brian Kildare? After spending weeks living in poverty in London's East End, he has joined up as a Private and is fighting on the Western Front. There, he distinguishes himself in battle and is wounded. While recuperating, he is amazed to find himself visited by Sexton Blake. The detective informs Kildare that he has inherited a large estate, his name has been cleared, and Daphne still loves him. A happy ending!
Rating: ★★★★☆ Blake, Tinker and Pedro are the perfectly balanced team here; each playing to their own specific strengths: Tinker is the expert tail, able to follow a suspect for days without being spotted; Pedro is the faultless tracker; and Blake, of course, is the man of action and peerless intelligence. And while this adventure may lack the thrills and spills of car/plane/boat/bicycle chases, it makes up for it by being very well plotted up until the final section, where it loses momentum.
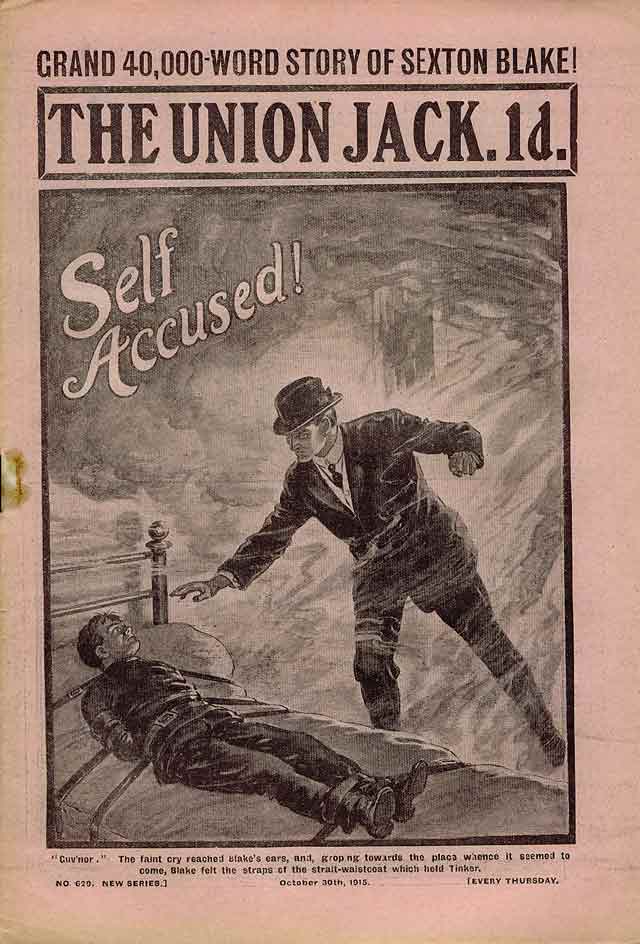
UNION JACK · New series · Issue 629 · 30/10/1915 · Amalgamated Press · 1d
Illustrator: E. E. Briscoe
Other content: His Little Lordship by Anon.; A Word from the Skipper (ed.)
Notes: In the village of Appelford, Sir Richard Carrisbrooke is tricked by a doctor named Cryps into believing that he has killed his uncle. Cryps then reveals to Carrisbrooke that he intends to blackmail him. The young man responds to this by 'disappearing'. He let's it be known that he is to travel to America on a liner, boards the ship, but then sneaks off in disguise. Later that evening, he is hit by a taxi and knocked unconscious. He is placed in the care of a doctor ... which, unfortunately, happens to be Cryps. When Carrisbrooke is declared lost at sea — having 'vanished' from the liner — his fiance, Eleanor, visits Sexton Blake and expresses her her suspicions of Cryps and her belief that Carrisbrooke is alive. Blake agrees to visit Appelford where Cryps has a nursing home. He takes Tinker and Humble Begge with him and the latter soon gets into a fight with the doctor. Blake meets with Eleanor who shows him a suicide note written by Carrisbrooke. In it, he confesses to his uncle's murder. Blake immediately spots that Cryps' claim that the note was sent from Liverpool on the eve of the liner's departure is a lie; in fact, it has been written very recently. While Blake is with Eleanor, Tinker spies on Cryps and witnesses an encounter between the doctor and Carrisbrooke, who is being held prisoner. Cryps hypnotises the young baron and reinforces the idea that he has murdered his own uncle. Tinker is captured and put into a strait-jacket. He sends a supposedly 'mad' inmate of the nursing home to fetch Begge but the 'man of peace' is shot in the shoulder by Cryps, who sets the nursing home on fire and escapes with Carrisbrooke. Blake, after rescuing Begge and Tinker, travels to London to fetch Pedro. Meanwhile, Cryps tries to hypnotise Carrisbrooke again but a distraction causes the spell to break and the two men fight. Cryps strangles his prisoner before taking to his heels. Blake, Pedro and the inmate get onto his trail and find the stricken baron. Blake tends to him while the inmate and Pedro continue the chase. When Cryps tries to shoot Pedro, the inmate leaps to his defence and kills Cryps. The truth comes out and Carrisbrooke is found innocent of all charges.
Trivia: Begge is described as 'tall' whereas in his first appearance he was said to be 'little'. When Blake goes to London to fetch Pedro, he gets the bloodhound from a 'shabby mews' in the East End. What was Pedro doing there? Training? At a vets? We are not informed.
Rating: ★★★★★

UNION JACK · New series · Issue 630 · 6/11/1915 · Amalgamated Press · 1d
Illustrator: H. M. Lewis
Other content: His Little Lordship by Anon.; A Word from the Skipper (ed.)
Notes: Story features George Marsden Plummer.
Unrated
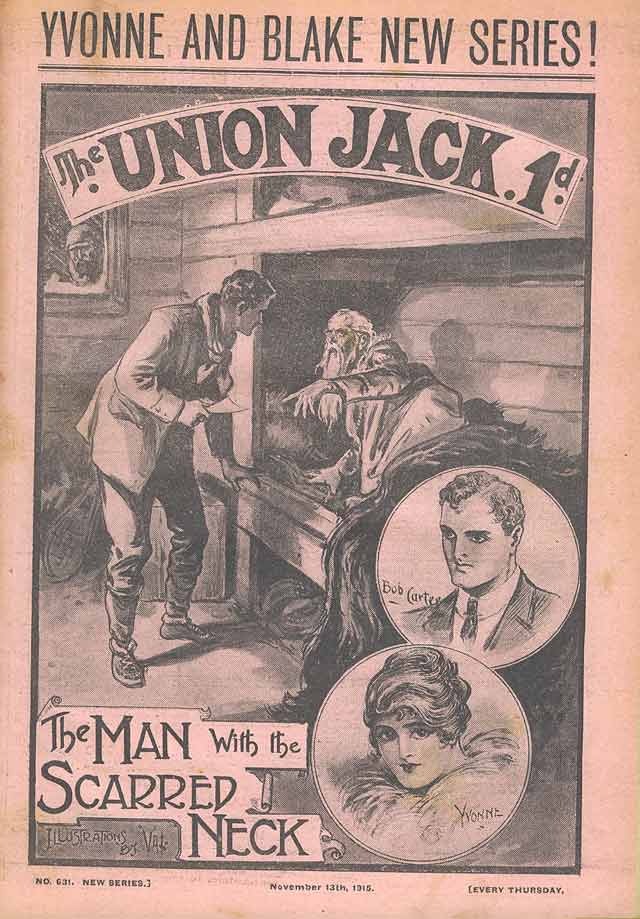
UNION JACK · New series · Issue 631 · 13/11/1915 · Amalgamated Press · 1d
Illustrator: Val Reading
Other content: His Little Lordship by Anon.; A Word from the Skipper (ed.)
Notes: On the cover, this is entitled THE MAN WITH THE SCARRED NECK, but on the title page it's called THE MAN WITH THE SCARRED THROAT. Story features Mlle. Yvonne Cartier.
Unrated
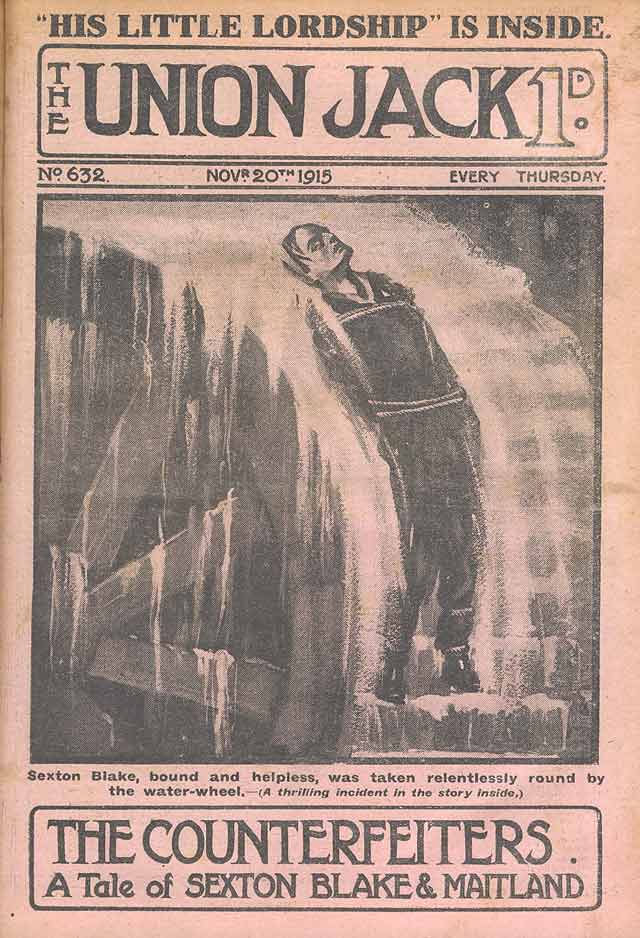
UNION JACK · New series · Issue 632 · 20/11/1915 · Amalgamated Press · 1d
Illustrator: Arthur Jones
Other content: His Little Lordship by Anon.
Notes: Detective-Inspector Martin is being driven to his wit's end by the amount of counterfeit money that's flooding the country. He reluctantly seeks help from Sexton Blake only to discover that the detective himself has fallen victim to the fraud, having found himself in possession of a forged £100 note. This had been given to him by a bookmaker named Frank Fox. In reality, though, Fox is Jack Clifton, a man who is desperate to make money in order to marry his sweetheart. The following day, Tinker follows Clifton from the Newmarket races and finds evidence that his quarry is, at heart, an honest man. Meanwhile, Blake attends court to watch the trial of Eugenie Weller, a woman Martin has arrested for passing a forged note. She is set free and the detective follows her, not realising that she is actually Broadway Kate. She leads him into a trap and he is left knocked unconscious in an alleyway. Kate then proceeds to an old abandoned watermill — the HQ of the counterfeiting operation — where she meets her husband, Ezra Q. Maitland. Clifton is fishing nearby and when Kate, observing him from the mill, sees that he has a large amount of money, she exchanges it for counterfeir notes while he is distracted. He later presents these at a restaurant and is promptly arrested. Blake is convinced of his innocence and organises a raid on the mill but Martin and his men are delayed, leaving Blake and Tinker to fall into Maitland's hands. The villain binds the detective to the waterwheel and his assistant to a sluice gate and leaves them to die. The police come to the rescue and Maitland is arrested, though Kate gets away.
Trivia: In the next story concerning these characters (THE CASE OF THE CINEMA STAR, UNION JACK 667, 1916), we learn that Ezra Q. Maitland was sent to trial, convicted as a spy and executed by firing squad.
Rating: ★★★★★
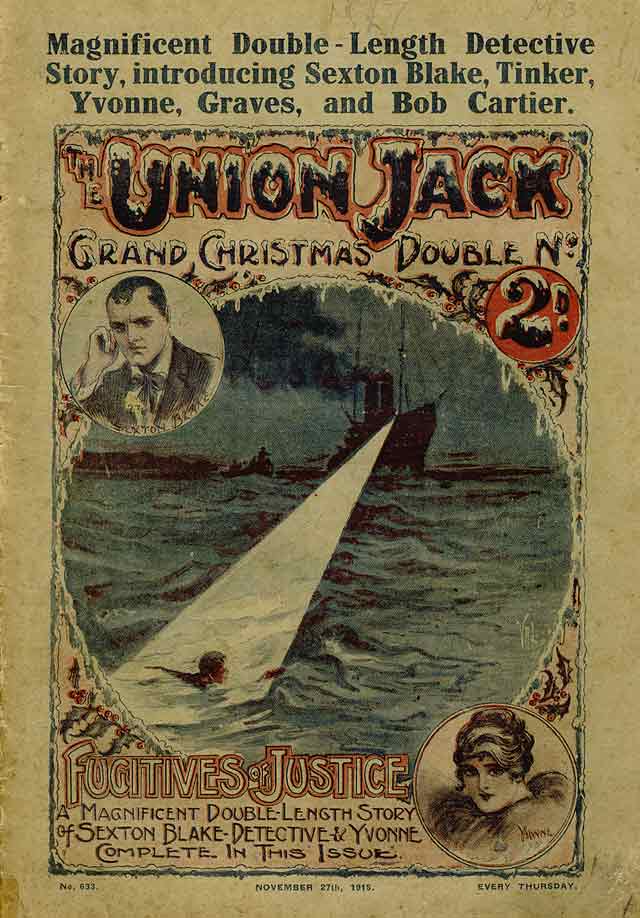
UNION JACK · New series · Issue 633 · 27/11/1915 · Amalgamated Press · 2d
Illustrator: Unknown
Other content: A Word from the Skipper (ed.); His Little Lordship by Anon.
Notes: Double Christmas issue featuring Mlle. Yvonne Cartier.
Trivia: The cover calls the story FUGITIVES OF JUSTICE, though 'from' is used internally.
Unrated
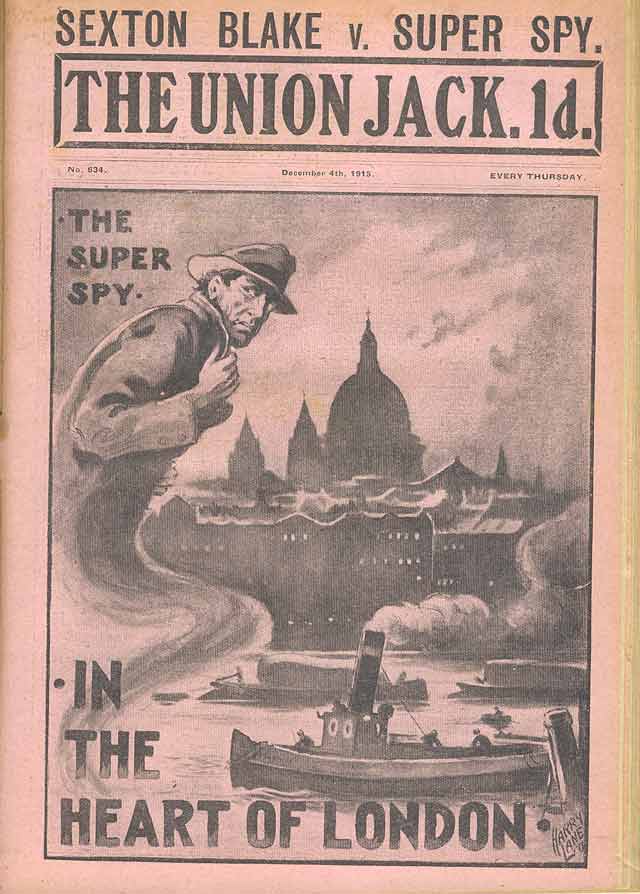
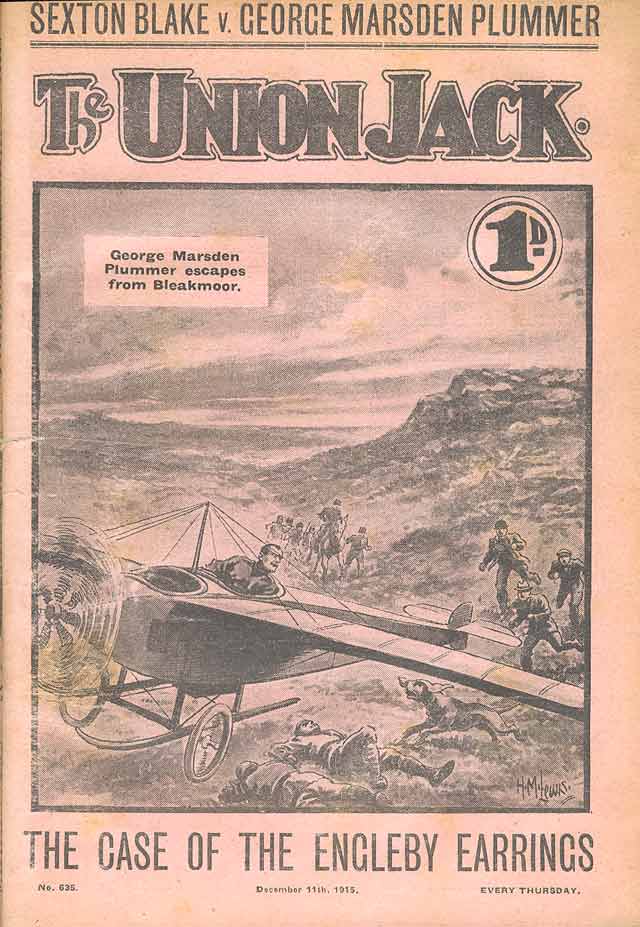

UNION JACK · New series · Issue 636 · 18/12/1915 · Amalgamated Press · 1d
Illustrator: E. E. Briscoe
Other content: A Word from the Skipper (ed.); His Little Lordship by Anon.
Notes: When wealthy shipowner Sir Daniel Trimms, mistakes Humble Begge for someone named Theodore Hart, the real Hart's nefarious plans immediately go awry. Posing as an African missionary, he has persuaded Trimms to donate £10,000 to his mission. In fact, Hart and his crooked partner, Paul Flavalla, will use the money to pay for a shipment of weapons. The armaments are to be sent to a slave trader, Said Ahmed, and used to attack Mogavva, a West African settlement. However, when Hart calls upon Trimm's secretary in order to receive the funds, he's told that the money has already been handed over to him. His bafflement and fury increase when he visits the ship carrying his cargo and discovers that the weapons have been removed — supposedly by him — and driven away. Meanwhile, after realising that Hart is a scoundrel and wondering who took his money, Trimms puts Sexton Blake on the case. Hart and Favalla know their game is up and decide to flee but first they trap and gas Blake, intending to dump him at sea en route to Africa. Tinker, having gone to see Humble Begge, is surprised to find his friend gone and a note by him left for Blake. Looking for his guv'nor, the youngster visits Trimms, who is in a rage after learning that Hart has already sailed for Africa. This, however, contradicts all the evidence ... which gives Tinker the idea that Begge is masquerading as the crook. Continuing his search, he is guided to a ship anchored off Greenwich. Hart and Flavalla are rowing Blake across to it when the detective, his hands bound, falls overboard. They believe it an accident, and the detective drowned, but he has tricked them and, as their ship departs, is fished from the water by Tinker. The letter from Begge is handed over. It instructs the detective to follow Begge to Mogavva. Blake does so, along with Tinker and Sir Daniel. Days later, Hart, Flavalla and Said Ahmed attack the settlement but are confronted by well-organised defences. The three villains are killed. Blake & Co. arrive and are greeted by Humble Begge, who has outwitted the crooks at every turn and who reveals that Hart was his younger brother.
Rating: ★★★★★