Sexton Blake Bibliography: 1895
Publishing: William Harold Maas takes over control of the Amalgamated Press boys' papers (but only for a very short period). NALDA THE NIHILIST (UNION JACK issue 69) is the first Sexton Blake tale to be recounted in first-person by the detective.
Blake: NALDA THE NIHILIST, though published this year, is clearly dated as commencing on 4th July 1893 (five months before the publication of THE MISSING MILLIONAIRE). In it, Blake has a maid named Sarah Ann. NALDA also reveals that, in 1893, Blake still had some family connections: " ... so I took the poor girl to an old friend and former housekeeper in my family — Mrs. Bulstrode ... "
In SEXTON BLAKE'S STRATAGEM, the detective has a valet named Kennedy. At some point this year (1895), the detective seems to have temporarily abandoned his Norfolk Street lodgings in favour of Shepherd's Bush, though this is likely to have been in connection with an unrecorded case.
ILLUSTRATED CHIPS · Issue 227 · 05/01/1895 · Amalgamated Press · ½d
Illustrator: Unknown
Other content: Unknown
Notes: The Heptic and the Black Barnacle engage in an inconclusive battle; their torpedoes missing each other. Seale's men grow mutinous, so he abandons the fray and orders the crew to steer the submarine back to Swatley Cove. Meanwhile, the man-o'-war returns to Dover where Sexton Blake goes ashore and heads back to London. There he finds that Muriel Lane and her father have had to put their house up for auction, forced by poverty to move to altogether shabbier quarters. Visiting the apartment, the detective discovers that the old man is alone; Muriel has gone to Swatley Cove, thinking to meet Blake there. The detective hurries after her but upon his arrival he is informed that she has vanished without trace. Unknown to him, one of Seale's men, Michael Sweeny, has tricked the girl into following him to the nearby cliff upon the brink of which she finds herself struggling in his grip.
Rating: ★★★★☆
ILLUSTRATED CHIPS · Issue 228 · 12/01/1895 · Amalgamated Press · ½d
Illustrator: Unknown
Other content: Unknown
Notes: Sweeny overpowers Muriel and carries her down a narrow path on the cliff face and into a subterranean cavern. Here — the headquarters of the pirate crew — Frederick Seale greets her and declares his love, vowing to marry her that very day. She spurns his advances and so is bound and gagged and placed aboard the submarine, which steams out to sea. Sexton Blake finds the now empty cavern and removes all the stolen treasure from it — including the bullion — and buries it further along the beach. He then formulates a plan to place a mine at the cavern's entrance to destroy the Black Barnacle, unaware that Muriel is aboard. He returns to London to inform Captain Lane that his daughter is missing. The news is too much for the old man to bear; he collapses and dies. Meanwhile, Seale continues his campaign to win Muriel's heart. When, in a fit of passion, he forces himself upon her, she accidentally grabs hold of a valve projecting from the vessel's inner wall. Seale is overcome with fear and implores her to remove her hand from it; opening it would drown everyone aboard. The girl threatens to do exactly that unless he vows never to touch her again.
Rating: ★★★★☆
ILLUSTRATED CHIPS · Issue 229 · 19/01/1895 · Amalgamated Press · ½d
Illustrator: Unknown
Other content: Unknown
Notes: I don't own this issue. Seale agrees to Muriel's demand and promises never to force himself upon her again. A ship is spotted and the submarine's crew become enthusiastic about attacking it. Seale, though, forbids them to do so; narrowly averting a mutinous reaction. However, when the men calm down he has a change of heart and orders the submarine to surface to reconnoitre.
Rating: ★★★★☆
ILLUSTRATED CHIPS · Issue 230 · 26/01/1895 · Amalgamated Press · ½d
Illustrator: Unknown
Other content: Unknown
Notes: As the Black Barnacle ascends through the water she is hit by a torpedo which shatters the observation tower. Rapidly flooding, the vessel spirals down towards the sea bed. Seale struggles to close a steel shutter to keep the water out; the strain robs him of consciousness but he succeeds and the flooding abates somewhat. Nevertheless, the leaks continue and the wounded ship sinks to the ocean floor. Seale's efforts to save it have been observed by one of his men — John Potts, also known as 'The Skunk' — who now takes the opportunity to kick his stricken captain, whom he hates. This infuriates his fellows who witness the act as they arrive upon the scene. Michael Sweeney attacks and kills him. The crew then make a terrible discovery: their submarine has settled between two mines, either of which might bump it and explode at any moment. Meanwhile, Sexton Blake, aboard the Heptic, recovers a handwritten note from the wreckage floating on the surface. The words he reads fill him with horror.
Rating: ★★★★☆
ILLUSTRATED CHIPS · Issue 231 · 02/02/1895 · Amalgamated Press · ½d
Illustrator: Unknown
Other content: Unknown
Notes: I don't own this issue. The note reveals that Muriel is aboard the submarine, which Sexton Blake believes to have been destroyed. However, on the sea bed, the piratical crew make repairs and are able to set the Black Barnacle moving.
Rating: ★★★★☆
ILLUSTRATED CHIPS · Issue 232 · 09/02/1895 · Amalgamated Press · ½d
Illustrator: Unknown
Other content: Unknown
Notes: The Black Barnacle moves across the sea bed and pulls alongside the ancient wreck of a Spanish galleon. Two of the pirates, Red-handed Pete and Jemmy Mason, don diving suits and cross to the ship where Pete finds a vast stockpile of jewels and gold. Thinking to keep it to himself, he tries to murder his fellow pirate but Jemmy fights back.
Rating: ★★★★☆
ILLUSTRATED CHIPS · Issue 233 · 16/02/1895 · Amalgamated Press · ½d
Illustrator: Unknown
Other content: Unknown
Notes: I don't own this issue. The Black Barnacle is attacked and damaged by a gigantic sea serpent. The vessel limps to the coast of Spain and puts in for repairs in a desolate tract of country near Cape Finisterre.
Rating: ★★★★☆
ILLUSTRATED CHIPS · Issue 234 · 23/02/1895 · Amalgamated Press · ½d
Illustrator: Unknown
Other content: Unknown
Notes: I don't own this issue. Muriel Lane, though rigorously guarded by Frederick Seale, manages to talk with a handsome young Spaniard named Alfiero while taking a walk along the cliffs. The man tells her, in excellent English, to keep heart. He assures her that her friends are working strenuously on her behalf and surreptitiously hands her a note.
Rating: ★★★★☆
ILLUSTRATED CHIPS · Issue 235 · 2/03/1895 · Amalgamated Press · ½d
Illustrator: Unknown
Other content: Unknown
Notes: Seale takes Muriel to the hut and leaves her there with two guards outside. She reads the note, which is from Sexton Blake. It reveals that a trapdoor in her room leads down to a cavern where the old scoundrel Mantello stores his ill-gotten gains. She enters this and descends into a network of caves, following the detective's written directions until, finally, she sees light ahead. At that moment, she also hears Seale's men catching up with her. With her enemies closing from behind and her friends rushing to her from ahead, the young girl's ordeal finally gets the better of her and she sinks to the ground in a dead faint.
Rating: ★★★★☆
ILLUSTRATED CHIPS · Issue 236 · 9/03/1895 · Amalgamated Press · ½d
Illustrator: Unknown
Other content: Unknown
Notes: Muriel's rescuers rush forward and exchange gunfire with Seale's men. Alfiero is killed killed but it is the pirates who find themselves in the losing position. Desperately, Seale calls for a truce. He asks two things: to know who the rescuers are and to be allowed to retreat unmolested. If this latter is not granted, he says he will shoot Muriel. His opponents reveal themselves to be Mantello's men. They order Seale to put his hands in the air, inform him that they are going to ransom the girl, and claim that, at a later date, they will do business with the submarine crew. Seale and his men retreat. Some time later Muriel recovers to find herself a captive of Mantello's gang. Alfiero had tricked her by falsifying a note from Sexton Blake. For the next few days, the girl endures brutal imprisonment until Mantello tells her that nobody has come forward to pay her ransom. He gives her a final chance to contact someone, under threat of 'extreme measures' — if she can't find anyone to pay the ransom, she will be killed. Despairing, she pens a letter and hands it to Mantello.
Rating: ★★★★☆
ILLUSTRATED CHIPS · Issue 237 · 16/03/1895 · Amalgamated Press · ½d
Illustrator: Unknown
Other content: Unknown
Notes: Muriel's letter, written in sheer desperation, is addressed to Frederick Seale. Two days later, the pirate sends a reply to the Spanish brigands in which he expresses willingness to pay the girl's ransom. Blindfolded, Muriel is forced to swear on the Bible that she will reveal nothing about the brigands to anyone. The cloth is then removed from her eyes and, to her astonishment, she finds that the brigands are, in fact, a branch of a vast masonic order — the 'True Warriors' — whose power and influence has extended throughout the length and breadth of Europe. Filled with admiration at the girl's courage, the men enrol her into the secret order. Muriel now hears that the True Warriors intend to capture the Black Barnacle and revenge themselves on the pirates. With a mission to complete, the girl is returned to the submarine.
Rating: ★★★★☆
ILLUSTRATED CHIPS · Issue 238 · 28/03/1895 · Amalgamated Press · ½d
Illustrator: Unknown
Other content: Unknown
Notes: Reluctantly reunited with Frederick Seale, Muriel finds herself transported to a small chapel where she is forced to attend her own marriage ceremony. However, when she manages to communicate to the priest that she is being coerced into the union, he refuses to go through with it. Furiously, Seale draws a pistol and shoots the priest dead. Days later, Muriel is once again a prisoner aboard the Black Barnacle, which, now fully repaired, is steaming towards Britain. On the Heptic, after a long and thus far fruitless search, Sexton Blake spots the 'Lamp of Death'.
Rating: ★★★★☆
ILLUSTRATED CHIPS · Issue 239 · 30/03/1895 · Amalgamated Press · ½d
Illustrator: Unknown
Other content: Unknown
Notes: Sexton Blake is shot out from the Heptic inside a specially adapted torpedo of his own design. He steers it towards the Black Barnacle but, as the pirates in the submarine look on through its portholes, he is intercepted by a giant octopus which swallows his small craft. Fortunately, the torpedo is attached to the Heptic via a stout cable and that ship's crew now haul the creature to the surface.
Rating: ★★★★☆
ILLUSTRATED CHIPS · Issue 240 · 6/04/1895 · Amalgamated Press · ½d
Illustrator: Unknown
Other content: Unknown

Notes: While the crew of the Heptic are busy cutting Sexton Blake free from the belly of the giant octopus, the Black Barnacle takes the opportunity to attack. The submarine scores a hit and the wreckage of the Heptic sinks around it. Seale then orders his crew to set course for Swatley Cove. For three days and three nights the pirate craft travels beneath the sea until, when nearing its destination, an acute oxygen shortage forces it to surface. The pirate submarine emerges from the depths within forty feet of a huge warship.
Rating: ★★★★☆
ILLUSTRATED CHIPS · Issue 241 · 13/04/1895 · Amalgamated Press · ½d
Illustrator: Unknown
Other content: Unknown
Notes: Frederick Seale orders his crew to outrun the warship but it isn't alone — the Black Barnacle has surfaced in the midst of a fleet. All the ships give chase, firing their guns at the little submarine, but with a tricky change of course, Seale throws his pursuers into confusion and manages to get away. He then orders the submarine to lay low until nightfall, when he hopes it can creep into its hidden base at Swatley Cove. However, when the time comes, he finds that he has fallen into an ambush laid by a fleet of small torpedo boats. Frantically, he orders the submarine to dive. It does so but inadvertently slips into an underwater cavern. Unable to navigate back out, the crew — along with Muriel — find themselves trapped in the vessel as the air slowly runs out. Meanwhile, Sexton Blake, who has been badly wounded, and a dozen other survivors of the Heptic have been picked up by a passing ship and are now on a liner heading home.
Trivia: Blake now drops out of the serial until its final instalment.
Rating: ★★★★☆
ILLUSTRATED CHIPS · Issue 242 · 20/04/1895 · Amalgamated Press · ½d
Illustrator: Unknown
Other content: Unknown
Notes: Unable to steer the submarine out of the undersea cavern, the pirates' air supply turns bad. On the brink of unconsciousness, Seale manages to restore four hours worth of oxygen but the effort is so great that he succumbs to a burst blood vessel. Muriel is ordered to nurse him back to health while Red-handed Pete takes over the navigation of the craft. Steering it into what appears to be a way out, he finds to his horror that the submarine is gripped by a ferocious current and is pulled miles into a subterranean tunnel.
Rating: ★★★★☆
ILLUSTRATED CHIPS · Issue 243 · 27/04/1895 · Amalgamated Press · ½d
Illustrator: Unknown
Other content: Unknown
Notes: As the vessel sinks into the depths, its crew give way to their fears and start drinking. Soon they are in a mutinous mood and they confront Frederick Seale. However, he has recovered his senses enough to once again bring them to heel ... and in this he is helped by the fact that the current gripping the Black Barnacle suddenly abates; it appears they are once more in clear water. Seale orders his crew to bring the craft to the surface. They obey and, after taking navigational readings, find that they are in a Norwegian fjord. Some of the men express a desire to leave the ship now but Pete holds them at gunpoint and they reluctantly agree to stay aboard.
Rating: ★★★★☆
ILLUSTRATED CHIPS · Issue 244 · 4/05/1895 · Amalgamated Press · ½d
Illustrator: Unknown
Other content: Unknown
Notes: Red-handed Pete orders the crew to steer the submarine to a small island behind which it comes to a halt, screened from the fishing village on the Norwegian shore. Unknown the Pete, though, the craft has been spotted by a young Frenchman named Professor Armand Du Ville, who recognises the vessel which his friend, Sexton Blake, has told him about. Du Ville decides to investigate further. Meanwhile, as the pirates of the Black Barnacle sleep, Red-handed Pete plots against them. Tired of their rebelliousness and of Frederick Seale's dominance, he decides that it's time to look after himself. Creeping to Seale's cabin, where the Captain is nursed by Muriel, Pete chloroforms the girl before stabbing Seale to death. He then distributes explosives around the submarine before picking up the girl and leaving the vessel via a rowing boat. As he does so, he spots another boat — that of Professor Du Ville, who is rowing towards him.
Rating: ★★★★☆
ILLUSTRATED CHIPS · Issue 245 · 11/05/1895 · Amalgamated Press · ½d
Illustrator: Unknown
Other content: Unknown
Notes: Red-handed Pete rows away from the other boat but Professor Du Ville, spotting Muriel, gives chase. Pete decides that his prisoner is slowing him down and so, picking up the unconscious girl, he drops her overboard. Du Ville rescues her and, at that moment, the explosives aboard the Black Barnacle ignite, destroying the craft and all aboard her in a terrific blast. Flying debris kills Pete and, thus, the terrible adventure of the Lamp of Death comes to an end. One year later, Muriel is recovered, rich and married ... to Sexton Blake!
Trivia: Sexton Blake is married! Muriel isn't mentioned by name in any subsequent stories but references to Sexton Blake's 'wife' are made in SEXTON BLAKE'S LOST CLUE (UNION JACK issue 396, 1901) and in the sequels to that story, THE REAL ADVENTURES OF SEXTON BLAKE and KING OF DETECTIVES, which were serialised in THE MARVEL between issues 421 and 501 (1901-03).
Rating: ★★★★☆
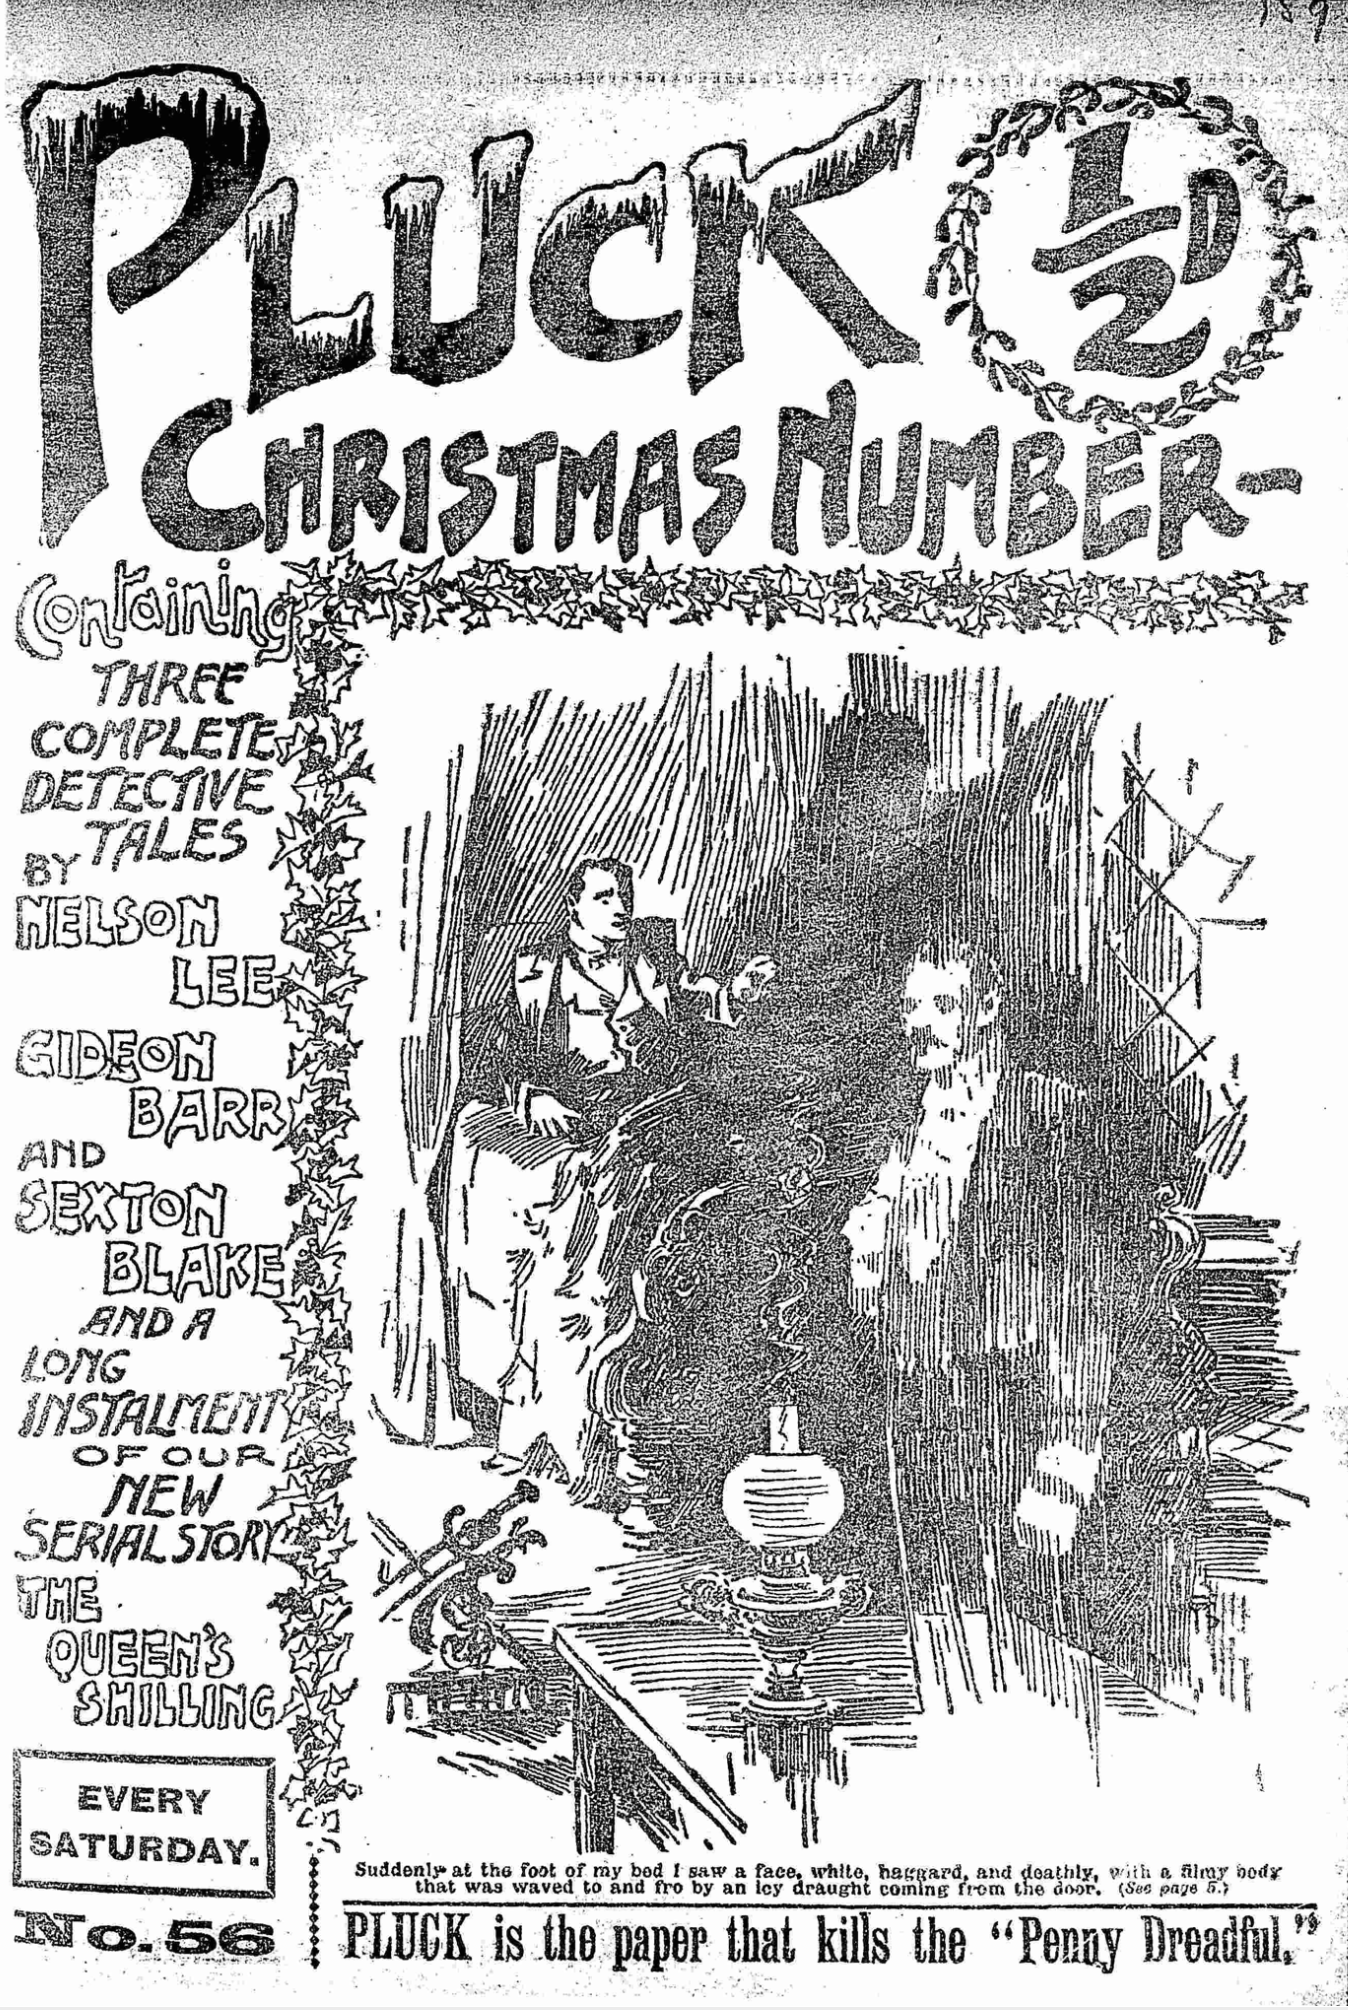
PLUCK · Issue 56 · 14/12/1895 · Amalgamated Press · ½d
Illustrator: Unknown
Other content: The Queen's Shilling by Captain Spencer; Christmas Chat (Ed.)
Notes: In this unusual tale, fellow detectives Sexton Blake, Nelson Lee, and Gideon Barr meet for dinner on Christmas Eve only to all be called away. They reconvene the next day and each gives an account of what happened. All three yarns are recounted in first person.
Sexton Blake begins by asserting that he does not believe in ghosts. He then tells how last night, after being summoned by the police to identify a captured crook, he sought shelter from a snowstorm in Elphinstone Castle, where ten years ago, a young heir had mysteriously vanished without a trace. There, Blake's reluctant host proved to be the missing man’s uncle. Apparently living like a hermit, he refused conversation but provided food and wine. Elphinstone then led Blake to the library, where a bed was set up. The colonel appeared terrified of the room and hastily departed. That night, Blake was visited by an apparition, watching as the ghostly form of the colonel murdered his nephew and cast him into the castle’s moat. In the morning, Elphinstone confessed the truth of the vision, and dropped dead.
Nelson Lee is next to tell his story. Last night, his assistance had been requested by the Great Northern Railway after a mail bag exploded. Inspector Walters of Scotland Yard, upon discovering the remains of an infernal device, blamed the incident on anarchists. However, when Lee found among the surviving letters one addressed to a solicitor, he surmised that the device was planted specifically to destroy it. He therefore delivered the missive himself, and it was revealed to be from a squire who, six months previously, had disinherited his son, Harry, after the lad stole family valuables. Having altered his will to favour a family friend, Bartolini, the squire was now seeking to change it back, for he had discovered his son's innocence and Bartolini's guilt. Nelson Lee visited the squire, finding him poisoned and on his deathbed. Paralysed, the man was only able to blink in response to the detective's questions, but that was sufficient. The new will was, at his behest, destroyed minutes before he died. Bartolini, exposed as a criminal, committed suicide. Harry was located and will now receive his rightful inheritance.
Gideon Barr's tale is next. An actor, Percy Vale, had taken him to meet his cousin, a young woman named Adeline. Their uncle had mysteriously vanished from his locked bed chamber. After spending the night in the missing man's bedroom, Barr had left the cousins for three hours, during which time Vale made an unwanted romantic advance toward his cousin, which she scornfully spurned. Upon his return, Barr instructed Adeline to remain with her new housekeeper while he himself spent time with Vale. Plying the young actor with drugged wine, Barr waited until he was unconscious then summoned the girl, who arrived to find her uncle sleeping on the sofa. The detective had discovered a wig and make-up, which he applied to Vale, making him resemble the missing man. This, he explained, was how a crime of impersonation was committed, for Vale had earlier that year pushed his uncle to his death in the Alps—an attempt to gain the family fortune, now foiled. In a surprise ending, the uncle arrives … he had survived the fall and had since been laying low, watching Vale to see what he would do!
Trivia: For the story of this story's creation (told by the editor in the previous issue), Click here.
Rating: ★★★★★ The most unique offering so far, this is the first story to confirm that Nelson Lee, Gideon Barr, and Sexton Blake all share the same reality. Their gathering is very well realised, and though the cases they recount are slight affairs— Blake's the most atmospheric, Lee's the best, and Barr's rather illogical— the entirety leaves a very positive impression.
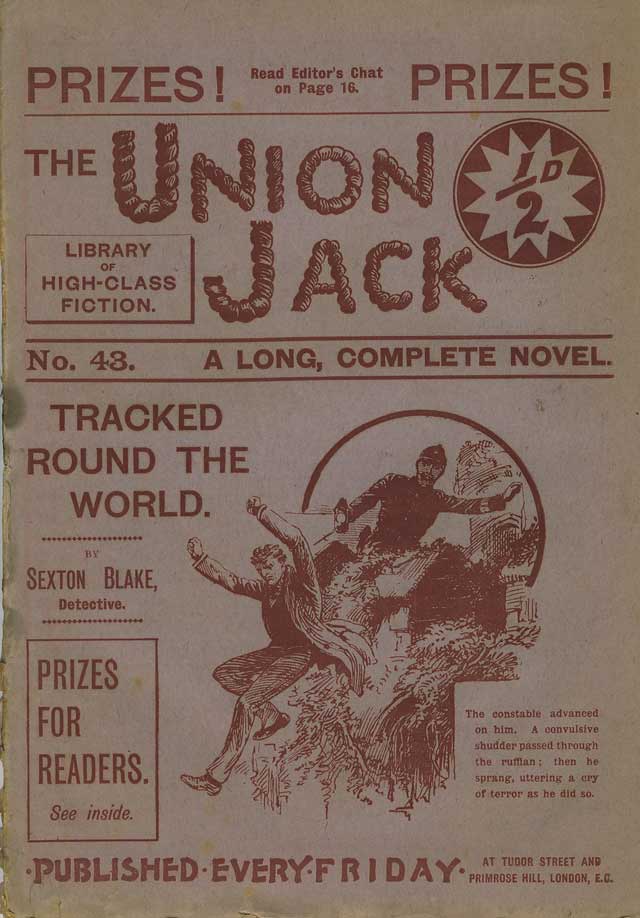
UNION JACK · Issue 43 · 14/2/1895 · Amalgamated Press · ½d
Illustrator: Unknown
Other content: From the Quarter-Deck (ed.); Peter Slim, the Wonderful Young Ventriloquist by Captain Spencer.
Notes: Alice Seldon consults Sexton Blake after valuable government documents are stolen from her father, General Seldon. A spy named Nightsdale is the chief suspect. A policeman who tracked him to a ruined castle in Ireland has been murdered and now Alice wants Blake to take up the hunt. He travels to the murder scene and manages to recover some of the papers. He also finds details of an address in Liverpool. There, he tracks down Nightsdale but is attacked and left for dead. The spy boards a ship bound for New York, not realising that Blake is still hot on his tail. At the voyage's end, Blake confronts him and is once again overpowered. He is incarcerated in a barrel and taken back aboard the ship. When it sets sail, the villain pushes the barrel overboard, unaware that it only contains ballast, Blake having escaped. Now the detective settles into life as a stowaway on a voyage that promises to be lengthy ... for he learns that their destination is Australia. One night, seeing Nightsdale in a drunken sleep, the detective emerges from hiding and steals the remaining plans from him. He sews them into the lining of his coat for safekeeping. After many days have passed, the ship nears Australia but is wrecked by a storm. The survivors, including Blake, fight through the heaving waters to the shore. When Nightsdale sneaks away from the small band of sailors, Blake, who has remained hidden from the group, follows. The villain makes his way to nearby Sydney and books passage back to England. Blake stays on his tail all the way to Ireland where they have their final confrontation in the ruined castle where the story began. The detective triumphs and Nightsdale is brought to justice.
Trivia: Blake's office is in the city but he lives in lodgings in Shepherd's Bush. This story was reprinted in PENNY POPULAR issue 77 (1914) as TRACKED ACROSS THE WORLD.
Rating: ★★☆☆☆ A fairly routine story which is highly entertaining during Blake's period as a stowaway but rather dull for the rest of the time.

UNION JACK · Issue 58 · 1/6/1895 · Amalgamated Press · ½d
Illustrator: Unknown
Other content: From Clue to Clue by Norman Brood
Author debut: Though he was one of the most prolific of the very early Sexton Blake writers, very little is known about William Shaw Rae. He is best remembered for having given Blake his first boy-assistant, in the form of We-Wee, and is credited with twenty-three Blake tales, all published between 1895 and 1901.
Notes: A telegram requests that Sexton Blake should visit, in the guise of a friend, Squire Marcel of Tremwell Towers in Oakdean. Upon arrival, the detective learns that Marcel's nephew, Harry, and his daughter, May, are engaged to be married. This has not pleased Captain Hyde, a man who has pretended friendship torwards Harry only that he might gain May's favour. But the Squire's real problem is that four five-pound notes recently went missing from his desk and Harry, who is like a son to Marcel, seems to be responsible for their theft. That night, Blake sees one of the house staff, whom he recognises as Jerry Snide, a man previously connected with a burglary case, secretly meeting with Captain Hyde. In the morning, Squire Marcel is found murdered, his safe open and the family jewels stolen. In his hand is found a button, ripped from his attacker's jacket. Young Harry Marcel is missing and the evidence quickly builds up against him. A few days later, Blake, disguised as 'William Dove', enters into service with Captain Hyde as his valet. Within minutes, he witnesses his employer admiring the stolen Marcel jewels. Then he finds a jacket with a button missing, matching the one in the murdered man's hand. But Hyde is onto him and knocks Blake unconscious. By the time the detective recovers, the villain has fled. Blake follows Jerry Snide to Rotterdam where the burglar, in his attempt to get away, falls into a canal and nearly drowns. Blake saves him and is rewarded with a confession and details of Hyde's movements. Blake sets off to catch his man but, before a final confrontation with Hyde, he stumbles across Harry Marcel. The youth explains that he ran away to Holland where he tried to settle some debts. He provides evidence of his innocence and vows to join Blake in pursuit of Hyde. They corner him in a windmill. Blake is shot in the shoulder then Hyde, seeing that his position is hopeless, commits suicide.
Trivia: Sexton Blake's habit of withholding police evidence is even more marked than usual during this adventure. A character estimates that the detective is in his mid-twenties (though he's in a slight disguise at the time). It is stated that Blake has recently returned from a long sea voyage.
Rating: ★★★☆☆
UNION JACK · Issue 62 · 29/6/1895 · Amalgamated Press · ½d
Illustrator: Unknown
Other content: From Clue to Clue by Norman Brood; From the Quarterdeck (ed.)
Notes: My copy of this issue is missing the cover. Sexton Blake is on holiday in Cornwall. While walking along a beach, he finds a message in a bottle. It reveals that Lord Dallington came into his title by murdering his cousins aboard a yacht. The detective sets out to bring Dallington to justice. He discovers that a crooked policeman is assisting the criminal. Blake follows the henchman to Antwerp then to Chili, where he finally corners Dallington. Essentially, this tale is little more than a chase by bicycle, train and steam ship involving multiple disguises along the way.
Trivia: Sexton Blake lives in Norfolk Street, the Strand. He hasn't ridden a bicycle for five years; he doesn't look at all the way you'd expect a detective to look; and his ability to hit a small target with a thrown stone is virtually nil. All of these observations run counter to established 'facts' which appear many times elsewhere in stories from this same period. This story was reprinted in PENNY POPULAR issue 100 as THE MESSAGE FROM THE SEA (1914) and in the 1976 compilation, SEXTON BLAKE'S EARLY CASES.
Rating: ★★☆☆☆ This one is far more obviously written for the juvenile market than the majority of Blake stories and so feels somewhat simplistic to an adult reader. The plot is reliant on coincidences and Blake, working without an assistant, communicates his plot points via a continuous soliloquy which sounds very artificial, though it was very much a literary convention of the day. The story has the usual amount of interest from an historical point of view: the concept of an 'exciting bicycle chase' seems unlikely to modern sensibilities; railway carriages no longer have private cabins; and no-one uses blotting paper when writing letters these days (in fact, few people write letters!) ... but this isn't enough to prevent it from being eclipsed by the wealth of far better tales from the same period.
UNION JACK · Issue 65 · 20/7/1895 · Amalgamated Press · ½d
Illustrator: Unknown
Other content: From Clue to Clue by Norman Brood; From the Quarterdeck (ed.)
Notes: Will Fickling is being hunted by the police for the murder of his grandfather. He protests his innocence to Sexton Blake, telling him that he had returned home and, despite the housekeeper &mdash: Mary Mellish — trying to stop him, had entered his guardian's study to find the safe open and his grandfather dead upon the floor. In a panic he had flown from the scene and now the police take that as a sign of guilt. Blake promises to help and shelters the young man in his own chambers. Later, while walking along the Embankment, the detective saves a woman from suicide. She turns out to be Mary Mellish. He takes her back to the house where the murder had occurred. Inside is Weevil of Scotland Yard. He informs Blake that £20,000 is missing from the safe. Joining Mellish in the kitchen, Blake spots clues which tell him that her lover is the murderer. She exclaims: "Who are you? How can you know these things?" "I'm Sexton Blake," was the quiet rejoinder. "I know all this, and much more." She refuses to tell him anything, then drugs his drink. As he falls into unconsciousness, he sees the murderer enter the room and hears his name: Stephen Darkfold. When he recovers, the man has gone and the woman remains tight-lipped. The next day, the detective rents the house opposite and from here starts a long vigil, waiting for Darkfold to visit Mellsih again. When this eventually happens, Blake tries to catch the killer but is once again foiled by the housekeeper. But he then learns that two men — Flash Jack and Curly Pet — intend to visit Darkfold, so he tails them as they journey to the midlands by train. They disembark at Ironfields and here Blake joins forces with a detective named Stafford. They find that the two men are attending Darkfold's wedding — a sham arrangement whereby he will claim a widow's fortune. The detectives, with the help of the police, break up the ceremony and arrest the three men. Sexton Blake escorts the prisoners back to London on the evening mail train but it crashes and Darkfold escapes. This is where Blake comes up with his stratagem: he introduces the widow to Mary Mellish (and discovers that, by an unbelievable coincidence, they know each other) and the two women realise they have been betrayed by a liar and a cheat. Mellish doesn't hesitate to reveal that Darkfold's hideout is a barge. Blake gathers Weevil and a squad of policemen, raids the vessel and captures the villain.
Trivia: Blake has a valet; an ex-constable named Kennedy (who is replaced by Tinker in the PENNY POPULAR reprint). Mention of THE MARCEL MYSTERY is made by the Scotland Yard man, Weevil. This story was reprinted in PENNY POPULAR issue 78 as SEXTON BLAKE'S RUSE (1914).
Rating: ★☆☆☆☆ A rather tedious tale in which Sexton Blake acts with little competence and the author once again uses a train crash as a plot device. How many train wrecks does Blake survive in his long career? Whatever the total, most of them seem to occur in these W. Shaw Rae stories.
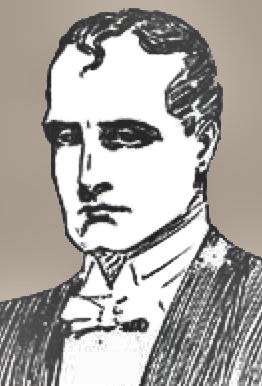
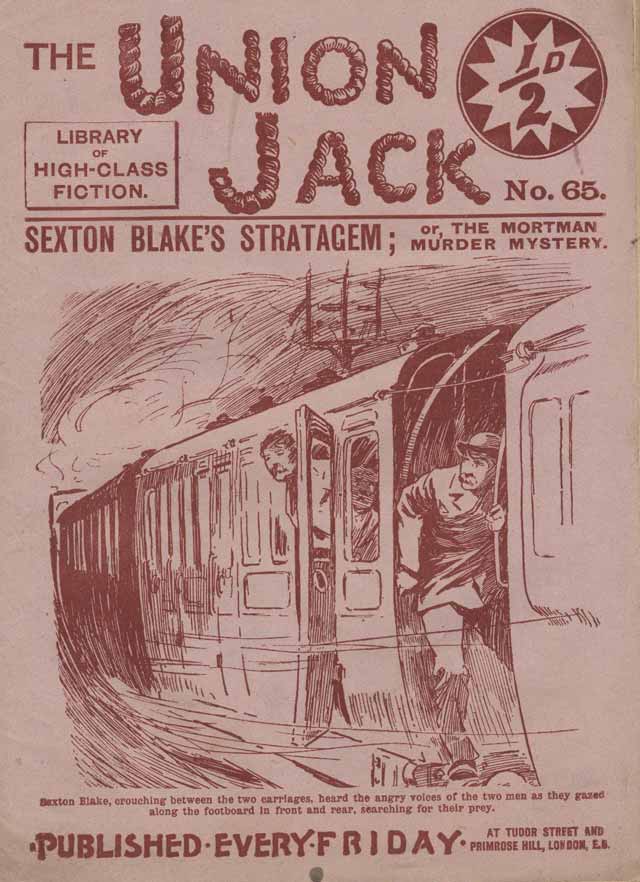
UNION JACK · Issue 69 · 17/8/1895 · Amalgamated Press · ½d
Illustrator: Unknown
Other content: From Clue to Clue by Norman Brood; From the Quarterdeck (ed.)
Author debut: W. J. Lomax, the author who created Tinker, is believed to have been a schoolmaster. He often wrote under the pseudonym "Herbert Maxwell." Shortly before the First World War, he went abroad and his Fleet Street associates neither saw nor heard from him again. Forty-nine Blake stories are attributed to him, some of them being long serials (each counted here as one story).
Notes: My copy of this issue is missing the cover. This is the first Sexton Blake tale to be recounted in first-person by the detective himself. Paul Nortoski, a Polish emigrant, has been murdered and the police believe that Wilfred Somers, a young artist who is the fiancee of Nortoski's daughter, is responsible. The daughter, Olga Nortoski, calls on Blake for help. The detective discovers that Nortoski had once been a member of The Brotherhood of the Sacred Cause, a Russian society founded on Nihilistic principles. Unable to escape its grip, even by moving to England, Nortoski was forced to oversee the manufacture of explosives to be used in terrorist attacks. He was murdered while writing a confession to the head of Russia's secret police — General Sobolokoff — and died before he could reveal the full details of a planned atrocity. Blake decides that the only appropriate course of action is to take a copy of the letter to Sobolokoff. Disguised in false beard and wig, he travels into Russia, trailed all the way by an agent of the secret police who has mistaken him for a man called Nalda the Nihilist. The spy betrays him and Blake is arrested and thrown into gaol. There he hears the story of Nortoski's murder and how it was committed by the real Nalda. After the secret police read Nortoski's letter, which they find in Blake's luggage, they realise their mistake and release him. Blake accompanies them to the headquarters of The Brotherhood and takes part in a successful raid. All the Nihilists are rounded up except Nalda who refuses to be captured and leaps from a window to his death. Back in England, Wilfred Somers is freed and marries Olga.
Trivia: This case is one of the few to give a date of commencement: 4th July 1893 (which places it before the publication of the first Blake story, THE MISSING MILLIONAIRE). Sexton Blake has a maid (a "household terror") called Sarah Ann. He lives in chambers on Norfolk Street, Strand. Blake appears to still have some family connections at this stage in his life: " ... so I took the poor girl to an old friend and former housekeeper in my family — Mrs. Bulstrode ... ".
Rating: ★☆☆☆☆ A pretty straightforward early case but interesting due to the first-person narrative and the various details revealed about Blake's life.
UNION JACK · Issue 72 · 7/9/1895 · Amalgamated Press · ½d
Illustrator: Unknown
Other content: From Clue to Clue by Norman Brood; Lost in a Mine by Anon.; From the Quarterdeck (ed.)
Author debut: Arnold Grahame remains a mystery. He had tales pubished in PLUCK and MARVEL but this was his only Sexton Blake story.
Notes: My copy of this issue is missing the cover. Gerald Buckley, an old school friend of Sexton Blake's who went on to Oxford with him, sends a telegraph asking the detective to come and see the body of his uncle, Sir Edward, who has just died from apparent heart failure. The cause of his concern is Sir Edward's eyes, which don't seem to be his own. Upon examining the body, Blake discovers that, in addition to the strange eyes, a scar has vanished. He suspects that a certain Doctor Bulasco is up to no good and, after investigating the man, concludes that an Indian, Abdul Kali, is behind the mystery. After surviving a train wreck caused by Bulasco, Blake travels to India in search of Abdul. He is attacked by natives, nearly thrown into a pool of crocodiles, almost burned at the stake, then locked in a dungeon full of starving rats. Making his escape, he discovers a scroll which solves the case then returns to England - though not before being attacked by a leopard and nearly crushed by a giant snake. The scroll describes a technique whereby two men's faces can be altered so that they look like one another. It seems, then, that Sir Edward isn't dead at all, merely replaced by a lookalike corpse. Blake rescues the real Sir Edward and brings Bulasco to justice.
Trivia: This was reprinted in PENNY POPULAR issue 74 as THE CHANGED EYES (1914). It was also included in the compilation SEXTON BLAKE'S EARLY CASES (1976).
Rating: ★☆☆☆☆ This is a typical boys' story paper yarn, with the emphasis firmly on action rather than anything that might resemble a believable plot. Filled with archetypal Victorian obsessions such as mesmerism and eyes recording the last sight they saw, it is ridiculous by modern standards but, nevertheless, great fun. Blake is still a lone operator at this stage and it's a weakness; with an assistant he at least has someone to explain plot points to. Without one, he just has to talk to himself. We are nowhere near the glories of his Golden Age but it's not hard to see from this story why Sexton Blake became such a favourite.
UNION JACK · Issue 75 · 28/9/1895 · Amalgamated Press · ½d
Illustrator: Unknown
Other content: From Clue to Clue by Norman Brood; From the Quarterdeck (ed.)
Author debut: Nothing is known of this author. Only two Sexton Blake tales are attributed to him.
Notes: My copy of this issue is missing the cover. Squire Tredgar of Gedlit Manor is hot-air ballooning with his nephew, Rupert Grey, when they are caught in a fierce storm. They crash into a stream at the bottom of Aberglaslyn Pass and the balloon's basket is struck by lightning. Tredgar is killed but, at the subsequent inquest, it is revealed that his death was from a shot to the head. Rupert, heir to his uncle's fortune, is accused and gaoled. His old tutor, Professor Bhryl, commissions Sexton Blake to investigate and informs him that, five years ago, an attempt had been made to poison the youth. Bhryl had suspected Owen Williams, the butler. The detective interviews Doctor Padget — the man who had declared murder at the inquest — and learns that the incident had involved Rupert Grey being injected with cocaine. The finger of suspicion points at Williams ... but Blake feels that it is being directed by another party: Doctor Padget. When he attempts to corner the medical man, Padget flees, leaving behind Tredgar's solicitor, who he had been torturing. Williams goes with him and Blake deduces that the two men have an uneasy alliance to protect a third party — Tredgar's killer; his secret son. The papers the solicitor had been hiding prove that this youth, named Edward, was born in Java. It was he who had attempted to poison Rupert. He had also aided Padget in blackmailing Tredgar over the indiscretion which led to his, Edward's, birth. To make matters worse, Edward is a wanted criminal; a forger and murderer. Sexton Blake catches Williams and has him arrested. The butler reveals that he had been duped into cooperating with Padget and setting up Rupert Grey to look like his uncle's killer. Grey is released from gaol. Blake sets off in pursuit of Edward, as he sails for Java. Thirty-two days later, the ship docks and the detective tracks the villain to the famous Death Valley. In this poisonous environment, Edward dies after slipping from a rockface. Returning to England, Blake hunts for Padget and discovers that the Doctor experienced a particularly nasty form of natural justice.
Trivia: This was reprinted in PENNY POPULAR issue 79 as SQUIRE TREDGAR'S SECRET (1914).
Rating: ★☆☆☆☆ The first half of this is really good, with Sexton Blake in full detection mode, but after that it deteriorates fast. A mad coincidence — so typical of the tales of this period — signals the sudden loosening of everything that had so far held the plot together. It quickly descends into a morass, which, coincidentally, is exactly what Blake does at the tale's climax.
UNION JACK · Issue 82 · 16/11/1895 · Amalgamated Press · ½d
Illustrator: Unknown
Other content: Fighting in Freedom's Cause by Owen Lander; From Clue to Clue by Norman Brood; From the Quarterdeck (ed.)
Notes: Fighting in Freedom's Cause by Owen Lander; From Clue to Clue by Norman Brood; From the Quarterdeck (ed.)
Notes: My copy of this issue is missing the cover. Amy Bathurst's father has vanished. Sexton Blake visits the missing man's house and breaks into the locked study where he finds signs of a struggle. Evidence suggests that Bathurst was a miser and a moneylender. A document reveals that a man named Jasper Carew (who, unknown to Miss Amy, is her cousin) was the last person to see him. Meanwhile, that selfsame personage is awaiting the death of his sick father, Bathurst's brother. Carew is a forger, a fact his parent has just discovered, and the old man wants to cut him out of his Will. That is something the wicked youth is keen to prevent, so he goes to visit Doctor Zebra, an occultist, mesmerist and practitioner of the Eastern Arts. Zebra had witnessed Carew throttle Miss Amy's father to death after a dispute over a debt. In return for £5,000, he agreed to help cover up the crime. He now has the corpse in his laboratory and assisted by Nick, his pet gorilla, he removes the strangulation marks from the dead man's neck. Carew explains that his uncle must die before he can change the Will. So Doctor Zebra, in the guise of a medical man, visits the patient and frightens him to death by means of a giant cobra. For this service, he charges Carew £250,000. Three days later Sexton Blake revisits the house of the missing Mr. Bathurst. And there, seated at his desk in a room that shows no signs of a struggle, is the man himself ... or, rather, the corpse of the man. But the detective quickly asserts that Bathurst had been killed days earlier then brought here. 48 hours pass. Amy receives notice that her uncle has died, leaving her half his fortune. Through this, Blake discovers who and where the co-inheritor is: Jasper Carew. And by following the lad, Blake is led to Doctor Zebra. Suspecting the occultist of involvement with the murder, the detective, disguised as an old man, pays him a visit and finds a ledger which had belonged to Bathurst. Afterwards, he confronts Carew and tells him he knows how the murder was committed. The next day, the youth once again visits the Doctor. But Zebra is furious because has yet to receive his money. He sends Carew into a hypnotic sleep and releases his animals to kill him. The gorilla strangles the young criminal to death. A police raid led by Blake takes Zebra by surprise and he accidentally thrusts his hand into the cobra which bites him, killing him with its venom.
Trivia: Sexton Blake has a male servant named Wallace. This was reprinted in PENNY POPULAR issue 80 as THE DOCTOR'S DUPE (1914).
Rating: ★★★☆☆ A good early adventure; far better written than most from this period and, thankfully, a story that totally lacks the usual crazy coincidences.
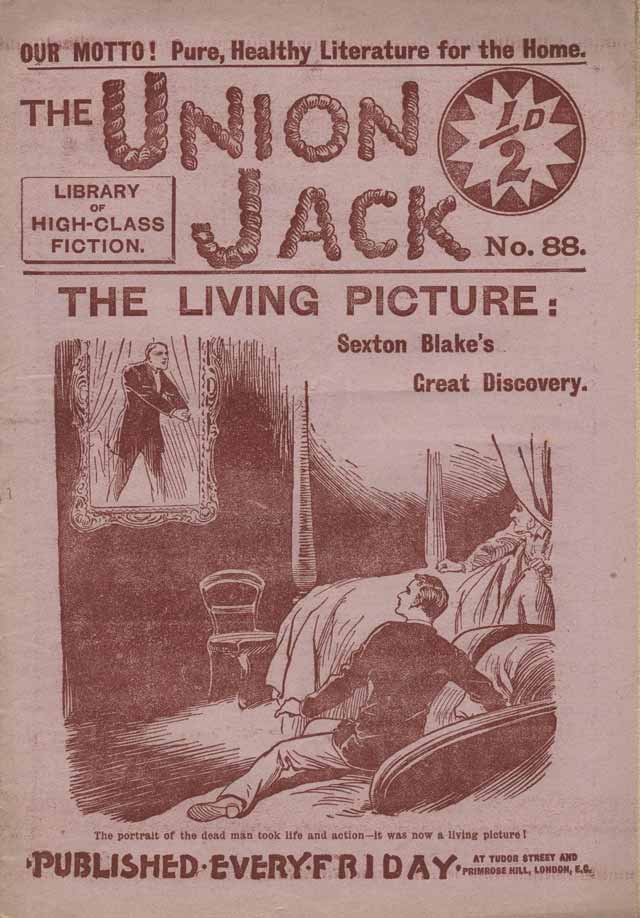
UNION JACK · Issue 88 · 28/12/1895 · Amalgamated Press · ½d
Illustrator: Unknown
Other content: Fighting in Freedom's Cause by Owen Lander; From the Quarterdeck (ed.)
Notes: Squire Langlands of Deepdean Manor has a young ward named May Freeling, the daughter of his deceased best friend, George. The latter had been prospecting in South America when he died. Shortly before his demise, he had sent to Langlands, in the hands of a Brazilian employee named Robardo, a huge diamond. It was carefully packaged and Robardo never knew what he was carrying. Langlands was instructed to keep the package intact until, on May's eighteenth birthday, it was to be placed in her hands. That occasion is now just a fortnight away and the Squire is having nightmares; dreaming that a large portrait of George Freeling is warning him that the diamond is not safe where it resides in a bank in Antwerp and must be brought to Deepdean. In desperation, Langlands sends for Sexton Blake. The detective spends the night in the master bedroom and, as the room fills with a strangely perfumed gas, witnesses the portrait 'coming to life' and giving the warning. The next morning, before he can examine the painting, Langlands packs him off to Antwerp to fetch the gem. On the way, the detective is followed by a wanted criminal named Leon Lebrun who tries, but fails, to hold him captive and gain possession of the gem. Back in England, Lebrun attacks again but the detective gets away and duly delivers the diamond to its owner. That evening, he follows Robardo into the woods and witnesses him meeting with Lebraun. But he is spotted and the two men beat him senseless. Hours later, he recovers and returns to the manor only to find that the diamond has been stolen. The detective pursues and catches Lebraun who, thinking that he has been betrayed by Robardo, reveals the latter's hiding place; a secret room behind the portrait. Blake finds his man but, in seeking to escape, Robardo loses his life by drowning. The diamond is recovered and the trickery of the painting exposed.
Trivia: This was reprinted in PENNY POPULAR issue 81 (1914) under the same title.
Rating: ★★☆☆☆ An unimaginative tale in which Sexton Blake is outrun and beaten in fist-fights rather too often.